| If you have been locked out of your account you can request a password reset here. |
Difference between revisions of "Medal of Honor: Frontline"
| (85 intermediate revisions by 9 users not shown) | |||
| Line 5: | Line 5: | ||
Lt. Jimmy Patterson returns as the game's protagonist. It is a semi remake and reboot of the original 1999 ''[[Medal of Honor (1999)|Medal of Honor]]''. Some missions, such as A Storm in the Port (Mission 2) and Rolling Thunder (Mission 5), are homages to Scuttle Das Boot U-4901 (Mission 3) and Destroy the Mighty Railgun Greta (Mission 2) from the first game. The plot takes place during Operation Market Garden, in between Mission 3 and Mission 4 of the first game. All of the weaponry has been brought back from the first game and ''[[Medal of Honor: Underground]]''. | Lt. Jimmy Patterson returns as the game's protagonist. It is a semi remake and reboot of the original 1999 ''[[Medal of Honor (1999)|Medal of Honor]]''. Some missions, such as A Storm in the Port (Mission 2) and Rolling Thunder (Mission 5), are homages to Scuttle Das Boot U-4901 (Mission 3) and Destroy the Mighty Railgun Greta (Mission 2) from the first game. The plot takes place during Operation Market Garden, in between Mission 3 and Mission 4 of the first game. All of the weaponry has been brought back from the first game and ''[[Medal of Honor: Underground]]''. | ||
| − | + | {{VG Title}} | |
| − | |||
| − | {{ | ||
__TOC__<br clear=all> | __TOC__<br clear=all> | ||
| Line 17: | Line 15: | ||
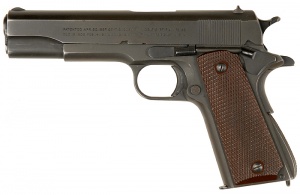
Known as the "Colt .45" in-game, the [[M1911A1]] appears as the standard sidearm in D-Day (Mission 1) and A Storm in the Port (Mission 2). It is also seen on the main menu as the option for 'next mission'. It is the most powerful pistol in the game, and is highly effective firing against MG positions Level 1 of D-Day (Mission 1). It holds 7 rounds. | Known as the "Colt .45" in-game, the [[M1911A1]] appears as the standard sidearm in D-Day (Mission 1) and A Storm in the Port (Mission 2). It is also seen on the main menu as the option for 'next mission'. It is the most powerful pistol in the game, and is highly effective firing against MG positions Level 1 of D-Day (Mission 1). It holds 7 rounds. | ||
[[Image:M1911Colt.jpg|thumb|300px|none|M1911A1 - .45 ACP]] | [[Image:M1911Colt.jpg|thumb|300px|none|M1911A1 - .45 ACP]] | ||
| − | [[Image:MOHF.colt.45.jpg|thumb|none| | + | [[Image:MOHF.colt.45.jpg|thumb|none|600px|The M1911A1 "Colt .45" promo image. The trigger is incorrect.]] |
| − | [[Image:MohfM1911A1 1.jpg|thumb|none| | + | [[Image:MohfM1911A1 1.jpg|thumb|none|600px|The M1911A1 in-game.]] |
| − | [[Image:MohfM1911A1 2.jpg|thumb|none| | + | [[Image:MohfM1911A1 2.jpg|thumb|none|600px|Reloading the M1911A1.]] |
| − | [[Image:MohfM1911A1 3.jpg|thumb|none| | + | [[Image:MohfM1911A1 3.jpg|thumb|none|600px|The M1911A1 on the game's main menu.]] |
==High Standard Victor== | ==High Standard Victor== | ||
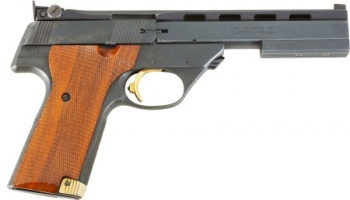
| − | Known as the "OSS | + | Known as the "OSS Hi-Standard Pistol", what mostly resembles a suppressed [[High Standard Victor]] is the most used pistol throughout the game. As a silenced pistol it replaces the suppressed [[Walther PPK]] and the [[High Standard HDM]] from the previous games, which is an odd decision as the Victor is highly anachronistic (first manufactured in 1974) and the Victor is not compatible with a suppressor. It is likely that the developers simply confused the Victor for the HDM. It first appears in Level 2 of Needle in the Haystack (Mission 3), and then returns in Several Bridges Too Far (Mission 4), and Level 1 in Rolling Thunder (Mission 5). It is slightly less powerful than the M1911A1 and holds 7 rounds. |
[[Image:High Standard Victor.jpeg|thumb|none|350px|High Standard Victor - .22 LR]] | [[Image:High Standard Victor.jpeg|thumb|none|350px|High Standard Victor - .22 LR]] | ||
| − | [[Image:HDM Frontline.JPG (2).jpg|thumb|none| | + | [[Image:HDM Frontline.JPG (2).jpg|thumb|none|600px|Side-view in a promo, revealing it as a High Standard Victor.]] |
| − | [[Image:Mohf HDM 1.jpg|thumb|none| | + | [[Image:Mohf HDM 1.jpg|thumb|none|600px|The Suppressed Victor in-game.]] |
| − | [[Image:Mohf HDM 2.jpg|thumb|none| | + | [[Image:Mohf HDM 2.jpg|thumb|none|600px|Reloading the Victor.]] |
==Walther P38== | ==Walther P38== | ||
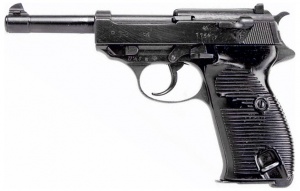
The [[Walther P38]] is mainly used by enemy officers and scientists. It is first obtained in Rolling Thunder (Mission 5) and is used again in The Hornet's Nest (Mission 6). It has short recoil, and is much more accurate than the M1911A1. It holds 8 rounds and uses Pistol ammunition. | The [[Walther P38]] is mainly used by enemy officers and scientists. It is first obtained in Rolling Thunder (Mission 5) and is used again in The Hornet's Nest (Mission 6). It has short recoil, and is much more accurate than the M1911A1. It holds 8 rounds and uses Pistol ammunition. | ||
[[Image:P38Black.jpg|thumb|none|300px|Walther P38 with black grips - 9x19mm]] | [[Image:P38Black.jpg|thumb|none|300px|Walther P38 with black grips - 9x19mm]] | ||
| − | [[Image:MOHF.walther.jpg|thumb|none| | + | [[Image:MOHF.walther.jpg|thumb|none|600px|Promo for the P38.]] |
| − | [[Image:Mohf Walther P38 2.jpg|thumb|none| | + | [[Image:Mohf Walther P38 2.jpg|thumb|none|600px|The Walther P38 in-game.]] |
| − | [[Image:Mohf Walther P38 3.jpg|thumb|none| | + | [[Image:Mohf Walther P38 3.jpg|thumb|none|600px|Reloading the P38.]] |
| − | [[Image:Mohf Walther P38 1.jpg|thumb|none| | + | [[Image:Mohf Walther P38 1.jpg|thumb|none|600px|A Kriegsmarine Enemy armed with a P38.]] |
===Behind the Scenes=== | ===Behind the Scenes=== | ||
In the game's Behind the Scenes featurette for Several Bridges Too Far (Mission 4), someone is seen fumbling with a Walther P38, possibly as a reference for animators. | In the game's Behind the Scenes featurette for Several Bridges Too Far (Mission 4), someone is seen fumbling with a Walther P38, possibly as a reference for animators. | ||
| − | [[Image:MOHFL WaltherP38 Bonus.jpg|thumb|none| | + | [[Image:MOHFL WaltherP38 Bonus.jpg|thumb|none|600px|A team member repeatedly works the slide on a Walther P38, possibly for animators.]] |
| − | [[Image:MOHFL WaltherP38 Bonus2.jpg|thumb|none| | + | [[Image:MOHFL WaltherP38 Bonus2.jpg|thumb|none|600px|He then attempts to insert a magazine into the weapon, only to have the bottom plate give-way and the platform spring shoots out.]] |
=Rifles= | =Rifles= | ||
==M1 Garand== | ==M1 Garand== | ||
The [[M1 Garand]] is the first weapon to be used in the game, and appears as the standard weapon for U.S. Army allies in the game. Unlike the real M1 Garand, the in-game model cannot be reloaded until the entire en-bloc clip is expended. This is because the game's engine only allows one reload animation per weapon - Reloading the Garand mid clip would require a second animation to show the manual ejection of the clip, and then the loading of a new clip. In Level 2 of Needle in the Haystack (Mission 3), an enemy soldier in the pub is carrying a Garand. This could possibly be a capture from an American casualty, or a programming error which is more likely. | The [[M1 Garand]] is the first weapon to be used in the game, and appears as the standard weapon for U.S. Army allies in the game. Unlike the real M1 Garand, the in-game model cannot be reloaded until the entire en-bloc clip is expended. This is because the game's engine only allows one reload animation per weapon - Reloading the Garand mid clip would require a second animation to show the manual ejection of the clip, and then the loading of a new clip. In Level 2 of Needle in the Haystack (Mission 3), an enemy soldier in the pub is carrying a Garand. This could possibly be a capture from an American casualty, or a programming error which is more likely. | ||
| − | [[Image:M1 Garand.jpg|thumb|none| | + | [[Image:M1 Garand.jpg|thumb|none|450px|M1 Garand .30-06]] |
| − | [[Image:MOHF.garand.jpg|thumb|none| | + | [[Image:MOHF.garand.jpg|thumb|none|600px|Promo for the M1 Garand.]] |
| − | [[Image:MohfM1 Garand 2.jpg|thumb|none| | + | [[Image:MohfM1 Garand 2.jpg|thumb|none|600px|The M1 Garand in-game.]] |
| − | [[Image:MohfM1 Garand 3.jpg|thumb|none| | + | [[Image:MohfM1 Garand 3.jpg|thumb|none|600px|Reloading the M1 Garand. Notice the enbloc has no bullets in it.]] |
| − | [[Image:MohfM1 Garand 1.jpg|thumb|none| | + | [[Image:MohfM1 Garand 1.jpg|thumb|none|600px|U.S. Soldier allies armed with M1 Garands in Level 1 of D-Day.]] |
| − | [[Image:MohfM1 Garand 5.jpg|thumb|none| | + | [[Image:MohfM1 Garand 5.jpg|thumb|none|600px|Corporal Barnes armed with an M1 Garand.]] |
| − | [[File:M1 Garand bayonet.jpg|thumb|none| | + | [[File:M1 Garand bayonet.jpg|thumb|none|450px|M1 Garand with M7 bayonet - .30-06]] |
| − | [[Image:MohfM1 Garand 4.jpg|thumb|none| | + | [[Image:MohfM1 Garand 4.jpg|thumb|none|600px|'THE FIGHT CONTINUES'. Loading screen of a US Paratrooper armed with an M1 Garand.]] |
==Springfield M1903A4== | ==Springfield M1903A4== | ||
The [[M1903A4 Springfield]] appears in Level 2 of A Storm in the Port (Mission 2) and in the first 2 levels of Needle in the Haystack (Mission 3). Like the first MOH game, it is first obtained through a hidden "gift package". It has a somewhat slow rate of fire due to the bolt-action, but it is incredibly accurate, and has great range. It holds 5 rounds. | The [[M1903A4 Springfield]] appears in Level 2 of A Storm in the Port (Mission 2) and in the first 2 levels of Needle in the Haystack (Mission 3). Like the first MOH game, it is first obtained through a hidden "gift package". It has a somewhat slow rate of fire due to the bolt-action, but it is incredibly accurate, and has great range. It holds 5 rounds. | ||
| − | [[Image:Rifle Springfield M1903A4 with M84 sight.jpg|thumb|none| | + | [[Image:Rifle Springfield M1903A4 with M84 sight.jpg|thumb|none|450px|M1903A4 Springfield Sniper Rifle - .30-06]] |
| − | [[Image:MOHFL Springfield.jpg|thumb|none| | + | [[Image:MOHFL Springfield.jpg|thumb|none|600px|Promo for the Springfield; it oddly has a disassembly disk on the buttstock like a Karabiner 98k in this image.]] |
| − | [[Image:Mohf Springfield 03.jpg|thumb|none| | + | [[Image:Mohf Springfield 03.jpg|thumb|none|600px|The Springfield M1903A4 in-game.]] |
| − | [[Image:Mohf Springfield 03 recycle.jpg|thumb|none| | + | [[Image:Mohf Springfield 03 recycle.jpg|thumb|none|600px|Recycling the Springfield.]] |
| − | [[Image:Mohf Springfield 03 scope pov.jpg|thumb|none| | + | [[Image:Mohf Springfield 03 scope pov.jpg|thumb|none|600px|Looking through the scope of the Springfield.]] |
==Gewehr 43== | ==Gewehr 43== | ||
| − | A scoped [[Gewehr 43]] appears as the second "sniping" weapon in the game, and is prominently seen in the hands of enemies in Level 1 of Several Bridges Too Far (Mission 4), where it is first obtained. It comes back in The Hornet's Nest (Mission 6). | + | A scoped [[Gewehr 43]] appears as the second "sniping" weapon in the game, and is prominently seen in the hands of enemies in Level 1 of Several Bridges Too Far (Mission 4), where it is first obtained. It comes back in The Hornet's Nest (Mission 6). Its accuracy is slightly less than the M1903. Being a semi automatic weapon, it has a much higher rate of fire and faster reload than the M1903. It holds 10 rounds. |
Note: the real Gewehr 43 has significantly less accuracy at range than the 1903 bolt action rifle and isn't nearly as reliable. Even as a basic semi-automatic rifle, its less than desirable, especially when compared to superior rifles like the M1 Garand. | Note: the real Gewehr 43 has significantly less accuracy at range than the 1903 bolt action rifle and isn't nearly as reliable. Even as a basic semi-automatic rifle, its less than desirable, especially when compared to superior rifles like the M1 Garand. | ||
| − | [[Image:Walther G43 8 x 57 IS Semi-Automatic Sniper Rifle.jpg|thumb|none| | + | [[Image:Walther G43 8 x 57 IS Semi-Automatic Sniper Rifle.jpg|thumb|none|450px|Gewehr 43 with ZF 4 scope - 7.92x57mm Mauser]] |
| − | [[Image:MOHF.Gewehr.43..jpg|thumb|none| | + | [[Image:MOHF.Gewehr.43..jpg|thumb|none|600px|Promo for the Gewehr 43. The buttstock here is misshaped in comparison to the actual '43. The text also incorrectly refers to it as a "sniper rifle" and that its maximum range is 2200 meters.]] |
| − | [[Image:Mohf Gewehr 43 1.jpg|thumb|none| | + | [[Image:Mohf Gewehr 43 1.jpg|thumb|none|600px|The Gewehr 43 in-game.]] |
| − | [[Image:Mohf Gewehr 43 3.jpg|thumb|none| | + | [[Image:Mohf Gewehr 43 3.jpg|thumb|none|600px|Reloading the Gewehr 43.]] |
| − | [[Image:Mohf Gewehr 43 4.jpg|thumb|none| | + | [[Image:Mohf Gewehr 43 4.jpg|thumb|none|600px|Looking through the Gewehr 43 scope. The Waffen SS Enemy in the cross-hairs is also armed with a Gewehr 43.]] |
==Karabiner 98k== | ==Karabiner 98k== | ||
The [[Karabiner 98k]] is the standard weapon used by enemies. Like the first game, it is unusable for the player. Scoped versions can be seen being used by enemy snipers in Level 1 of Several Bridges Too Far (Mission 4). They have a low rate of fire and take enemies a considerable amount of time to reload. Enemies will likely use them as melee weapons if close enough. They slowly diminish in favor of the Gewehr 43 in later missions. It holds 5 rounds. | The [[Karabiner 98k]] is the standard weapon used by enemies. Like the first game, it is unusable for the player. Scoped versions can be seen being used by enemy snipers in Level 1 of Several Bridges Too Far (Mission 4). They have a low rate of fire and take enemies a considerable amount of time to reload. Enemies will likely use them as melee weapons if close enough. They slowly diminish in favor of the Gewehr 43 in later missions. It holds 5 rounds. | ||
| − | [[Image:Karabiner-98K.jpg|thumb|none| | + | [[Image:Karabiner-98K.jpg|thumb|none|450px|Karabiner 98k - 7.92x57mm Mauser]] |
| − | [[ | + | [[File:Scoped 98k.jpg|thumb|none|450px|Karabiner 98k with Zeiss ZF42 scope - 7.92x57mm Mauser]] |
| − | [[Image:K98k Guard MOHF.jpg|thumb|none| | + | [[Image:K98k Guard MOHF.jpg|thumb|none|600px|Waffen SS Enemy with a Karabiner 98k.]] |
| − | [[Image:Mohf Karabiner 98k 2.jpg|thumb|none| | + | [[Image:Mohf Karabiner 98k 2.jpg|thumb|none|600px|Von Sturmgeist's SS guards armed with Karabiner 98ks.]] |
==Lee-Enfield No. 4 Mk I== | ==Lee-Enfield No. 4 Mk I== | ||
The [[Lee-Enfield No. 4 Mk I]] is seen in the hands of British Paratroopers Allies in Level 3 of Several Bridges Too Far (Mission 4). It is unusable for the player and only seen in this level. They share the same sound effect with the M1 Garand. | The [[Lee-Enfield No. 4 Mk I]] is seen in the hands of British Paratroopers Allies in Level 3 of Several Bridges Too Far (Mission 4). It is unusable for the player and only seen in this level. They share the same sound effect with the M1 Garand. | ||
| − | [[Image:LeeEnfield4Rifle.jpg|thumb|none| | + | [[Image:LeeEnfield4Rifle.jpg|thumb|none|450px|Lee-Enfield No. 4 Mk I - .303 British]] |
| − | [[Image:Enfield Ally MOHF.jpg|thumb|none| | + | [[Image:Enfield Ally MOHF.jpg|thumb|none|600px|A British Paratrooper Ally with a Lee-Enfield.]] |
| − | [[Image:Enfield Ally2 MOHF.jpg|thumb|none| | + | [[Image:Enfield Ally2 MOHF.jpg|thumb|none|600px|British Para firing his Lee-Enfield.]] |
==Sturmgewehr 44== | ==Sturmgewehr 44== | ||
Known as the "STG44", the [[Sturmgewehr 44]] is first obtained in Level 3 of Needle in a Haystack (Mission 3). It later comes back in Rolling Thunder (Mission 5). It is seen in enemy hands in any level where the player uses the B.A.R., likely to counter the firepower. The in-game model is disproportionate to the real STG44, seeming to be stretched out for some reason. Its rate of fire is generally slow, but seems to be much faster in enemy hands. At the game's climax, Baron Rudolph Ulbricht Von Sturmgeist, the game's antagonist, is armed with a Sturmgewehr in the final duel. | Known as the "STG44", the [[Sturmgewehr 44]] is first obtained in Level 3 of Needle in a Haystack (Mission 3). It later comes back in Rolling Thunder (Mission 5). It is seen in enemy hands in any level where the player uses the B.A.R., likely to counter the firepower. The in-game model is disproportionate to the real STG44, seeming to be stretched out for some reason. Its rate of fire is generally slow, but seems to be much faster in enemy hands. At the game's climax, Baron Rudolph Ulbricht Von Sturmgeist, the game's antagonist, is armed with a Sturmgewehr in the final duel. | ||
| − | [[Image:Sturmgewehr 44.jpg|thumb|none| | + | [[Image:Sturmgewehr 44.jpg|thumb|none|450px|Sturmgewehr 44 - 7.92x33mm]] |
| − | [[Image:MOHF.MP44.jpg|thumb|none| | + | [[Image:MOHF.MP44.jpg|thumb|none|600px|Promo for the Sturmgewehr 44; note the somewhat squashed-looking stock, and the fact that somebody forgot how to spell "Sturmgewehr".]] |
| − | [[Image:Mohf STG44 3.jpg|thumb|none| | + | [[Image:Mohf STG44 3.jpg|thumb|none|600px|The Sturmgewehr 44 in-game.]] |
| − | [[Image:Mohf STG44 4.jpg|thumb|none| | + | [[Image:Mohf STG44 4.jpg|thumb|none|600px|Reloading the Sturmgewehr 44.]] |
| − | [[Image:Mohf STG44 2.jpg|thumb|none| | + | [[Image:Mohf STG44 2.jpg|thumb|none|600px|A Wehrmacht Enemy armed with a Sturmgewehr 44.]] |
| − | [[Image:Sturmgewehr 44 4.jpg|thumb|none| | + | [[Image:Sturmgewehr 44 4.jpg|thumb|none|600px|Von Sturmgeist armed with a Sturmgewehr 44.]] |
===Behind the Scenes=== | ===Behind the Scenes=== | ||
In the Behind the Scenes featurette for A Storm in the Port (Mission 2), several images of in-game weapons are shown along with the developer's notes. One happens to be for the Sturmgewehr 44. | In the Behind the Scenes featurette for A Storm in the Port (Mission 2), several images of in-game weapons are shown along with the developer's notes. One happens to be for the Sturmgewehr 44. | ||
| − | [[Image:MOHFL SGT44 Bonus.jpg|thumb|none| | + | [[Image:MOHFL SGT44 Bonus.jpg|thumb|none|600px|Notes on the detail of the in-game Sturmgewehr 44.]] |
=Submachine Guns= | =Submachine Guns= | ||
==M1A1 Thompson== | ==M1A1 Thompson== | ||
| − | The [[M1A1 Thompson]] appears in D-Day (Mission 1) and Needle in a Haystack (Mission 3). It can be found in the surf and hidden by a Belgian Gate obstacle in Level 1 of D-Day. It has the highest rate of fire in terms of SMG's and is very powerful. The "Captain" on D-Day carries one (one of many homages in the game to [[Saving Private Ryan]]), as do several allied U.S. Soldiers in Level 1 of Storm in the Port (Mission 2). Strangely, it holds 20 rounds despite being modeled with a 30 round magazine. | + | The [[M1A1 Thompson]] appears in D-Day (Mission 1) and Needle in a Haystack (Mission 3). It can be found in the surf and hidden by a Belgian Gate obstacle in Level 1 of D-Day. It has the highest rate of fire in terms of SMG's and is very powerful. The "Captain" on D-Day carries one (one of many homages in the game to [[Saving Private Ryan]]), as do several allied U.S. Soldiers in Level 1 of Storm in the Port (Mission 2). Strangely, it holds 20 rounds despite being modeled with a 30 round magazine. The Thompson featured on the game's coverart appears to be a [[Thompson M1928A1|M1928A1]] variant; ''Frontline'' seems to be the first of a long line of many WWII shooters that used this coverart trope. |
[[Image:M1sb.jpg|thumb|none|500px|M1A1 Thompson - .45 ACP]] | [[Image:M1sb.jpg|thumb|none|500px|M1A1 Thompson - .45 ACP]] | ||
| − | [[Image:MOHF.thompson.jpg|thumb|none| | + | [[Image:MOHF.thompson.jpg|thumb|none|450px|Promo for the Thompson with a 30-round magazine, in fact claiming it holds 30 rounds, despite the in-game holding 20.]] |
| − | [[Image:Mohf Thompson 2.jpg|thumb|none| | + | [[Image:Mohf Thompson 2.jpg|thumb|none|600px|The Thompson M1A1 in-game.]] |
| − | [[Image:Mohf Thompson 3.jpg|thumb|none| | + | [[Image:Mohf Thompson 3.jpg|thumb|none|600px|Reloading the Thompson M1A1.]] |
| − | [[Image:Mohf Thompson 1.jpg|thumb|none| | + | [[Image:Mohf Thompson 1.jpg|thumb|none|600px|The "Captain" armed with a Thompson M1A1.]] |
===Behind the Scenes=== | ===Behind the Scenes=== | ||
The featurette for The Hornet's Nest (Mission 6) shows the game's animators in a gym acting out in-game scenarios to better understand natural movement. One animator is seen with a Thompson M1A1. | The featurette for The Hornet's Nest (Mission 6) shows the game's animators in a gym acting out in-game scenarios to better understand natural movement. One animator is seen with a Thompson M1A1. | ||
| − | [[Image:MOHFL ThompsonM1A1 Bonus.jpg|thumb|none| | + | [[Image:MOHFL ThompsonM1A1 Bonus.jpg|thumb|none|600px|An animator acts-out a dying scenario holding a Thompson as a prop. Unfortunately for him, once he hits the mat, the gun's stock smacks him in the side.]] |
==MP40== | ==MP40== | ||
The [[MP40]] is used by enemies throughout the game, but is slowly replaced by the Sturmgewehr 44 as the levels progress. It is used in A Storm in the Port (Mission 2), Several Bridges Too Far (Mission 5) and Level 1 of Rolling Thunder (Mission 6). It has a high rate of fire, much higher than the actual MP40, but low damage rate. When used by enemies, the rate of fire is much higher, but they tend to fire it in short bursts. It is incorrectly shown firing with a closed bolt. | The [[MP40]] is used by enemies throughout the game, but is slowly replaced by the Sturmgewehr 44 as the levels progress. It is used in A Storm in the Port (Mission 2), Several Bridges Too Far (Mission 5) and Level 1 of Rolling Thunder (Mission 6). It has a high rate of fire, much higher than the actual MP40, but low damage rate. When used by enemies, the rate of fire is much higher, but they tend to fire it in short bursts. It is incorrectly shown firing with a closed bolt. | ||
| − | [[Image:MP40.jpg|thumb|none| | + | [[Image:MP40.jpg|thumb|none|450px|MP40 - 9x19mm]] |
| − | [[Image:MOHF.MP40.jpg|thumb|none| | + | [[Image:MOHF.MP40.jpg|thumb|none|600px|Promo for the MP40. Here it is redundantly labeled "MP40 SMG".]] |
| − | [[Image:Mohf MP40 3.jpg|thumb|none| | + | [[Image:Mohf MP40 3.jpg|thumb|none|600px|The MP40 in-game.]] |
| − | [[Image:Mohf MP40 4.jpg|thumb|none| | + | [[Image:Mohf MP40 4.jpg|thumb|none|600px|Reloading the MP40.]] |
| − | [[Image:Mohf MP40 1.jpg|thumb|none| | + | [[Image:Mohf MP40 1.jpg|thumb|none|600px|An MP40 resting on a crate.]] |
| − | [[Image:Mohf MP40 5.jpg|thumb|none| | + | [[Image:Mohf MP40 5.jpg|thumb|none|600px|Kriegsmarine Enemy armed with an MP40.]] |
===Behind the Scenes=== | ===Behind the Scenes=== | ||
During the weapons montage in the Storm in the Port featurette, the MP40 is featured prominently. | During the weapons montage in the Storm in the Port featurette, the MP40 is featured prominently. | ||
| − | [[Image:MOHFL MP40 Bonus1.jpg|thumb|none| | + | [[Image:MOHFL MP40 Bonus1.jpg|thumb|none|600px|Notes comparing the in-game MP40 to the detail of a real one.]] |
| − | [[Image:MOHFL MP40 Bonus2.jpg|thumb|none| | + | [[Image:MOHFL MP40 Bonus2.jpg|thumb|none|600px|Some kind of color-coded notes pertaining to the MP40's texture.]] |
==Sten Mk II== | ==Sten Mk II== | ||
| − | The [[Sten Mk II]] appears in Level 3 of Several Bridges Too Far (Mission 4) in the hands of British paratrooper allies, particularly the squad leader - Master Sgt. Kelso. Like the Lee-Enfield, the Sten is exclusive to the British paratrooper allies and not available for player use. Although armed with the Mk II, the British | + | The [[Sten Mk II]] appears in Level 3 of Several Bridges Too Far (Mission 4) in the hands of British paratrooper allies, particularly the squad leader - Master Sgt. Kelso. Like the Lee-Enfield, the Sten is exclusive to the British paratrooper allies and not available for player use. Although armed with the Mk II, the British paras would have likely been armed with the [[Sten Mk V]] Paratrooper variant. It uses the same sound effect of the Sturmgewehr 44. |
| − | [[Image:Sten.jpg|thumb|none| | + | [[Image:Sten.jpg|thumb|none|450px|Sten Mk II submachine gun - 9x19mm]] |
| − | [[Image:Mohf Sten 1.jpg|thumb|none| | + | [[Image:Mohf Sten 1.jpg|thumb|none|600px|Master Sgt. Kelso armed with a Sten.]] |
| − | [[Image:Sten MKII Paratrooper MOHF.jpg|thumb|none| | + | [[Image:Sten MKII Paratrooper MOHF.jpg|thumb|none|600px|British Para firing Sten.]] |
=Shotguns= | =Shotguns= | ||
| − | ==Winchester Model 1897 | + | ==Winchester Model 1897 "Trench Gun"== |
| − | The militarized version of the [[Winchester Model 1897]] shotgun appears in Needle in the Haystack (Mission 3) and Several Bridges Too Far (Mission 4). In Level 2 of Several Bridges Too Far (Mission 4), an elderly Dutch Resistance member is briefly seen armed with a Trench Gun, before being quickly taken down by an enemy sniper. It has a very short range but will usually kill enemies with one shot. For some reason, the weapon holds eight shells, despite the real weapon carrying | + | The militarized version of the [[Winchester Model 1897 "Trench Gun"]] shotgun appears in Needle in the Haystack (Mission 3) and Several Bridges Too Far (Mission 4). In Level 2 of Several Bridges Too Far (Mission 4), an elderly Dutch Resistance member is briefly seen armed with a Trench Gun, before being quickly taken down by an enemy sniper. It has a very short range but will usually kill enemies with one shot. For some reason, the weapon holds eight shells, despite the real weapon carrying five plus one in the chamber. Its ammo feeds from the "Shotgun Ammunition" pool. |
| − | [[Image:1897.jpg|thumb|none| | + | [[Image:1897.jpg|thumb|none|450px|Winchester Model 1897 "Trench Gun" - 12 gauge]] |
| − | [[Image:MOHF.trech.gun.jpg|thumb|none| | + | [[Image:MOHF.trech.gun.jpg|thumb|none|600px|Promo for the Trench Gun.]] |
| − | [[Image:Mohf Shotgun 1.jpg|thumb|none| | + | [[Image:Mohf Shotgun 1.jpg|thumb|none|600px|The Trench Gun in-game.]] |
| − | [[Image:Mohf Shotgun 3.jpg|thumb|none| | + | [[Image:Mohf Shotgun 3.jpg|thumb|none|600px|Reloading the Trench Gun.]] |
| − | [[Image:Mohf Shotgun 2.jpg|thumb|none| | + | [[Image:Mohf Shotgun 2.jpg|thumb|none|600px|Dutch Resistance member armed with a Trench Gun.]] |
=Machine Guns= | =Machine Guns= | ||
==Browning Automatic Rifle== | ==Browning Automatic Rifle== | ||
| − | The [[Browning Automatic Rifle]] or BAR makes its first appearance in Level 2 of D-Day (Mission 1) in the hands of a US Army ally, but cannot be used. When in the hands of allies, the bipod is unfolded. But, when used by Patterson, the bipod is folded up and cannot be used. It can first be used in Level 3 of Several Bridges Too Far (Mission 3) and is later obtained in The Hornet's Nest (Mission 6). Although somewhat inaccurate at long range and having a slow rate of fire, it is the most powerful automatic weapon in the game. It holds 20 rounds. | + | The [[Browning Automatic Rifle]] or BAR makes its first appearance in Level 2 of D-Day (Mission 1) in the hands of a US Army ally, but cannot be used. When in the hands of allies, the bipod is unfolded. But, when used by Patterson, the bipod is folded up and cannot be used. It can first be used in Level 3 of Several Bridges Too Far (Mission 3) and is later obtained in The Hornet's Nest (Mission 6). Unlike the real BAR, the in-game version's charging handle is cylindrical, more like that of a [[Browning M1919]], and cycles back and forth when fired. Although somewhat inaccurate at long range and having a slow rate of fire, it is the most powerful automatic weapon in the game. It holds 20 rounds. |
| − | [[Image:BAR.jpg|thumb| | + | [[Image:BAR.jpg|thumb|450px|none|Browning Automatic Rifle - .30-06]] |
| − | [[Image:MOHF BAR P.jpg|thumb|none| | + | [[Image:MOHF BAR P.jpg|thumb|none|600px|Promo for the BAR.]] |
| − | [[Image:Mohf BAR 2.jpg|thumb|none| | + | [[Image:Mohf BAR 2.jpg|thumb|none|600px|The BAR in-game.]] |
| − | [[Image:Mohf BAR 3.jpg|thumb|none| | + | [[Image:Mohf BAR 3.jpg|thumb|none|600px|Reloading the BAR. Note the incorrect cylindrical charging handle.]] |
| − | [[Image:BAR US Ranger Frontline.jpg|thumb|none| | + | [[Image:BAR US Ranger Frontline.jpg|thumb|none|600px|A US Army Ally armed with a BAR.]] |
| − | [[Image:BAR Table MOHF.jpg|thumb|none| | + | [[Image:BAR Table MOHF.jpg|thumb|none|600px|A BAR resting on a table. The ejection port is completely inaccurate to that of the real BAR.]] |
| − | [[Image:Mohf Returning to Base.jpg|thumb|none| | + | [[Image:Mohf Returning to Base.jpg|thumb|none|600px|Returning to Base. Loading screen showing Patterson rightfully armed with a BAR, which seems to be his signature weapon in the series.]] |
===Behind the Scenes=== | ===Behind the Scenes=== | ||
In the Storm in the Port (Mission 2) featurette, a BAR is seen being fired for sound effects. | In the Storm in the Port (Mission 2) featurette, a BAR is seen being fired for sound effects. | ||
| − | [[Image:MOHFL BAR Bonus.jpg|thumb|500px|none|An Armorer fires a BAR for sound effects. He fires it on the faster of the | + | [[Image:MOHFL BAR Bonus.jpg|thumb|500px|none|An Armorer fires a BAR for sound effects. He fires it on the faster of the BARs two full-auto fire modes, instead of the slow auto-fire mode as it is depicted in the game.]] |
==Browning M1919== | ==Browning M1919== | ||
In Level 1 of A Storm in the Port (Mission 2), a [[Browning M1919]] can be used, mounted on a wrecked US Army jeep after being strafed by a German Me-109. It incorrectly ejects spent shells from the side, has unlimited ammo, and the same rate of fire of the MG42 in the game. | In Level 1 of A Storm in the Port (Mission 2), a [[Browning M1919]] can be used, mounted on a wrecked US Army jeep after being strafed by a German Me-109. It incorrectly ejects spent shells from the side, has unlimited ammo, and the same rate of fire of the MG42 in the game. | ||
| − | [[Image:BrowningM37MG.jpg|thumb|none| | + | [[Image:BrowningM37MG.jpg|thumb|none|450px|Browning M1919 - .30-06]] |
[[Image:M1919 3rd MOHF.jpg|thumb|none|500px|The in-game Browning M1919 mounted on the wrecked jeep.]] | [[Image:M1919 3rd MOHF.jpg|thumb|none|500px|The in-game Browning M1919 mounted on the wrecked jeep.]] | ||
[[Image:Browning M1919 2.jpg|thumb|none|500px|Manning the Browning M1919. Notice how the spent cartridges incorrectly eject from the side, instead of underneath.]] | [[Image:Browning M1919 2.jpg|thumb|none|500px|Manning the Browning M1919. Notice how the spent cartridges incorrectly eject from the side, instead of underneath.]] | ||
| Line 164: | Line 162: | ||
===Behind the Scenes=== | ===Behind the Scenes=== | ||
In the Storm in the Port (Mission 2) featurette, a photo of a mounted Browning M1919 is shown on a firing range for recording sound effects. | In the Storm in the Port (Mission 2) featurette, a photo of a mounted Browning M1919 is shown on a firing range for recording sound effects. | ||
| − | [[Image:MOHFL M1919 Bonus.jpg|thumb|none| | + | [[Image:MOHFL M1919 Bonus.jpg|thumb|none|450px|Rear-view of a Browning M1919 on a firing range.]] |
==MG42== | ==MG42== | ||
The [[MG42]] appears frequently in the game mounted in several positions, most notably in enemy bunkers on D-Day (Mission 1). Just like the M1919 machine gun, it incorrectly ejects spect shells from the side. In traditional Medal of Honor fashion, manning one will trigger a swarm of enemies to come forth to attack, though you again have the benefit of unlimited ammo with which to counter the threat. The MG42 is also erroneously shown being capable of destroying enemy Panzer III tanks. Its rate of fire is also much lower than the real-life MG42. | The [[MG42]] appears frequently in the game mounted in several positions, most notably in enemy bunkers on D-Day (Mission 1). Just like the M1919 machine gun, it incorrectly ejects spect shells from the side. In traditional Medal of Honor fashion, manning one will trigger a swarm of enemies to come forth to attack, though you again have the benefit of unlimited ammo with which to counter the threat. The MG42 is also erroneously shown being capable of destroying enemy Panzer III tanks. Its rate of fire is also much lower than the real-life MG42. | ||
| − | [[Image:MG42.jpg|thumb|none| | + | [[Image:MG42.jpg|thumb|none|450px|MG42 - 7.92x57mm Mauser]] |
| − | [[Image:Mohf MG42 4.jpg|thumb|none| | + | [[Image:Mohf MG42 4.jpg|thumb|none|600px|Manning the MG42. Like the Browning M1919, the spent cartridges incorrectly eject from the side.]] |
| − | [[Image:Mohf MG42 2.jpg|thumb|none| | + | [[Image:Mohf MG42 2.jpg|thumb|none|600px|An Enemy machine gun team fires an MG42 from a bunker.]] |
| − | [[Image:Mohf MG42 3.jpg|thumb|none| | + | [[Image:Mohf MG42 3.jpg|thumb|none|600px|An MG42 mounted in a bell tower. This is clearly an homage to the end of Steven Spielberg's [[Saving Private Ryan]] where Pvt. Parker uses a machine gun in a bell tower.]] |
=Rocket Launchers= | =Rocket Launchers= | ||
==M9A1 "Bazooka"== | ==M9A1 "Bazooka"== | ||
| − | The [[M9A1 "Bazooka"]] appears in The Hornet's Nest (Mission 6). | + | The [[M9A1 "Bazooka"]] appears in The Hornet's Nest (Mission 6). Upon finding it leaning against a wall, it uses the Panzerschreck skin. Contrary to the real-life version, it can be effectively operated by a single person, which at best would be highly impractical in a combat situation. It also takes little time to reload, and is aimed through an optic sight. It is more used as an anti-personnel weapon than its original anti-tank role. |
| − | [[File:M9A1 Bazooka.jpg|thumb|none| | + | [[File:M9A1 Bazooka.jpg|thumb|none|450px|M9A1 "Bazooka" - 2.36 inch]] |
| − | [[Image:MOHFL M9.bazooka.jpg|thumb|none| | + | [[Image:MOHFL M9.bazooka.jpg|thumb|none|600px|Promo for the M9A1 Bazooka, which is actually a post-WWII M20B1 "Super Bazooka".]] |
| − | [[Image: | + | [[Image:M9 Bazooka MOHF.jpg|thumb|none|600px|The Bazooka in-game.]] |
| − | + | [[Image:Bazooka scope MOHF.jpg|thumb|none|600px|The Bazooka's scope.]] | |
| − | |||
| − | |||
| − | [[Image: | + | ==Panzerschreck RPzB 54== |
| − | [[Image: | + | The [[Panzerschreck RPzB 54]] appears in the game as the German counterpart to the American M9A1 Bazooka. It is first seen in Level 2 of Needle in a Haystack (Mission 3), in the hands of a frantic enemy who blows up the truck where Fox and Patterson are, killing Fox instantly. It later comes back in Level 3 of Needle in a Haystack, Several Bridges Too Far (Mission 4) and Rolling Thunder (Mission 5). In the hands of enemies, it is the 43 model without a blast shield (despite enemies never wearing the protective mask or gloves required to use the 43), but suddenly has the blast shield of the 54 model once used by Patterson. Enemies are quite slow to using them, but can be pretty effective once firing. The blast shield obscures the view, making it difficult to aim. It takes a long time to reload and uses 'Panzerschreck Rocket' ammo. |
| − | [[Image:Mohf Panzerschreck 4.jpg|thumb|none| | + | [[Image:Tank h5.jpg|thumb|none|450px|Panzerschreck RPzB 54 - 88mm]] |
| − | [[Image:Mohf Panzerschreck 1.jpg|thumb|none| | + | [[Image:MOHF.Panzerschreck (1).jpg|thumb|none|600px|Promo for RPzB "Panzerschreck".]] |
| − | [[Image:Mohf Panzerschreck 3.jpg|thumb|none| | + | [[Image:Mohf Panzerschreck 4.jpg|thumb|none|600px|The RPzB (54 model) in-game.]] |
| + | [[Image:Mohf Panzerschreck 1.jpg|thumb|none|600px|A German soldier firing a RPzB (43 model) at the walkway bridge.]] | ||
| + | [[Image:Mohf Panzerschreck 3.jpg|thumb|none|600px|A Wehrmacht enemy armed with a RPzB (43 model).]] | ||
=Grenades= | =Grenades= | ||
==Mk 2 Hand Grenade== | ==Mk 2 Hand Grenade== | ||
| − | The [[Mk 2 hand grenade]] frequently appears in the game. They are used in Level 1 of A Storm in the Port (Mission 2), Needle in the Haystack (Mission 3), and Several Bridges Too Far (Mission 4). Like the other allied weapons, it is generally available where U.S. Army forces are present. Like previous Medal of Honor games, the grenades explode on impact when hitting enemy troops. If a grenade does not strike an enemy, they are likely to either throw it back or run away. Grenade bundles are frequently encountered through out levels, sometimes in bags and sometimes in crates. | + | The [[Mk 2 hand grenade]] frequently appears in the game. They are used in Level 1 of A Storm in the Port (Mission 2), Needle in the Haystack (Mission 3), and Several Bridges Too Far (Mission 4). Like the other allied weapons, it is generally available where U.S. Army forces are present. Like previous Medal of Honor games, the grenades explode on impact when hitting enemy troops. If a grenade does not strike an enemy, they are likely to either throw it back or run away. Grenade bundles are frequently encountered through out levels, sometimes in bags and sometimes in crates. On the PlayStation 2 console, the animated save icon for this game's progress files is a 3D model of a Mk 2 hand grenade. |
[[Image:MK2 grenade DoD.jpg|thumb|none|150px|Mk 2 hand grenade|Mk 2 High-Explosive Fragmentation hand grenade]] | [[Image:MK2 grenade DoD.jpg|thumb|none|150px|Mk 2 hand grenade|Mk 2 High-Explosive Fragmentation hand grenade]] | ||
| − | [[Image:Mk II Grenade 1.jpg|thumb|none| | + | [[Image:MOHF MKIIFRAG.jpg|thumb|none|600px|Promo for the Mk 2 Hand Grenade.]] |
| − | [[Image:Mk II Grenade 2.jpg|thumb|none| | + | [[Image:Mk II Grenade 1.jpg|thumb|none|600px|A crate full of Mk 2 Hand Grenades.]] |
| − | [[Image:Mk II Grenade 3.jpg|thumb|none| | + | [[Image:Mk II Grenade 2.jpg|thumb|none|600px|The Mk 2 Hand Grenade in-game.]] |
| + | [[Image:Mk II Grenade 3.jpg|thumb|none|600px|Throwing the Mk 2 Hand Grenade.]] | ||
==Model 16/Model 24 Stielhandgranate== | ==Model 16/Model 24 Stielhandgranate== | ||
| − | The | + | The German grenades, while in Patterson's hands, is modeled after the outdated [[Model 16 Stielhandgranate]] with the belt hook. But once thrown, it turns into the [[Model 24 Stielhandgranate]]. In enemy hands or seen in crates, it is the Model 24. Regardless, they are obtainable and enemies will use them more frequently as the game progresses. They appear in Level 3 of A Storm in the Port (Mission 2), Rolling Thunder (Mission 5), and The Hornet's Nest (Mission 6). They share all characteristics with the Mk 2 grenades, including exploding on impact with enemies. They are obtainable and enemies will use them more frequently as the game progresses. They appear in Level 3 of A Storm in the Port (Mission 2), Rolling Thunder (Mission 5), and The Hornet's Nest (Mission 6). They share all characteristics with the Mk 2 grenades, including exploding on impact with enemies. |
[[Image:M16stick.jpg|thumb|none|300px|Model 16 Stielhandgranate "Potato Masher" high-Explosive Fragmentation hand grenade.]] | [[Image:M16stick.jpg|thumb|none|300px|Model 16 Stielhandgranate "Potato Masher" high-Explosive Fragmentation hand grenade.]] | ||
[[Image:24-43 grenade.jpg|thumb|none|300px|Model 24 Stielhandgranate "Potato Masher" high-explosive fragmentation hand grenade.]] | [[Image:24-43 grenade.jpg|thumb|none|300px|Model 24 Stielhandgranate "Potato Masher" high-explosive fragmentation hand grenade.]] | ||
| − | [[Image:Mohf Stick Grenade 1.jpg|thumb|none| | + | [[Image:MOHF.Stielhandgrenate (1).jpg|thumb|none|500px|Promo for the Model 16 Stielhandgranate.]] |
| − | [[Image:Mohf Stick Grenade 2.jpg|thumb|none| | + | [[Image:Mohf Stick Grenade 1.jpg|thumb|none|600px|A crate full of Stielhandgranates.]] |
| − | [[Image:Mohf Stick Grenade 3.jpg|thumb|none| | + | [[Image:Mohf Stick Grenade 2.jpg|thumb|none|600px|A Model 16 in Patterson's hand.]] |
| + | [[Image:Mohf Stick Grenade 3.jpg|thumb|none|600px|Once thrown, it turns into a Model 24]] | ||
==M18 Smoke Grenade== | ==M18 Smoke Grenade== | ||
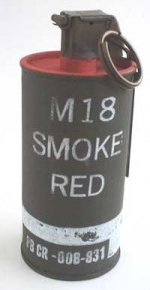
In Level 1 of D-Day (Mission 1), it is required to mark German bunkers for the Allied Fleet in the channel to destroy. This is done by placing a [[M18 smoke grenade]] in the "gun deck" of the bunker. Once placed, time is short to escape before the fleet nails the bunker. | In Level 1 of D-Day (Mission 1), it is required to mark German bunkers for the Allied Fleet in the channel to destroy. This is done by placing a [[M18 smoke grenade]] in the "gun deck" of the bunker. Once placed, time is short to escape before the fleet nails the bunker. | ||
[[Image:M18red.jpg|thumb|none|150px|M18 smoke grenade]] | [[Image:M18red.jpg|thumb|none|150px|M18 smoke grenade]] | ||
| − | [[Image:Smoke Grenade.jpg|thumb|none| | + | [[Image:Smoke Grenade.jpg|thumb|none|600px|The M18 Smoke Grenade being placed in the bunker.]] |
=Extras= | =Extras= | ||
==Thompson M1928A1== | ==Thompson M1928A1== | ||
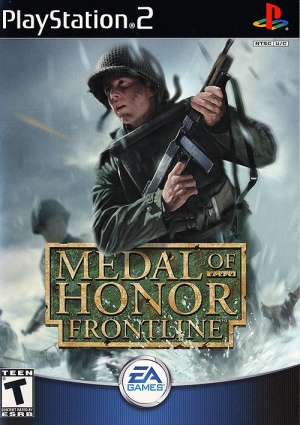
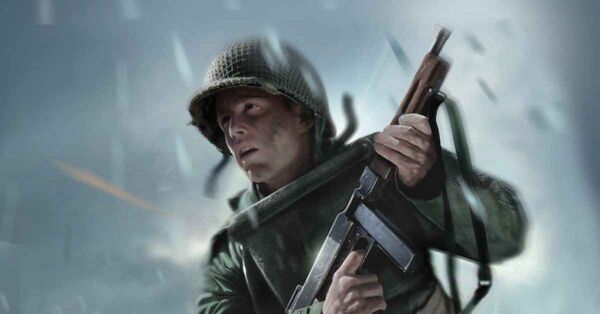
| − | The game's cover art features a US Soldier | + | The game's cover art features a US Soldier charging through the surf on Omaha Beach, brandishing a [[Thompson M1928A1]] loaded with a 20 round magazine. |
| − | [[Image:Submachine gun M1928 Thompson.jpg|thumb|none| | + | [[Image:Submachine gun M1928 Thompson.jpg|thumb|none|450px|M1928A1 Thompson with 20-round magazine - .45 ACP]] |
| − | [[Image:Medal-of-honor-frontline-keyart.jpg.adapt.crop191x100.628p.jpg|thumb|none| | + | [[Image:Medal-of-honor-frontline-keyart.jpg.adapt.crop191x100.628p.jpg|thumb|none|600px|Cover Art featuring the Thompson M1928A1.]] |
==Oerlikon 20mm Cannon== | ==Oerlikon 20mm Cannon== | ||
| Line 221: | Line 221: | ||
[[Image:20mm Oerlikon Cannon.jpg|thumb|none|400px|US Navy Mark 4 single pedestal mount Oerlikon L70 Cannon with early-war eyepiece / ring antiaircraft sight - 20x110mm RB]] | [[Image:20mm Oerlikon Cannon.jpg|thumb|none|400px|US Navy Mark 4 single pedestal mount Oerlikon L70 Cannon with early-war eyepiece / ring antiaircraft sight - 20x110mm RB]] | ||
[[Image:Eastern Front. Protection from air attack. Gunner at sea pointing weapon into the sky corbis.jpg|thumb|none|300px|The original photograph used to make the loading screen.]] | [[Image:Eastern Front. Protection from air attack. Gunner at sea pointing weapon into the sky corbis.jpg|thumb|none|300px|The original photograph used to make the loading screen.]] | ||
| − | [[Image:Mohf AA Gun 1.jpg|thumb|none| | + | [[Image:Mohf AA Gun 1.jpg|thumb|none|600px|Cliping Their Wings. Loading screen showing a Flak Crewman manning a Flak 29 Oerlikon (the Kriegsmarine uniform patches removed from the original photograph). The image has also been mirrored from the original photograph, flipping all the components of the gun.]] |
| − | == | + | ==QF 6-pounder Hotchkiss== |
| − | The loading screen for Level | + | The loading screen for Level 2 of Rolling Thunder (Mission 5) shows a French Hotchkiss naval gun mounted on a German Panzerzug, a very unlikely place for such a captured armament. |
| − | [[Image: | + | [[Image:Elswick6PounderGuncirca1897.jpg|thumb|none|500px|QF 6-pounder Hotchkiss]] |
| − | [[Image: | + | [[Image:Mohf Panzerzug canon.jpg|thumb|none|600px|Riding Out the Storm loading screen showing the Hotchkiss on a Panzerzug.]] |
| − | == | + | ==Demolition Charges== |
| − | + | Like the previous games, it is required to obtain and use demolition charges to sabotage specific targets. And again, just like in the first game, targets marked for sabotage are identified by pulsating red boxes. Although a step-up from the gigantic clock design, the demolition charges still do not resemble any real-life demolition system used during WWII and remain red dynamite sticks wired to a small timer. Enemies are also seen using the same type of demolitions in Level 1 of Several Bridges Too Far (Mission 4), strapping them to the supports of Nijmegen Bridge. | |
| − | [[Image: | + | [[Image:Mohf Demolition Charge 1.jpg|thumb|none|600px|Demolition Charge in-game.]] |
| − | [[Image: | + | [[Image:Mohf Rifle Case.jpg|thumb|none|600px|A Case containing Demolition Charges and (supposedly) a Springfield M1903, seen in Level 3 of Mission 2 (A Storm in the Port).]] |
| − | == | + | ==Karabiner 98AZ== |
| − | In the | + | In Level 3 of Mission 2 (A Storm in the Port), a case meant to contain a Springfield M1903 appears to have a broken-down [[Karabiner 98AZ]]. Why this model was used instead of Springfield is a mystery. |
| − | [[Image: | + | [[Image:Mauser 98AZ Artillery Carbine.jpg|thumb|none|450px|Karabiner 98AZ - 7.92x57mm Mauser. Late version with a grasping groove.]] |
| − | + | [[Image:Mohf Rifle Case.jpg|thumb|none|600px|A Case containing the broken-down Karabiner 98AZ, meant to be a Springfield M1903, seen in Level 3 of Mission 2 (A Storm in the Port).]] | |
| − | |||
| − | |||
| − | |||
| − | |||
| − | [[Image:Mohf Rifle Case.jpg|thumb|none| | ||
==Model 39 Eihandgranate== | ==Model 39 Eihandgranate== | ||
The SS Panzergrenadier enemies have the [[Model 39 Eihandgranate]] hanging from their webbing, although they are not in use in the game. | The SS Panzergrenadier enemies have the [[Model 39 Eihandgranate]] hanging from their webbing, although they are not in use in the game. | ||
[[Image:M39 Eihandgranate.JPG|thumb|none|200px|The Model 39 Eihandgranate hand grenade.]] | [[Image:M39 Eihandgranate.JPG|thumb|none|200px|The Model 39 Eihandgranate hand grenade.]] | ||
| − | [[Image:MOHFL Egg Grenade.jpg|thumb|none| | + | [[Image:MOHFL Egg Grenade.jpg|thumb|none|600px|The Model 39 Eihandgranate circled in red on a SS Panzergrenadier enemy.]] |
==Granatwerfer 34 Mortar== | ==Granatwerfer 34 Mortar== | ||
| − | In Level 1 of Needle in the Haystack (Mission 3), two German [[Granatwerfer 34 Mortar]] | + | In Level 1 of Needle in the Haystack (Mission 3), two German [[Granatwerfer 34 Mortar]]s are encountered. They fire numerous rounds and can inflict serious damage. They are exclusive to the Germans and cannot be used by Patterson. |
[[Image:8cm-granatwerfer-34.jpg|thumb|none|300px|8-cm Granatwerfer 34 (GrW 34).]] | [[Image:8cm-granatwerfer-34.jpg|thumb|none|300px|8-cm Granatwerfer 34 (GrW 34).]] | ||
| − | [[Image:Mohf German Mortar 1.jpg|thumb|none| | + | [[Image:Mohf German Mortar 1.jpg|thumb|none|600px|Wehrmacht enemy using a Granatwerfer 34.]] |
==8.8 cm SK C/30 naval gun== | ==8.8 cm SK C/30 naval gun== | ||
The final objective in Level 4 of A Storm in the Port (Mission 2) is to destroy a fuel depot within the port. To achieve this, Patterson must commandeer a 8.8 cm SK C/30 naval gun fastened to a U-Boat resting in the pen. The weapon itself lacks a lot of detail and is much smaller than its real-life counterpart, but it is extremely powerful and can eliminate numerous enemies at once. | The final objective in Level 4 of A Storm in the Port (Mission 2) is to destroy a fuel depot within the port. To achieve this, Patterson must commandeer a 8.8 cm SK C/30 naval gun fastened to a U-Boat resting in the pen. The weapon itself lacks a lot of detail and is much smaller than its real-life counterpart, but it is extremely powerful and can eliminate numerous enemies at once. | ||
| − | [[Image:600px-88mm SKC30.jpg|thumb|none| | + | [[Image:600px-88mm SKC30.jpg|thumb|none|450px|8.8 cm SK C/30 naval gun]] |
| − | [[Image:Mohf Naval Gun 2.jpg|thumb|none| | + | [[Image:Mohf Naval Gun 2.jpg|thumb|none|600px|The 8.8cm mounted on a U-Boat.]] |
| − | [[Image:Mohf Naval Gun 3.jpg|thumb|none| | + | [[Image:Mohf Naval Gun 3.jpg|thumb|none|600px|Firing the 8.8cm.]] |
==2 cm Flakvierling 38== | ==2 cm Flakvierling 38== | ||
| − | The [[Flakvierling 38]] is seen throughout the game, although it can never be used. It is first seen atop the bluff of Omaha Beach in Mission 1 (D-Day), despite the fact no Flakvierling | + | The [[Flakvierling 38]] is seen throughout the game, although it can never be used. It is first seen atop the bluff of Omaha Beach in Mission 1 (D-Day), despite the fact no Flakvierling 38s were on the real Omaha Beach. It becomes a target for destruction in Level 1 of Several Bridges Too Far (Mission 4), and can later be seen in an A-Wagen of a Panzerzug BP42 (Armored Train) in Level 2 of Rolling Thunder (Mission 5). |
| − | [[Image: | + | [[Image:2 cm FlaKVierling 38.jpg|thumb|none|500px|Flakvierling 38 - 20x138mm B]] |
| − | [[Image:Mohf Thompson 3.jpg|thumb|none| | + | [[Image:Mohf Thompson 3.jpg|thumb|none|450px|A couple Flakvierling 38s atop the bluff on Omaha Beach.]] |
| − | [[Image:Flak Guns 2.jpg|thumb|none| | + | [[Image:Flak Guns 2.jpg|thumb|none|600px|A Flakvierling 38 seen behind 'The Captain' on Omaha Beach.]] |
| − | [[Image:Flak Guns 3.jpg|thumb|none| | + | [[Image:Flak Guns 3.jpg|thumb|none|600px|A Flakvierling 38 atop a bunker.]] |
==15 cm Nebelwerfer 41== | ==15 cm Nebelwerfer 41== | ||
| − | The Nebelwerfer 41 rocket launcher appears only once in the game. In Mission 1 of Needle in the Haystack (Mission 3), it is required to use a Nebelwerfer to destroy a Panzer | + | The [[15 cm Nebelwerfer 41]] rocket launcher appears only once in the game. In Mission 1 of Needle in the Haystack (Mission 3), it is required to use a Nebelwerfer to destroy a Panzer IV tank across a river. Cpl. Barnes advises "We can't get that tank from here. Try taking it out with that rocket launcher." Once triggered, it rapid fires all six rockets and destroys the tank. |
| − | [[Image:15cm Nebelwerfer 41.jpg|thumb|none| | + | [[Image:15cm Nebelwerfer 41.jpg|thumb|none|450px|15 cm Nebelwerfer 41 multiple rocket launcher]] |
| − | [[Image: | + | [[Image:MOHF Nebelwerfer promo.jpg|thumb|none|600px|Promo for the Nebelwerfer.]] |
| − | [[Image:MohfM1 Screaming Mimi | + | [[Image:MohfM1 Screaming Mimi 1.jpg|thumb|none|600px|The Nebelwerfer 41 in-game.]] |
| − | + | [[Image:MohfM1 Screaming Mimi 2.jpg|thumb|none|600px|Firing the Nebelwerfer.]] | |
| − | |||
| − | |||
| − | |||
| − | |||
| − | |||
| − | |||
| − | |||
| − | |||
| − | |||
| − | |||
| − | |||
| − | |||
| − | |||
| − | |||
| − | [[Image: | ||
| − | |||
| − | |||
| − | |||
| − | == | + | ==MG 34 Panzerlauf== |
| − | + | In several levels, particularly Level 1 of Needle in the Haystack (Mission 3), enemy Panzer IV tanks use the [[MG 34 Panzerlauf]] as their secondary weapon. Their rate of fire is much higher than the actual MG 34, and their sound effect appears to be that of the MP 40. | |
| − | + | [[Image:MG 34 Panzerlauf 2.jpg|thumb|none|450px|MG 34 Panzerlauf - 7.92x57mm Mauser]] | |
| − | + | [[Image:MG34Frontline.jpg|thumb|none|600px|The MG 34 Panzerlauf of an enemy Panzer IV.]] | |
| − | |||
| − | |||
| − | |||
| − | |||
| − | [[ | ||
| − | |||
| − | |||
| − | |||
| − | |||
| − | |||
| − | |||
| − | |||
| − | [[Image: | ||
| − | |||
| − | |||
| − | |||
| − | |||
| − | |||
| − | |||
| − | |||
| − | |||
| − | |||
| − | |||
| − | |||
| − | [[Image: | ||
| − | |||
| − | |||
| − | |||
| − | |||
| − | |||
| − | |||
| − | |||
| − | |||
| − | |||
| − | |||
| − | |||
==Browning M2 Aircraft== | ==Browning M2 Aircraft== | ||
The US P-51 fighters are briefly seen using their fixed [[Browning M2 Aircraft]] guns against the Schnabelstande emplacements on Omaha Beach. | The US P-51 fighters are briefly seen using their fixed [[Browning M2 Aircraft]] guns against the Schnabelstande emplacements on Omaha Beach. | ||
| − | [[Image:M2aircraft.jpg|thumb|none| | + | [[Image:M2aircraft.jpg|thumb|none|450px|Browning M2 Aircraft, Fixed - .50 BMG.]] |
| − | [[Image:MOHFL USplanes 3.jpg|thumb|none| | + | [[Image:MOHFL USplanes 3.jpg|thumb|none|600px|A P-51 strafes the neighboring Schnabelstande, easily killing everyone inside with one pass.]] |
| − | |||
| − | |||
| − | |||
| − | |||
| − | |||
| − | |||
| − | |||
| − | |||
| − | |||
| − | |||
| − | |||
| − | |||
| − | |||
| − | |||
| − | |||
==MG17== | ==MG17== | ||
| − | In the presence of the Junkers | + | In the presence of the Junkers, it always uses its [[MG17 machine gun]], which was used in both the Junkers Ju 87 and Messerschmitt Bf 109. |
| − | [[Image:MG 17.jpg|thumb|none| | + | [[Image:MG 17.jpg|thumb|none|450px|MG17 - 7.92x57mm Mauser]] |
| − | [[Image:MOHFL MG17 1.jpg|thumb|none| | + | [[Image:MOHFL MG17 1.jpg|thumb|none|600px|The Junkers Ju 87 strafes the beach.]] |
| − | = | + | =Cut Weapons= |
| − | + | A few weapons appear in beta images and Behind the Scenes featurettes that did not make the final release. | |
| − | |||
| − | |||
| − | |||
| − | |||
| − | |||
| − | |||
| − | |||
| − | |||
| − | |||
| − | |||
| − | |||
| − | |||
| − | |||
| − | |||
| − | |||
| − | |||
| − | |||
| − | |||
| − | |||
| − | |||
| − | |||
| − | |||
| − | |||
| − | |||
| − | |||
| − | |||
| − | |||
| − | |||
| − | |||
| − | |||
| − | |||
| − | |||
| − | |||
| − | |||
| − | |||
| − | |||
| − | |||
| − | |||
| − | |||
| − | |||
| − | |||
| − | |||
| − | |||
| − | |||
| − | |||
| − | |||
| − | |||
| − | |||
| − | |||
| − | |||
| − | |||
| − | |||
| − | |||
| − | |||
| − | |||
| − | |||
| − | |||
| − | |||
| − | |||
| − | |||
| − | |||
| − | |||
| − | |||
| − | |||
| − | |||
| − | |||
| − | |||
| − | |||
| − | |||
| − | |||
| − | |||
| − | |||
| − | |||
| − | |||
| − | |||
| − | |||
| − | |||
| − | |||
| − | |||
| + | ==Mauser M712 Schnellfeuer== | ||
| + | A screenshot of the game's beta version shows a Kriegsmarine Enemy brandishing a [[Mauser M712 Schnellfeuer]], identified by its extended magazine. It was planned to be in game, and possibly used, but did not make the final version of the game. | ||
| + | [[Image:MauserM712Schnellfeuer.jpg|thumb|none|350px|Mauser M712 Schnellfeuer - 7.63x25mm Mauser]] | ||
| + | [[Image:Moh-frontline-3 C96.jpg|thumb|none|600px|Enemy on the left brandishing Schnellfeuer in a beta screenshot.]] | ||
| + | ==FP-45 Liberator== | ||
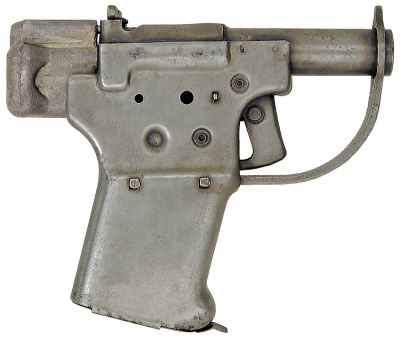
| + | An image displaying untextured weapons in the Storm in the Port (Mission 2) featurette shows a [[FP-45 Liberator]]. It is possible the Liberator was meant to be used in the covert levels of the game but was dropped once the developers realized how unreliable it would be. | ||
| + | [[Image:LiberatorPistol.jpg|thumb|none|400px|FP-45 Liberator - .45 ACP.]] | ||
| + | [[Image:MOHFL FP45.jpg|thumb|none|600px|The FP-45 Liberator circled in red.]] | ||
| + | ==Tellermine 42== | ||
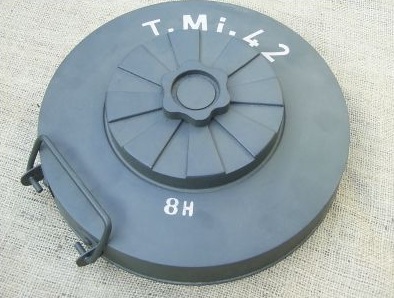
| + | In the same image of untextured weapons, a [[Tellermine 42]] is seen in the bottom right. It never appears in the game so, like the FP-45, it is assumed that it was cut. | ||
| + | [[Image:Tellermine 42.jpg|thumb|none|400px|Tellermine 42 Anti-tank mine.]] | ||
| + | [[Image:MOHFL Mine.jpg|thumb|none|600px|The Tellermine 42 circled in red.]] | ||
{{Medal of Honor Series}} | {{Medal of Honor Series}} | ||
Latest revision as of 11:55, 23 December 2024
Medal of Honor: Frontline is the fourth installment in the Medal of Honor series, released in North America for the PlayStation 2 on May 29, 2002 and for the Xbox and GameCube consoles on November 7, 2002. In 2010, an HD port of the game was included in the "Limited Edition" PlayStation 3 version of Medal of Honor.
Lt. Jimmy Patterson returns as the game's protagonist. It is a semi remake and reboot of the original 1999 Medal of Honor. Some missions, such as A Storm in the Port (Mission 2) and Rolling Thunder (Mission 5), are homages to Scuttle Das Boot U-4901 (Mission 3) and Destroy the Mighty Railgun Greta (Mission 2) from the first game. The plot takes place during Operation Market Garden, in between Mission 3 and Mission 4 of the first game. All of the weaponry has been brought back from the first game and Medal of Honor: Underground.
The following weapons appear in the video game Medal of Honor: Frontline:
![]() WARNING! THIS PAGE CONTAINS SPOILERS!
WARNING! THIS PAGE CONTAINS SPOILERS!
Pistols
M1911A1
Known as the "Colt .45" in-game, the M1911A1 appears as the standard sidearm in D-Day (Mission 1) and A Storm in the Port (Mission 2). It is also seen on the main menu as the option for 'next mission'. It is the most powerful pistol in the game, and is highly effective firing against MG positions Level 1 of D-Day (Mission 1). It holds 7 rounds.
High Standard Victor
Known as the "OSS Hi-Standard Pistol", what mostly resembles a suppressed High Standard Victor is the most used pistol throughout the game. As a silenced pistol it replaces the suppressed Walther PPK and the High Standard HDM from the previous games, which is an odd decision as the Victor is highly anachronistic (first manufactured in 1974) and the Victor is not compatible with a suppressor. It is likely that the developers simply confused the Victor for the HDM. It first appears in Level 2 of Needle in the Haystack (Mission 3), and then returns in Several Bridges Too Far (Mission 4), and Level 1 in Rolling Thunder (Mission 5). It is slightly less powerful than the M1911A1 and holds 7 rounds.
Walther P38
The Walther P38 is mainly used by enemy officers and scientists. It is first obtained in Rolling Thunder (Mission 5) and is used again in The Hornet's Nest (Mission 6). It has short recoil, and is much more accurate than the M1911A1. It holds 8 rounds and uses Pistol ammunition.
Behind the Scenes
In the game's Behind the Scenes featurette for Several Bridges Too Far (Mission 4), someone is seen fumbling with a Walther P38, possibly as a reference for animators.
Rifles
M1 Garand
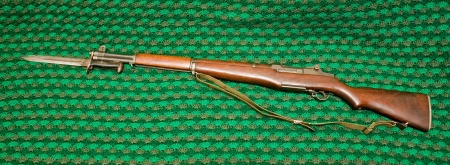
The M1 Garand is the first weapon to be used in the game, and appears as the standard weapon for U.S. Army allies in the game. Unlike the real M1 Garand, the in-game model cannot be reloaded until the entire en-bloc clip is expended. This is because the game's engine only allows one reload animation per weapon - Reloading the Garand mid clip would require a second animation to show the manual ejection of the clip, and then the loading of a new clip. In Level 2 of Needle in the Haystack (Mission 3), an enemy soldier in the pub is carrying a Garand. This could possibly be a capture from an American casualty, or a programming error which is more likely.
Springfield M1903A4
The M1903A4 Springfield appears in Level 2 of A Storm in the Port (Mission 2) and in the first 2 levels of Needle in the Haystack (Mission 3). Like the first MOH game, it is first obtained through a hidden "gift package". It has a somewhat slow rate of fire due to the bolt-action, but it is incredibly accurate, and has great range. It holds 5 rounds.
Gewehr 43
A scoped Gewehr 43 appears as the second "sniping" weapon in the game, and is prominently seen in the hands of enemies in Level 1 of Several Bridges Too Far (Mission 4), where it is first obtained. It comes back in The Hornet's Nest (Mission 6). Its accuracy is slightly less than the M1903. Being a semi automatic weapon, it has a much higher rate of fire and faster reload than the M1903. It holds 10 rounds.
Note: the real Gewehr 43 has significantly less accuracy at range than the 1903 bolt action rifle and isn't nearly as reliable. Even as a basic semi-automatic rifle, its less than desirable, especially when compared to superior rifles like the M1 Garand.
Karabiner 98k
The Karabiner 98k is the standard weapon used by enemies. Like the first game, it is unusable for the player. Scoped versions can be seen being used by enemy snipers in Level 1 of Several Bridges Too Far (Mission 4). They have a low rate of fire and take enemies a considerable amount of time to reload. Enemies will likely use them as melee weapons if close enough. They slowly diminish in favor of the Gewehr 43 in later missions. It holds 5 rounds.
Lee-Enfield No. 4 Mk I
The Lee-Enfield No. 4 Mk I is seen in the hands of British Paratroopers Allies in Level 3 of Several Bridges Too Far (Mission 4). It is unusable for the player and only seen in this level. They share the same sound effect with the M1 Garand.
Sturmgewehr 44
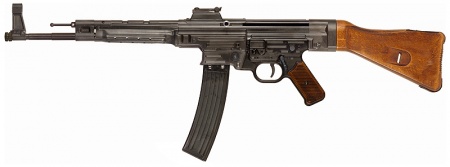
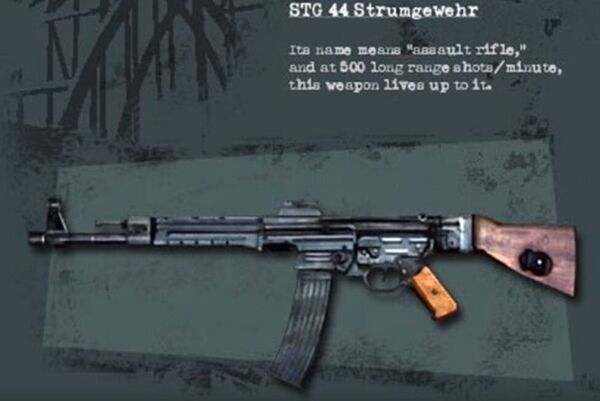
Known as the "STG44", the Sturmgewehr 44 is first obtained in Level 3 of Needle in a Haystack (Mission 3). It later comes back in Rolling Thunder (Mission 5). It is seen in enemy hands in any level where the player uses the B.A.R., likely to counter the firepower. The in-game model is disproportionate to the real STG44, seeming to be stretched out for some reason. Its rate of fire is generally slow, but seems to be much faster in enemy hands. At the game's climax, Baron Rudolph Ulbricht Von Sturmgeist, the game's antagonist, is armed with a Sturmgewehr in the final duel.
Behind the Scenes
In the Behind the Scenes featurette for A Storm in the Port (Mission 2), several images of in-game weapons are shown along with the developer's notes. One happens to be for the Sturmgewehr 44.
Submachine Guns
M1A1 Thompson
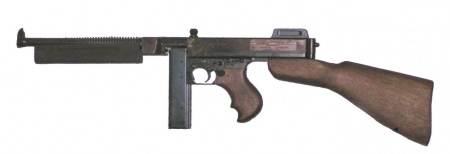
The M1A1 Thompson appears in D-Day (Mission 1) and Needle in a Haystack (Mission 3). It can be found in the surf and hidden by a Belgian Gate obstacle in Level 1 of D-Day. It has the highest rate of fire in terms of SMG's and is very powerful. The "Captain" on D-Day carries one (one of many homages in the game to Saving Private Ryan), as do several allied U.S. Soldiers in Level 1 of Storm in the Port (Mission 2). Strangely, it holds 20 rounds despite being modeled with a 30 round magazine. The Thompson featured on the game's coverart appears to be a M1928A1 variant; Frontline seems to be the first of a long line of many WWII shooters that used this coverart trope.
Behind the Scenes
The featurette for The Hornet's Nest (Mission 6) shows the game's animators in a gym acting out in-game scenarios to better understand natural movement. One animator is seen with a Thompson M1A1.
MP40
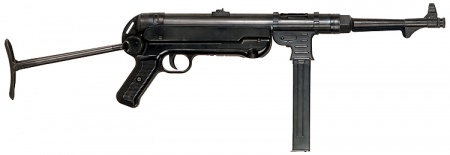
The MP40 is used by enemies throughout the game, but is slowly replaced by the Sturmgewehr 44 as the levels progress. It is used in A Storm in the Port (Mission 2), Several Bridges Too Far (Mission 5) and Level 1 of Rolling Thunder (Mission 6). It has a high rate of fire, much higher than the actual MP40, but low damage rate. When used by enemies, the rate of fire is much higher, but they tend to fire it in short bursts. It is incorrectly shown firing with a closed bolt.
Behind the Scenes
During the weapons montage in the Storm in the Port featurette, the MP40 is featured prominently.
Sten Mk II
The Sten Mk II appears in Level 3 of Several Bridges Too Far (Mission 4) in the hands of British paratrooper allies, particularly the squad leader - Master Sgt. Kelso. Like the Lee-Enfield, the Sten is exclusive to the British paratrooper allies and not available for player use. Although armed with the Mk II, the British paras would have likely been armed with the Sten Mk V Paratrooper variant. It uses the same sound effect of the Sturmgewehr 44.
Shotguns
Winchester Model 1897 "Trench Gun"
The militarized version of the Winchester Model 1897 "Trench Gun" shotgun appears in Needle in the Haystack (Mission 3) and Several Bridges Too Far (Mission 4). In Level 2 of Several Bridges Too Far (Mission 4), an elderly Dutch Resistance member is briefly seen armed with a Trench Gun, before being quickly taken down by an enemy sniper. It has a very short range but will usually kill enemies with one shot. For some reason, the weapon holds eight shells, despite the real weapon carrying five plus one in the chamber. Its ammo feeds from the "Shotgun Ammunition" pool.
Machine Guns
Browning Automatic Rifle
The Browning Automatic Rifle or BAR makes its first appearance in Level 2 of D-Day (Mission 1) in the hands of a US Army ally, but cannot be used. When in the hands of allies, the bipod is unfolded. But, when used by Patterson, the bipod is folded up and cannot be used. It can first be used in Level 3 of Several Bridges Too Far (Mission 3) and is later obtained in The Hornet's Nest (Mission 6). Unlike the real BAR, the in-game version's charging handle is cylindrical, more like that of a Browning M1919, and cycles back and forth when fired. Although somewhat inaccurate at long range and having a slow rate of fire, it is the most powerful automatic weapon in the game. It holds 20 rounds.
Behind the Scenes
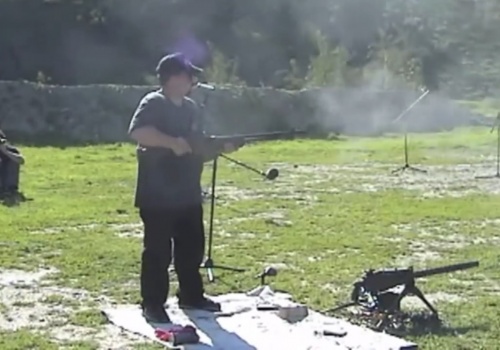
In the Storm in the Port (Mission 2) featurette, a BAR is seen being fired for sound effects.
Browning M1919
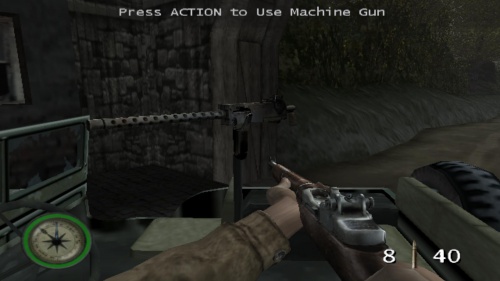
In Level 1 of A Storm in the Port (Mission 2), a Browning M1919 can be used, mounted on a wrecked US Army jeep after being strafed by a German Me-109. It incorrectly ejects spent shells from the side, has unlimited ammo, and the same rate of fire of the MG42 in the game.
Behind the Scenes
In the Storm in the Port (Mission 2) featurette, a photo of a mounted Browning M1919 is shown on a firing range for recording sound effects.
MG42
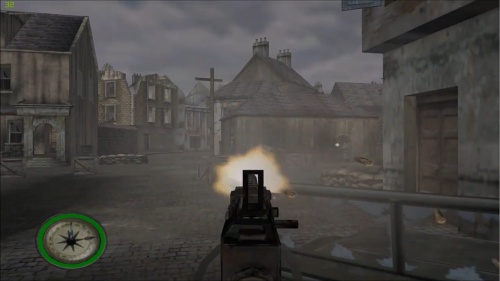
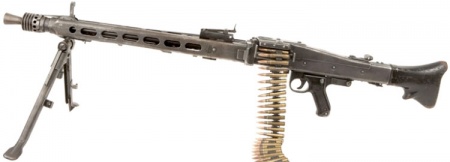
The MG42 appears frequently in the game mounted in several positions, most notably in enemy bunkers on D-Day (Mission 1). Just like the M1919 machine gun, it incorrectly ejects spect shells from the side. In traditional Medal of Honor fashion, manning one will trigger a swarm of enemies to come forth to attack, though you again have the benefit of unlimited ammo with which to counter the threat. The MG42 is also erroneously shown being capable of destroying enemy Panzer III tanks. Its rate of fire is also much lower than the real-life MG42.

Rocket Launchers
M9A1 "Bazooka"
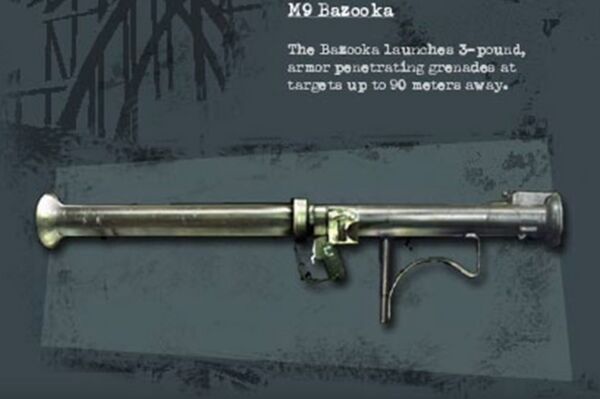
The M9A1 "Bazooka" appears in The Hornet's Nest (Mission 6). Upon finding it leaning against a wall, it uses the Panzerschreck skin. Contrary to the real-life version, it can be effectively operated by a single person, which at best would be highly impractical in a combat situation. It also takes little time to reload, and is aimed through an optic sight. It is more used as an anti-personnel weapon than its original anti-tank role.
Panzerschreck RPzB 54
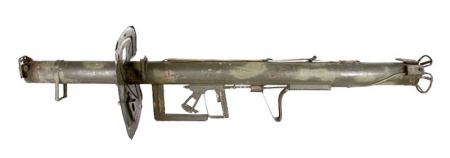
The Panzerschreck RPzB 54 appears in the game as the German counterpart to the American M9A1 Bazooka. It is first seen in Level 2 of Needle in a Haystack (Mission 3), in the hands of a frantic enemy who blows up the truck where Fox and Patterson are, killing Fox instantly. It later comes back in Level 3 of Needle in a Haystack, Several Bridges Too Far (Mission 4) and Rolling Thunder (Mission 5). In the hands of enemies, it is the 43 model without a blast shield (despite enemies never wearing the protective mask or gloves required to use the 43), but suddenly has the blast shield of the 54 model once used by Patterson. Enemies are quite slow to using them, but can be pretty effective once firing. The blast shield obscures the view, making it difficult to aim. It takes a long time to reload and uses 'Panzerschreck Rocket' ammo.
Grenades
Mk 2 Hand Grenade
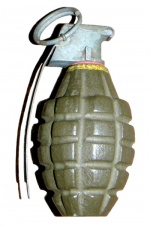
The Mk 2 hand grenade frequently appears in the game. They are used in Level 1 of A Storm in the Port (Mission 2), Needle in the Haystack (Mission 3), and Several Bridges Too Far (Mission 4). Like the other allied weapons, it is generally available where U.S. Army forces are present. Like previous Medal of Honor games, the grenades explode on impact when hitting enemy troops. If a grenade does not strike an enemy, they are likely to either throw it back or run away. Grenade bundles are frequently encountered through out levels, sometimes in bags and sometimes in crates. On the PlayStation 2 console, the animated save icon for this game's progress files is a 3D model of a Mk 2 hand grenade.
Model 16/Model 24 Stielhandgranate
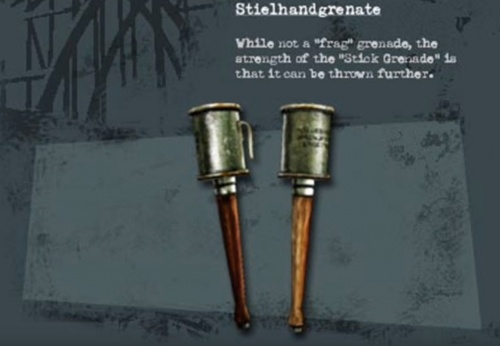
The German grenades, while in Patterson's hands, is modeled after the outdated Model 16 Stielhandgranate with the belt hook. But once thrown, it turns into the Model 24 Stielhandgranate. In enemy hands or seen in crates, it is the Model 24. Regardless, they are obtainable and enemies will use them more frequently as the game progresses. They appear in Level 3 of A Storm in the Port (Mission 2), Rolling Thunder (Mission 5), and The Hornet's Nest (Mission 6). They share all characteristics with the Mk 2 grenades, including exploding on impact with enemies. They are obtainable and enemies will use them more frequently as the game progresses. They appear in Level 3 of A Storm in the Port (Mission 2), Rolling Thunder (Mission 5), and The Hornet's Nest (Mission 6). They share all characteristics with the Mk 2 grenades, including exploding on impact with enemies.
M18 Smoke Grenade
In Level 1 of D-Day (Mission 1), it is required to mark German bunkers for the Allied Fleet in the channel to destroy. This is done by placing a M18 smoke grenade in the "gun deck" of the bunker. Once placed, time is short to escape before the fleet nails the bunker.
Extras
Thompson M1928A1
The game's cover art features a US Soldier charging through the surf on Omaha Beach, brandishing a Thompson M1928A1 loaded with a 20 round magazine.
Oerlikon 20mm Cannon
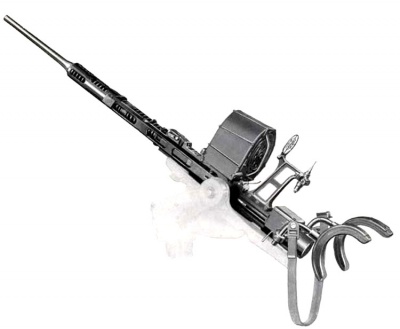
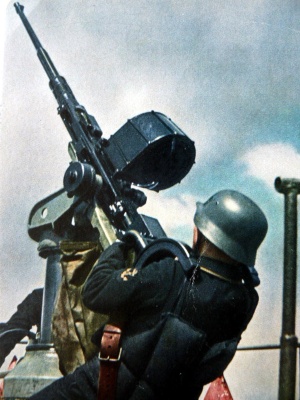
The German version of the Oerlikon 20mm Cannon, the 2cm FlaK 29, is seen being used by a Luftwaffe Flak Crewman depicted on the loading screen for Level 1 of The Hornets Nest (Mission 6). This image was taken from a real-life photograph of a Kriegsmarine sailor manning a Flak 29 aboard a ship (seen in the image below). The Flak 29 was mainly designed for the Kriegsmarine. Therefore, it would not likely be found near a Luftwaffe air strip.
QF 6-pounder Hotchkiss
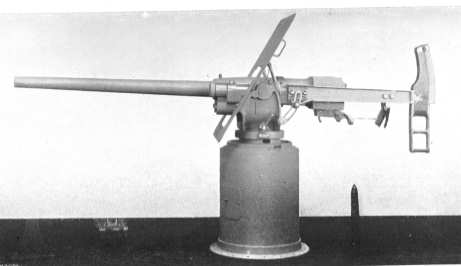
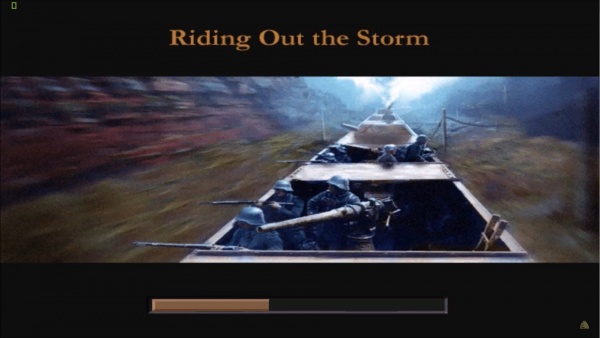
The loading screen for Level 2 of Rolling Thunder (Mission 5) shows a French Hotchkiss naval gun mounted on a German Panzerzug, a very unlikely place for such a captured armament.
Demolition Charges
Like the previous games, it is required to obtain and use demolition charges to sabotage specific targets. And again, just like in the first game, targets marked for sabotage are identified by pulsating red boxes. Although a step-up from the gigantic clock design, the demolition charges still do not resemble any real-life demolition system used during WWII and remain red dynamite sticks wired to a small timer. Enemies are also seen using the same type of demolitions in Level 1 of Several Bridges Too Far (Mission 4), strapping them to the supports of Nijmegen Bridge.
Karabiner 98AZ
In Level 3 of Mission 2 (A Storm in the Port), a case meant to contain a Springfield M1903 appears to have a broken-down Karabiner 98AZ. Why this model was used instead of Springfield is a mystery.
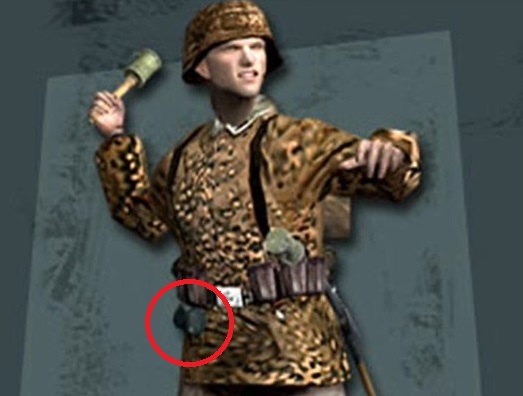
Model 39 Eihandgranate
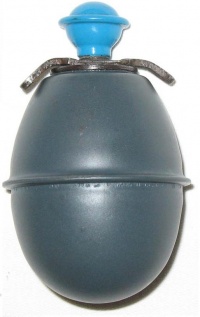
The SS Panzergrenadier enemies have the Model 39 Eihandgranate hanging from their webbing, although they are not in use in the game.
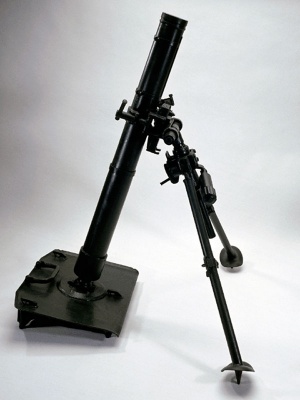
Granatwerfer 34 Mortar
In Level 1 of Needle in the Haystack (Mission 3), two German Granatwerfer 34 Mortars are encountered. They fire numerous rounds and can inflict serious damage. They are exclusive to the Germans and cannot be used by Patterson.
The final objective in Level 4 of A Storm in the Port (Mission 2) is to destroy a fuel depot within the port. To achieve this, Patterson must commandeer a 8.8 cm SK C/30 naval gun fastened to a U-Boat resting in the pen. The weapon itself lacks a lot of detail and is much smaller than its real-life counterpart, but it is extremely powerful and can eliminate numerous enemies at once.
2 cm Flakvierling 38
The Flakvierling 38 is seen throughout the game, although it can never be used. It is first seen atop the bluff of Omaha Beach in Mission 1 (D-Day), despite the fact no Flakvierling 38s were on the real Omaha Beach. It becomes a target for destruction in Level 1 of Several Bridges Too Far (Mission 4), and can later be seen in an A-Wagen of a Panzerzug BP42 (Armored Train) in Level 2 of Rolling Thunder (Mission 5).
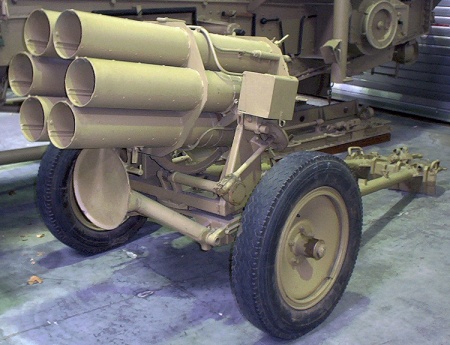
15 cm Nebelwerfer 41
The 15 cm Nebelwerfer 41 rocket launcher appears only once in the game. In Mission 1 of Needle in the Haystack (Mission 3), it is required to use a Nebelwerfer to destroy a Panzer IV tank across a river. Cpl. Barnes advises "We can't get that tank from here. Try taking it out with that rocket launcher." Once triggered, it rapid fires all six rockets and destroys the tank.
MG 34 Panzerlauf
In several levels, particularly Level 1 of Needle in the Haystack (Mission 3), enemy Panzer IV tanks use the MG 34 Panzerlauf as their secondary weapon. Their rate of fire is much higher than the actual MG 34, and their sound effect appears to be that of the MP 40.
Browning M2 Aircraft
The US P-51 fighters are briefly seen using their fixed Browning M2 Aircraft guns against the Schnabelstande emplacements on Omaha Beach.
MG17
In the presence of the Junkers, it always uses its MG17 machine gun, which was used in both the Junkers Ju 87 and Messerschmitt Bf 109.
Cut Weapons
A few weapons appear in beta images and Behind the Scenes featurettes that did not make the final release.
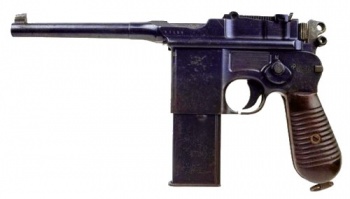
Mauser M712 Schnellfeuer
A screenshot of the game's beta version shows a Kriegsmarine Enemy brandishing a Mauser M712 Schnellfeuer, identified by its extended magazine. It was planned to be in game, and possibly used, but did not make the final version of the game.
FP-45 Liberator
An image displaying untextured weapons in the Storm in the Port (Mission 2) featurette shows a FP-45 Liberator. It is possible the Liberator was meant to be used in the covert levels of the game but was dropped once the developers realized how unreliable it would be.
Tellermine 42
In the same image of untextured weapons, a Tellermine 42 is seen in the bottom right. It never appears in the game so, like the FP-45, it is assumed that it was cut.
