| If you have been locked out of your account you can request a password reset here. |
Difference between revisions of "Fifty Dead Men Walking"
(bulk of it.) |
|||
| Line 11: | Line 11: | ||
==Beretta 92FS Inox== | ==Beretta 92FS Inox== | ||
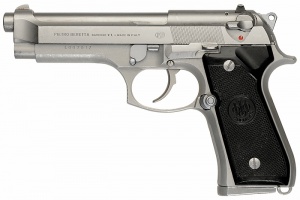
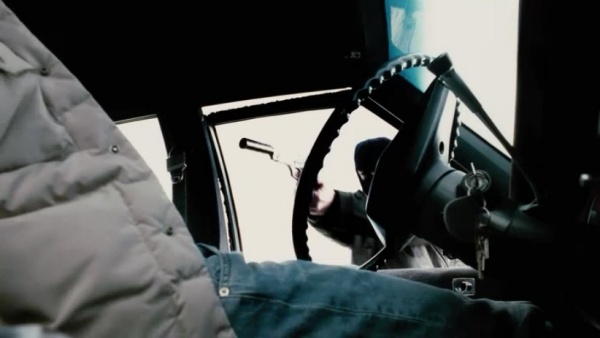
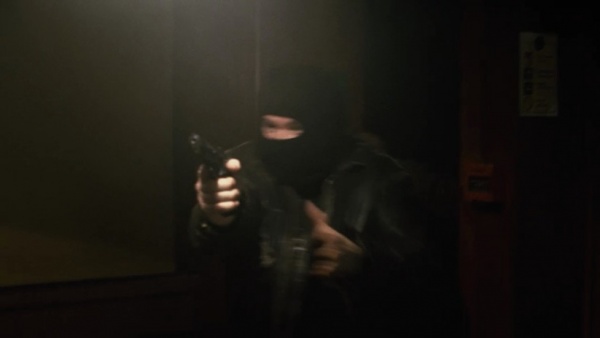
A suppressed [[Beretta_92_pistol_series#Beretta_92FS_Inox|Beretta 92FS Inox]] is used on the assassination attempt on Martin at the start of the film. | A suppressed [[Beretta_92_pistol_series#Beretta_92FS_Inox|Beretta 92FS Inox]] is used on the assassination attempt on Martin at the start of the film. | ||
| − | [[Image:Beretta-Inox.jpg|thumb|none| | + | [[Image:Beretta-Inox.jpg|thumb|none|300px|Beretta 92FS INOX - 9x19mm. ]] |
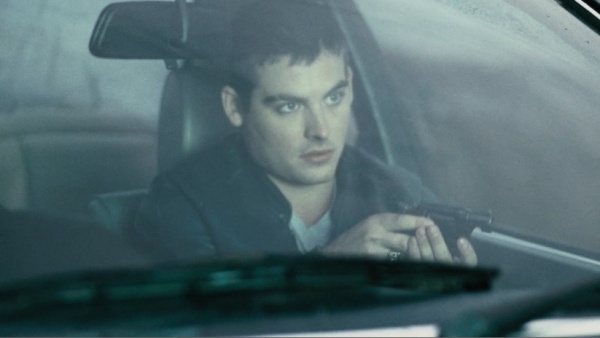
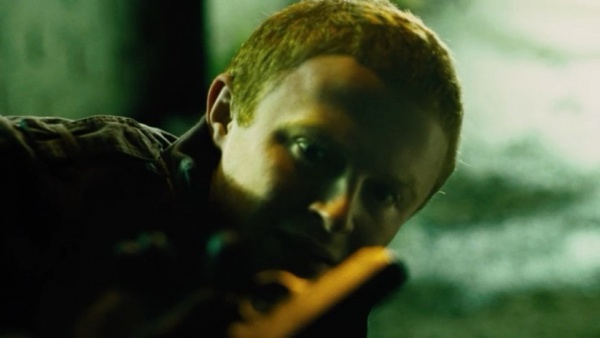
[[Image:FDMWM92.JPG|thumb|none|600px|The IRA Hitman pointing his 92SB-C at Martin.]] | [[Image:FDMWM92.JPG|thumb|none|600px|The IRA Hitman pointing his 92SB-C at Martin.]] | ||
==Smith & Wesson Model 10== | ==Smith & Wesson Model 10== | ||
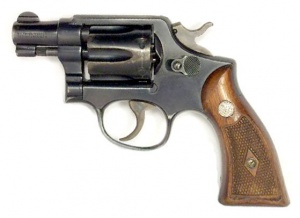
A snub-nosed [[Smith & Wesson Model 10]] is first seen when Sean ([[Kevin Zegers]]) pulls one out of his jacket when stopped by an RUC/British Army checkpoint. It is also seen in the hands of an RUC officer who arrests Bobby Quinn. | A snub-nosed [[Smith & Wesson Model 10]] is first seen when Sean ([[Kevin Zegers]]) pulls one out of his jacket when stopped by an RUC/British Army checkpoint. It is also seen in the hands of an RUC officer who arrests Bobby Quinn. | ||
| − | [[Image:S&WModel10SnubEarly.jpg|none|thumb| | + | [[Image:S&WModel10SnubEarly.jpg|none|thumb|300px|Smith & Wesson Model 10 snub nose revolver - .38 Special. Early Model]] |
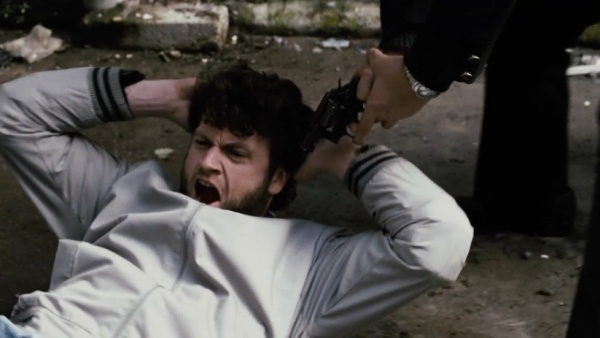
[[Image:FDMW_SW10_01.jpg|none|thumb|600px|An RUC officer sticks his snub nosed S&W 10 in Bobby Quinn's face when they apprehend him.]] | [[Image:FDMW_SW10_01.jpg|none|thumb|600px|An RUC officer sticks his snub nosed S&W 10 in Bobby Quinn's face when they apprehend him.]] | ||
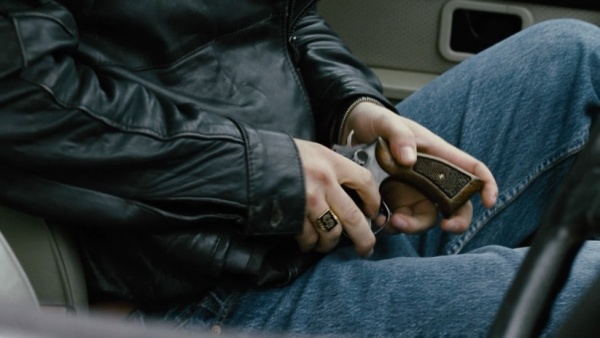
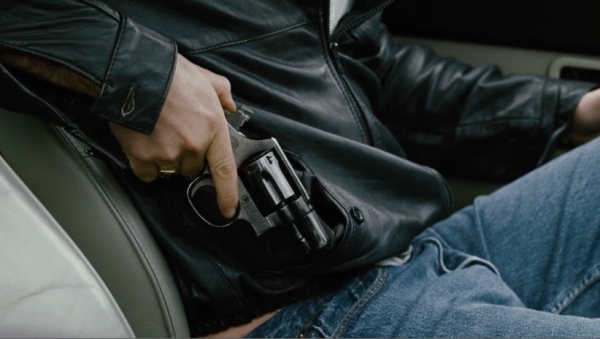
[[Image:FDMW_SW10_02.jpg|none|thumb|600px|Sean readies his snub-nosed Smith & Wesson Model 10]] | [[Image:FDMW_SW10_02.jpg|none|thumb|600px|Sean readies his snub-nosed Smith & Wesson Model 10]] | ||
| Line 24: | Line 24: | ||
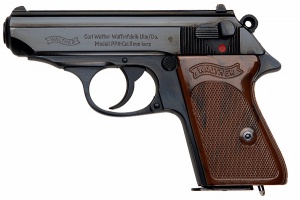
==Walther PPK== | ==Walther PPK== | ||
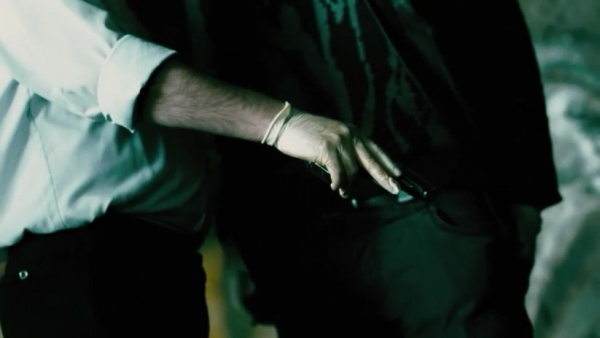
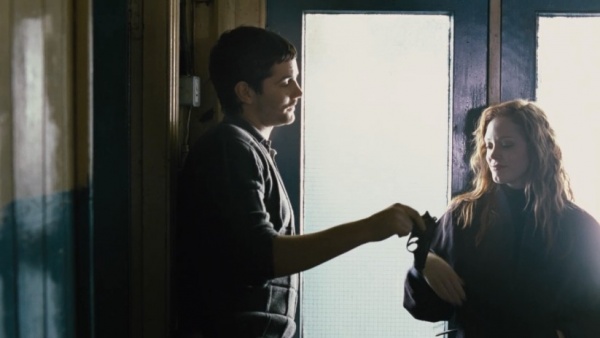
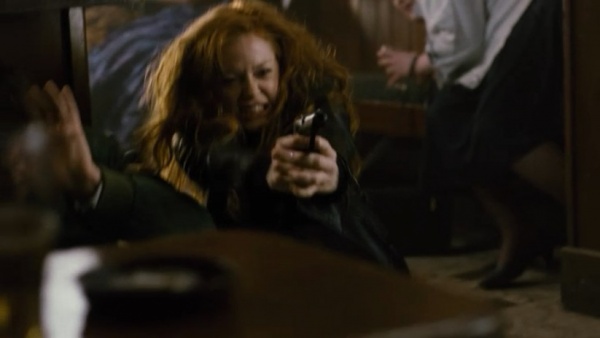
Donovan ([[David Pearse]]) gives Martin ([[Jim Sturgess]]) a [[Walther PPK]] to execute the tout (informer.) Martin later tucks it into his own pants. He later gives a deactivated PPK to Grace ([[Rose McGowan]]). Ray ([[William Houston]]) uses one to kneecap Frankie. | Donovan ([[David Pearse]]) gives Martin ([[Jim Sturgess]]) a [[Walther PPK]] to execute the tout (informer.) Martin later tucks it into his own pants. He later gives a deactivated PPK to Grace ([[Rose McGowan]]). Ray ([[William Houston]]) uses one to kneecap Frankie. | ||
| − | [[Image:WaltherPPK.jpg|none|thumb| | + | [[Image:WaltherPPK.jpg|none|thumb|300px|Walther PPK - 9mm Kurz aka .380 ACP]] |
[[Image:FDMW_Mak_01.jpg|none|thumb|600px|Ray shows the PPK to Frankie.]] | [[Image:FDMW_Mak_01.jpg|none|thumb|600px|Ray shows the PPK to Frankie.]] | ||
[[Image:FDMW_PPK_01.jpg|none|thumb|600px|Donovan hands the PPK to Martin.]] | [[Image:FDMW_PPK_01.jpg|none|thumb|600px|Donovan hands the PPK to Martin.]] | ||
| Line 32: | Line 32: | ||
==Luger P08== | ==Luger P08== | ||
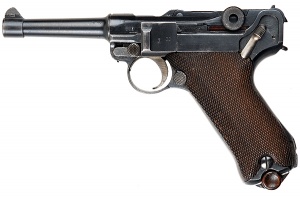
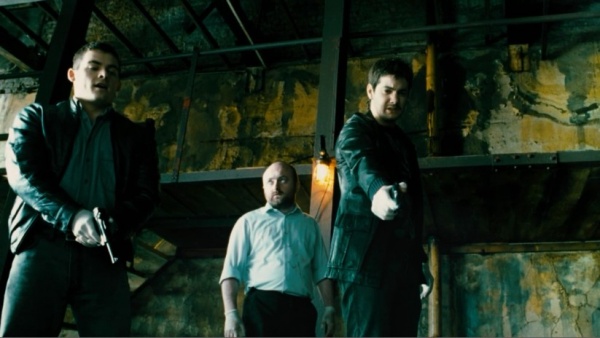
A [[Luger P08]] is used by Sean ([[Kevin Zegers]]) to kill the tout after Martin hesitates. He sticks it back into his pants once he's done. | A [[Luger P08]] is used by Sean ([[Kevin Zegers]]) to kill the tout after Martin hesitates. He sticks it back into his pants once he's done. | ||
| − | [[Image:P08Luger1917.jpg|none|thumb| | + | [[Image:P08Luger1917.jpg|none|thumb|300px|Luger P08 - 9x19mm.]] |
[[Image:P08Sean.JPG|none|thumb|600px|Sean (left) with his Luger P08.]] | [[Image:P08Sean.JPG|none|thumb|600px|Sean (left) with his Luger P08.]] | ||
==Makarov PM== | ==Makarov PM== | ||
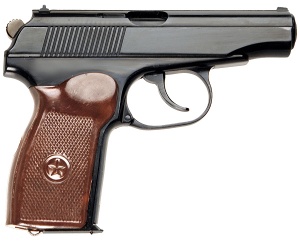
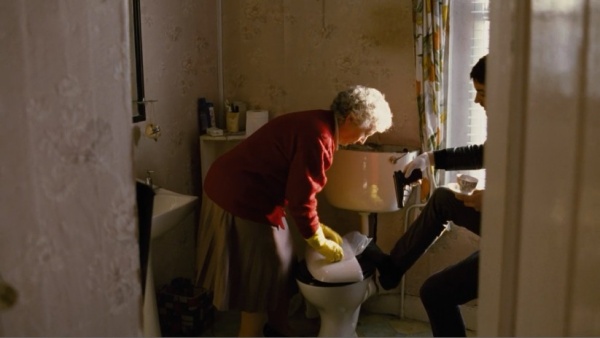
Martin is seen handing a [[Makarov PM]] to an elderly woman to hide in her toilet tank in a montage. | Martin is seen handing a [[Makarov PM]] to an elderly woman to hide in her toilet tank in a montage. | ||
| − | [[Image:MakarovPM.jpg|none|thumb| | + | [[Image:MakarovPM.jpg|none|thumb|300px|Russian Makarov PM - 9x18mm Makarov]] |
| − | |||
[[Image:FDMW_Mak_02.jpg|none|thumb|600px|Martin hands over his Makarov.]] | [[Image:FDMW_Mak_02.jpg|none|thumb|600px|Martin hands over his Makarov.]] | ||
==Beretta 92F/FS== | ==Beretta 92F/FS== | ||
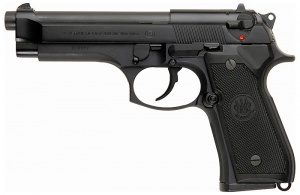
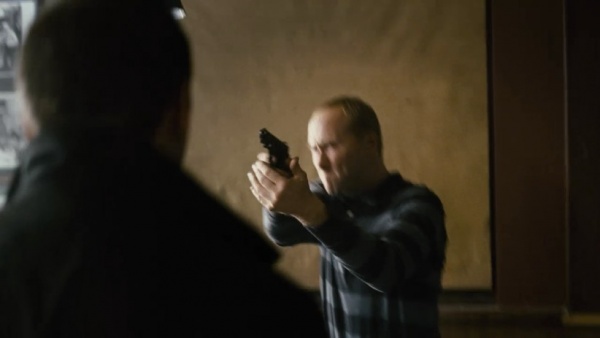
British agents use [[Beretta_92_pistol_series#Beretta_92F.2FFS|Beretta 92F/FS]] pistols during the pub ambush. | British agents use [[Beretta_92_pistol_series#Beretta_92F.2FFS|Beretta 92F/FS]] pistols during the pub ambush. | ||
| − | [[Image:BerettaM92FS.jpg|none|thumb| | + | [[Image:BerettaM92FS.jpg|none|thumb|300px|Beretta 92FS - 9x19mm]] |
[[Image:FDMW_B92_01.jpg|none|thumb|600px|]] | [[Image:FDMW_B92_01.jpg|none|thumb|600px|]] | ||
[[Image:FDMW_B92_02.jpg|none|thumb|600px|]] | [[Image:FDMW_B92_02.jpg|none|thumb|600px|]] | ||
| Line 49: | Line 48: | ||
==M1911-type== | ==M1911-type== | ||
Donovan fires upon Martin's ambulance with an [[M1911 pistol series|M1911-type pistol]]. It's not seen clearly enough to identify it beyond that. | Donovan fires upon Martin's ambulance with an [[M1911 pistol series|M1911-type pistol]]. It's not seen clearly enough to identify it beyond that. | ||
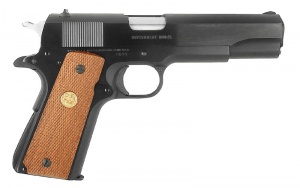
| − | [[Image:ColtGovernmentModel.jpg|none|thumb| | + | [[Image:ColtGovernmentModel.jpg|none|thumb|300px|Colt Government Model M1911A1 - .45 ACP]] |
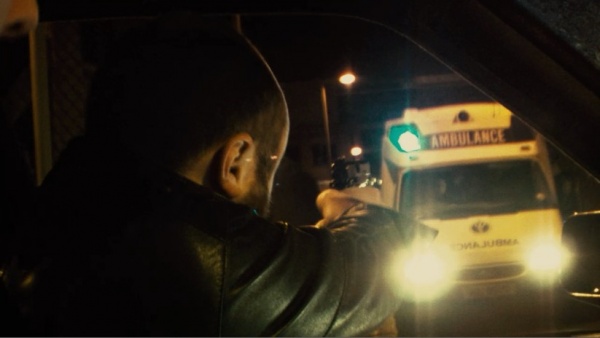
[[Image:FDMW_M1911_01.jpg|none|thumb|600px|Donovan fires on the ambulance. This pistol appears to have an ambidextrous safety.]] | [[Image:FDMW_M1911_01.jpg|none|thumb|600px|Donovan fires on the ambulance. This pistol appears to have an ambidextrous safety.]] | ||
| Line 56: | Line 55: | ||
==Ingram MAC-10== | ==Ingram MAC-10== | ||
The Libyan arms dealers in Scotland are armed with [[MAC-10]]s. | The Libyan arms dealers in Scotland are armed with [[MAC-10]]s. | ||
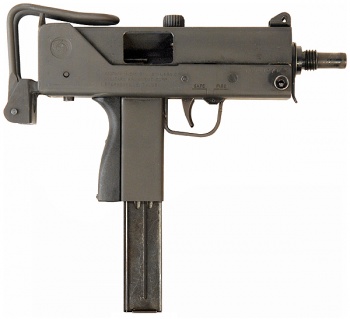
| − | [[Image:IngramMAC10.jpg|none|thumb| | + | [[Image:IngramMAC10.jpg|none|thumb|350px|Ingram MAC-10 open bolt submachine gun - .45 ACP]] |
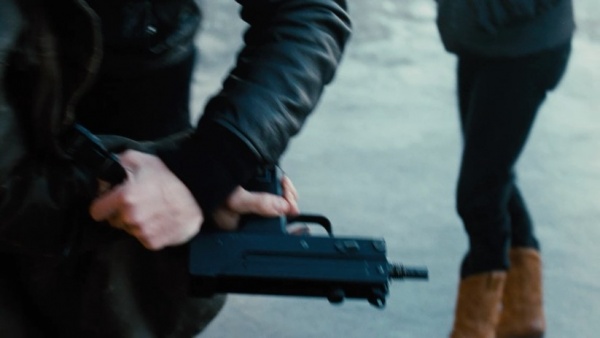
[[Image:FDMWMAC.JPG|none|thumb|600px|Martin and Sean scuffle with the Libyans before Grace calms them down.]] | [[Image:FDMWMAC.JPG|none|thumb|600px|Martin and Sean scuffle with the Libyans before Grace calms them down.]] | ||
| Line 69: | Line 68: | ||
==L85A1== | ==L85A1== | ||
The [[L85A1]] rifle is seen multiple times throughout the film in the hands of British soldiers. | The [[L85A1]] rifle is seen multiple times throughout the film in the hands of British soldiers. | ||
| − | [[Image:L85A1.jpg|none|thumb| | + | [[Image:L85A1.jpg|none|thumb|400px|L85A1 with SUSAT scope - 5.56x45mm NATO]] |
[[Image:FDMW_L85_01.jpg|none|thumb|600px|Sean and Martin try to BS their way through a checkpoint.]] | [[Image:FDMW_L85_01.jpg|none|thumb|600px|Sean and Martin try to BS their way through a checkpoint.]] | ||
[[Image:SA80FDMW.JPG|none|thumb|600px|A British soldier aims his SA80 at Martin.]] | [[Image:SA80FDMW.JPG|none|thumb|600px|A British soldier aims his SA80 at Martin.]] | ||
| Line 79: | Line 78: | ||
[[Image:M16A1wA2Handguards.jpg|none|thumb|400px|M16A1 with A2 style handguards - 5.56x45mm. Putting the distinctive A2 handguards on the older rifle was a method used by Movie/TV armorers to simulate A2 rifles when M16A1s were the only ones available. The same thing has been done vice-versa, Using M16A2's with A1 handguards for Vietnam War B Movies.]] | [[Image:M16A1wA2Handguards.jpg|none|thumb|400px|M16A1 with A2 style handguards - 5.56x45mm. Putting the distinctive A2 handguards on the older rifle was a method used by Movie/TV armorers to simulate A2 rifles when M16A1s were the only ones available. The same thing has been done vice-versa, Using M16A2's with A1 handguards for Vietnam War B Movies.]] | ||
[[Image:M16A2FDMW.JPG|none|thumb|600px|Sean with the AR-15.]] | [[Image:M16A2FDMW.JPG|none|thumb|600px|Sean with the AR-15.]] | ||
| + | |||
| + | =Other= | ||
| + | ==Schermuly Multi-Purpose Gun== | ||
| + | British troops are seen containing the riot with [[Schermuly Multi-Purpose Gun]]s launching rubber bullets. | ||
| + | [[Image:WebleySchermuly37mm.jpg|none|thumb|400px|Schermuly Multi-Purpose Gun - 37mm]] | ||
| + | [[Image:FDMW_launcher_01.jpg|none|thumb|600px|]] | ||
| + | [[Image:FDMW_launcher_02.jpg|none|thumb|600px|]] | ||
| + | |||
| + | ==Flash Bang Grenade== | ||
| + | British agents toss a flash bang to start the pub ambush. | ||
| + | [[Image:FDMW_flash_01.jpg|none|thumb|600px|]] | ||
=News Footage= | =News Footage= | ||
| Line 88: | Line 98: | ||
==Sten Gun== | ==Sten Gun== | ||
A suppressed [[Sten]] gun is seen on the news report about the weapons bust. | A suppressed [[Sten]] gun is seen on the news report about the weapons bust. | ||
| − | [[Image:StenMKIISilenced.jpg|none|thumb| | + | [[Image:StenMKIISilenced.jpg|none|thumb|350px|Sten Mk II fitted with suppressor - 9x19mm]] |
[[Image:STENMK2FDMW.JPG|none|thumb|600px|A Sten in the middle. This one appears to have a nice after-market stock.]] | [[Image:STENMK2FDMW.JPG|none|thumb|600px|A Sten in the middle. This one appears to have a nice after-market stock.]] | ||
| Line 100: | Line 110: | ||
[[Image:H%26R_Topper_Shotgun.jpg|none|thumb|400px|Harrington & Richardson Topper Shotgun - 12 gauge. This is a common single barreled breach loading top break shotgun.]] | [[Image:H%26R_Topper_Shotgun.jpg|none|thumb|400px|Harrington & Richardson Topper Shotgun - 12 gauge. This is a common single barreled breach loading top break shotgun.]] | ||
[[Image:STENMK2FDMW.JPG|none|thumb|600px|A Single Shot Shotgun on the right.]] | [[Image:STENMK2FDMW.JPG|none|thumb|600px|A Single Shot Shotgun on the right.]] | ||
| + | |||
| + | ==Avenger Submachine Gun== | ||
| + | An Avenger Submachine gun is seen in the news footage. The Avenger was designed and built by Loyalists near Belfast during the nineties. The barrel was unrifled and threaded to take suppressors. It was fed with Sten magazines. | ||
| + | [[Image:FDMW_subgun_01.jpg|thumb|none|600px|]] | ||
==L7 Machine Gun== | ==L7 Machine Gun== | ||
Revision as of 22:19, 28 January 2012
Work In Progress This article is still under construction. It may contain factual errors. See Talk:Fifty Dead Men Walking for current discussions. Content is subject to change. |
The following weapons are used in Fifty Dead Men Walking
Handguns
Beretta 92FS Inox
A suppressed Beretta 92FS Inox is used on the assassination attempt on Martin at the start of the film.
Smith & Wesson Model 10
A snub-nosed Smith & Wesson Model 10 is first seen when Sean (Kevin Zegers) pulls one out of his jacket when stopped by an RUC/British Army checkpoint. It is also seen in the hands of an RUC officer who arrests Bobby Quinn.
Walther PPK
Donovan (David Pearse) gives Martin (Jim Sturgess) a Walther PPK to execute the tout (informer.) Martin later tucks it into his own pants. He later gives a deactivated PPK to Grace (Rose McGowan). Ray (William Houston) uses one to kneecap Frankie.
Luger P08
A Luger P08 is used by Sean (Kevin Zegers) to kill the tout after Martin hesitates. He sticks it back into his pants once he's done.
Makarov PM
Martin is seen handing a Makarov PM to an elderly woman to hide in her toilet tank in a montage.
Beretta 92F/FS
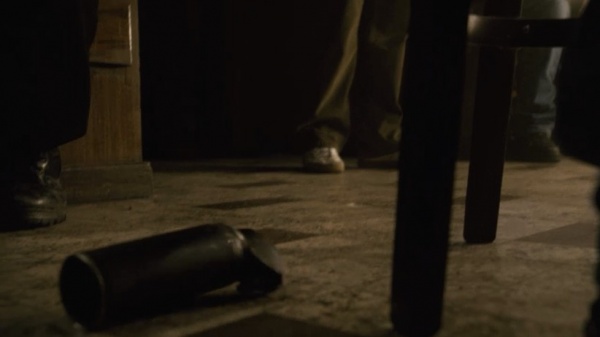
British agents use Beretta 92F/FS pistols during the pub ambush.
M1911-type
Donovan fires upon Martin's ambulance with an M1911-type pistol. It's not seen clearly enough to identify it beyond that.
Submachine Guns
Ingram MAC-10
The Libyan arms dealers in Scotland are armed with MAC-10s.
Rifles
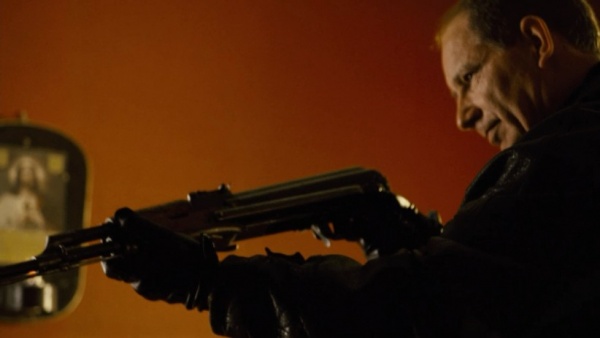
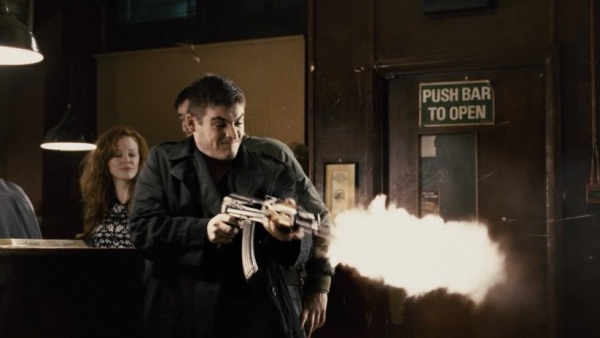
Norinco Type 56-1
A Norinco Type 56-1 is seen near the start of the film, when Mickey (Tom Collins) takes one out of a duffel bag and inspects it. He along with Ray is later seen putting it into a bin bag when Martin abruptly walks into his back garden. Finally, it is seen when Martin imagines Sean riddling the pub with one.
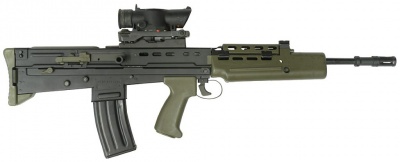
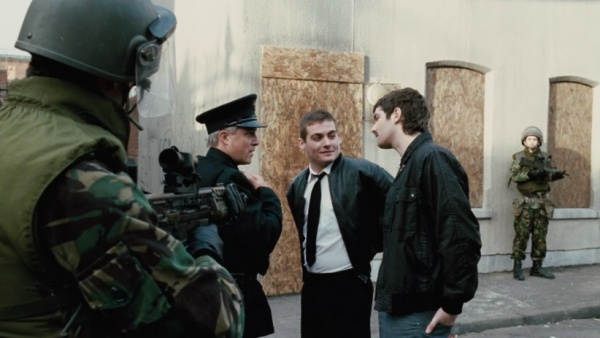
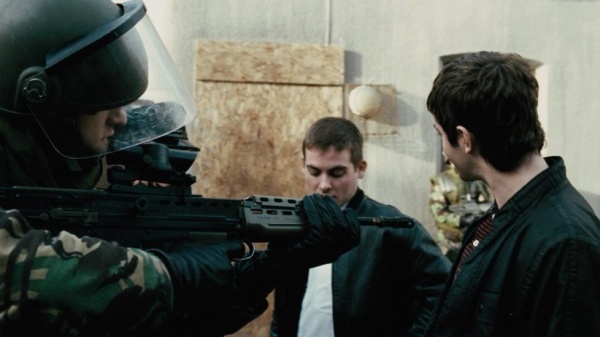
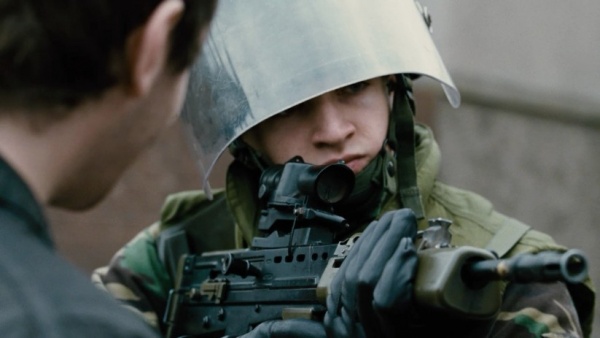
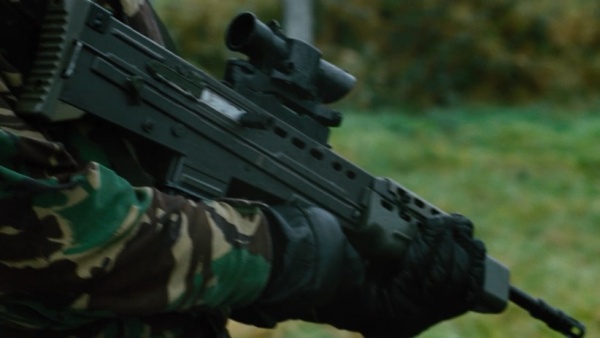
L85A1
The L85A1 rifle is seen multiple times throughout the film in the hands of British soldiers.
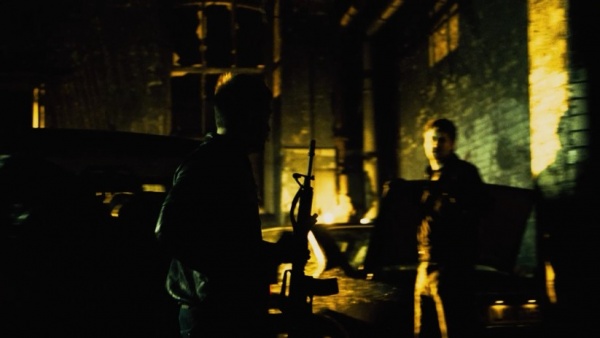
AR-15-type
Sean loads an AR-15-type rifle into Martin's boot. The only obvious details are the bayonet lug and the A2-style handguards.

Other
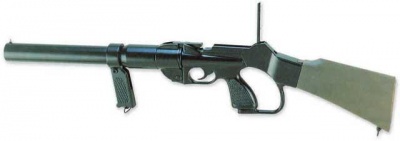
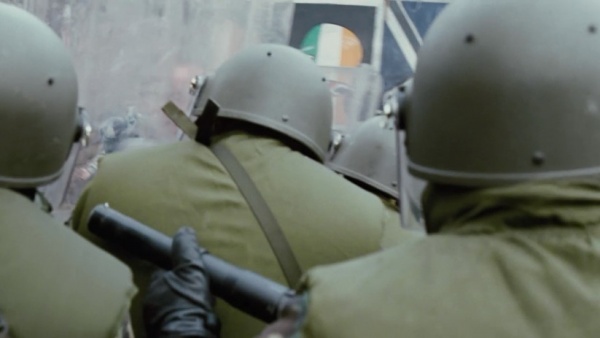
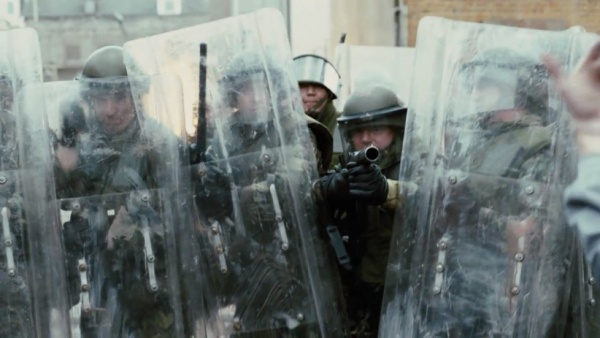
Schermuly Multi-Purpose Gun
British troops are seen containing the riot with Schermuly Multi-Purpose Guns launching rubber bullets.
Flash Bang Grenade
British agents toss a flash bang to start the pub ambush.
News Footage
L1A1 SLR
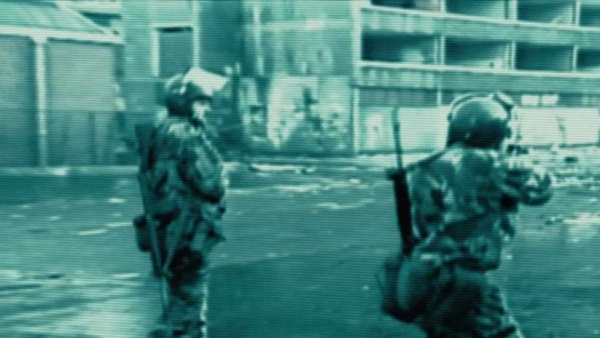
A L1A1 SLR is seen briefly on the back of a British soldier at the beginning prologue showing real-life footage of the Troubles.
Sten Gun
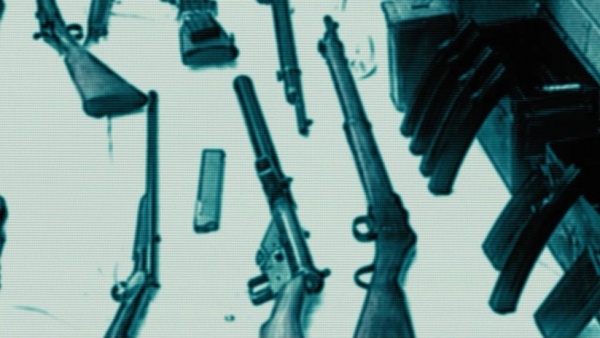
A suppressed Sten gun is seen on the news report about the weapons bust.
Martini-Henry Rifle
A Martini-Henry Rifle is seen in the same shot.
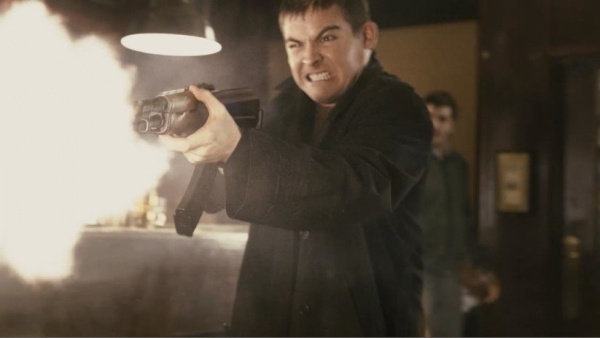
Single Shot Shotgun
A Single Shot Shotgun is seen in the same shot.
Avenger Submachine Gun
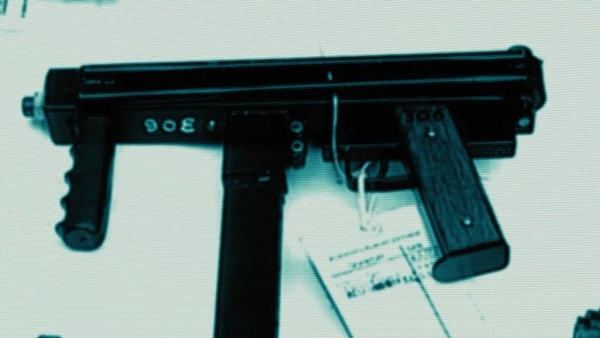
An Avenger Submachine gun is seen in the news footage. The Avenger was designed and built by Loyalists near Belfast during the nineties. The barrel was unrifled and threaded to take suppressors. It was fed with Sten magazines.
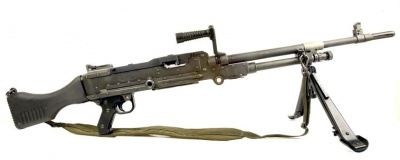
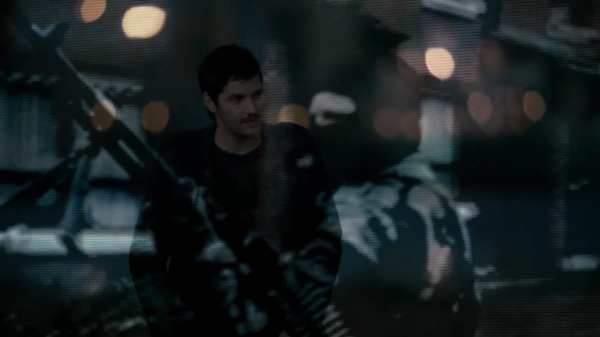
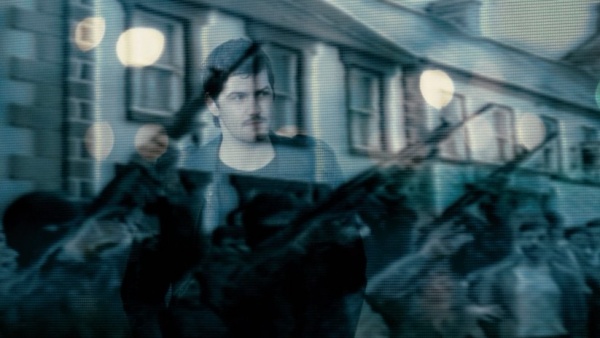
L7 Machine Gun
A L7 Machine Gun is seen during a montage of The Troubles.
Heckler & Koch G3
A Heckler & Koch G3 is seen during a montage of The Troubles.

