| If you have been locked out of your account you can request a password reset here. |
Difference between revisions of "A Reason to Live, A Reason to Die"
Doctor Luika (talk | contribs) (Created page with "{{Infobox Movie |name = ''A Reason to Live, A Reason to Die'' |picture = A_Reason_to_Live,_A_Reason_to_Die.jpg |caption = ''A Reason to Live, A Reason to Die (1972)'' |country...") |
PyramidHead (talk | contribs) |
||
| Line 9: | Line 9: | ||
|studio= Sancrosiap Terza Film<BR> Atlantida Films<BR> Corona | |studio= Sancrosiap Terza Film<BR> Atlantida Films<BR> Corona | ||
|distributor= Indipendenti Regionali | |distributor= Indipendenti Regionali | ||
| − | |character1=Colonel | + | |character1=Colonel Pembroke |
|actor1=[[James Coburn]] | |actor1=[[James Coburn]] | ||
|character2=Eli Sampson | |character2=Eli Sampson | ||
|actor2=[[Bud Spencer]] | |actor2=[[Bud Spencer]] | ||
| − | |character3= | + | |character3=Major Ward |
|actor3=[[Telly Savalas]] | |actor3=[[Telly Savalas]] | ||
| − | |character4=Sergeant | + | |character4=Sergeant Brent |
|actor4=[[Reinhard Kolldehoff]] | |actor4=[[Reinhard Kolldehoff]] | ||
|character5=Samuel "Piggot" Picket | |character5=Samuel "Piggot" Picket | ||
| Line 28: | Line 28: | ||
__TOC__<br clear="all"> | __TOC__<br clear="all"> | ||
| − | =Revolvers | + | =Revolvers= |
==Colt 1851 Navy (Cartridge Conversion)== | ==Colt 1851 Navy (Cartridge Conversion)== | ||
| − | The [[Colt_1851_Navy#Colt_1851_.28Cartridge_Conversion.29|Colt 1851 Navy ( | + | The [[Colt_1851_Navy#Colt_1851_.28Cartridge_Conversion.29|Colt 1851 Navy (cartridge conversion)]] is used by the film's main characters, such as Colonel Pembroke ([[James Coburn]]), Eli Sampson ([[Bud Spencer]]), and Major Ward [[Telly Savalas]]) and his aide (Fabrizio Moresco). It is also seen in the hands of other minor characters. |
[[File:Richards-navy-1851.jpg|thumb|none|350px|Colt 1851 Navy w/ cartridge conversion - .38 Long Colt/.38 S&W Special]] | [[File:Richards-navy-1851.jpg|thumb|none|350px|Colt 1851 Navy w/ cartridge conversion - .38 Long Colt/.38 S&W Special]] | ||
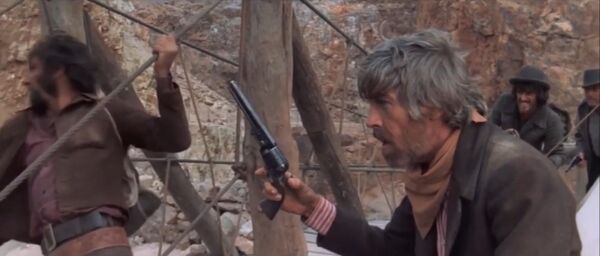
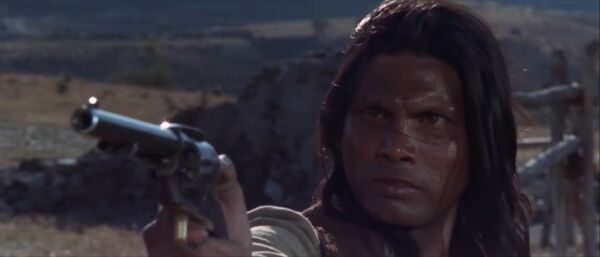
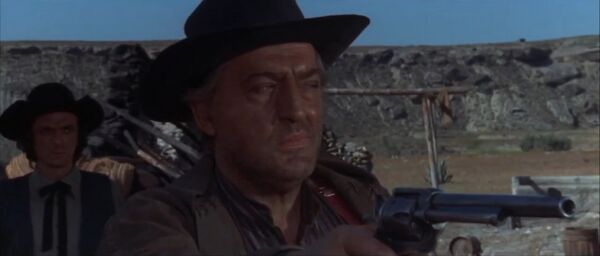
| − | [[File:A.R.L.A.R.D_Colt_1851_Navy-1.jpeg|thumb|none|600px| | + | [[File:A.R.L.A.R.D_Colt_1851_Navy-1.jpeg|thumb|none|600px|Brent, angry with Colonel Pembroke, points his Colt 1851 Navy (cartridge conversion) toward the latter. All because Pembroke wanted his team to be as sober as possible, which he didn't like.]] |
| − | [[File:A.R.L.A.R.D_Colt_1851_Navy-2.jpeg|thumb|none|600px|Sergeant Spike (George Géret) reveals to Eli Sampson that he knows he is a Union infiltrator and points his Colt 1851 Navy ( | + | [[File:A.R.L.A.R.D_Colt_1851_Navy-2.jpeg|thumb|none|600px|Sergeant Spike (George Géret) reveals to Eli Sampson that he knows he is a Union infiltrator and points his Colt 1851 Navy (cartridge conversion) at him before alerting his fellow Confederates.]] |
| − | [[File:A.R.L.A.R.D_Colt_1851_Navy-3.jpeg|thumb|none|600px|After Eli Sampson is captured by the Confederacy, Pembroke and his group infiltrate Fort Howie. Pembroke cocks his Colt 1851 Navy ( | + | [[File:A.R.L.A.R.D_Colt_1851_Navy-3.jpeg|thumb|none|600px|After Eli Sampson is captured by the Confederacy, Pembroke and his group infiltrate Fort Howie. Pembroke cocks his Colt 1851 Navy (cartridge conversion) before walking straight into the place.]] |
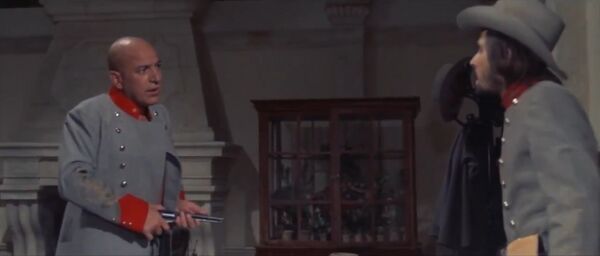
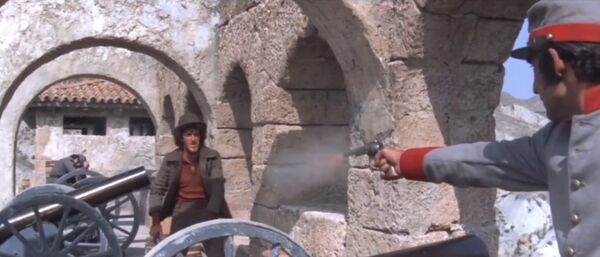
| − | [[File:A.R.L.A.R.D_Colt_1851_Navy-4.jpeg|thumb|none|600px|After interrogating Eli Sampson and locking him up for execution, Major | + | [[File:A.R.L.A.R.D_Colt_1851_Navy-4.jpeg|thumb|none|600px|After interrogating Eli Sampson and locking him up for execution, Major Ward arms himself with his Colt 1851 Navy (cartridge conversion) in front of his aide.]] |
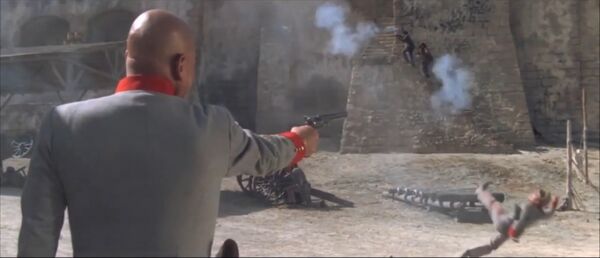
| − | [[File:A.R.L.A.R.D_Colt_1851_Navy-5.jpeg|thumb|none|600px|Realizing the cowardice of many of his soldiers, Ward takes it out on the nearest soldier and fires his [[Colt_1851_Navy#Colt_1851_.28Cartridge_Conversion.29|Colt 1851 Navy ( | + | [[File:A.R.L.A.R.D_Colt_1851_Navy-5.jpeg|thumb|none|600px|Realizing the cowardice of many of his soldiers, Ward takes it out on the nearest soldier and fires his [[Colt_1851_Navy#Colt_1851_.28Cartridge_Conversion.29|Colt 1851 Navy (cartridge conversion)]] mercilessly, much to the surprise of his aide.]] |
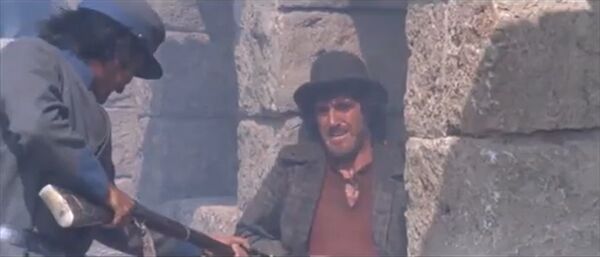
| − | [[File:A.R.L.A.R.D_Colt_1851_Navy-6.jpeg|thumb|none|600px|Pembroke and his group eliminate a soldier with | + | [[File:A.R.L.A.R.D_Colt_1851_Navy-6.jpeg|thumb|none|600px|Pembroke and his group eliminate a soldier with an M1865 Gatling Gun in a guard tower, getting rid of a potential threat.]] |
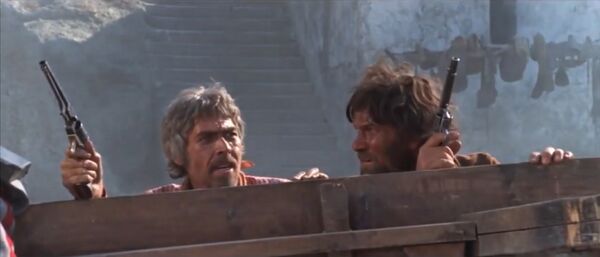
| − | [[File:A.R.L.A.R.D_Colt_1851_Navy-7.jpeg|thumb|none|600px|Pembroke and Piggot take cover from the fire of the few remaining Confederate soldiers at Fort Holman; Pembroke sends Piggott to execute Ward's | + | [[File:A.R.L.A.R.D_Colt_1851_Navy-7.jpeg|thumb|none|600px|Pembroke and Piggot take cover from the fire of the few remaining Confederate soldiers at Fort Holman; Pembroke sends Piggott to execute Ward's aide, who survived and was seen entering the base of a fort.]] |
| − | [[File:A.R.L.A.R.D_Colt_1851_Navy-9.jpeg|thumb|none|600px|Ward's | + | [[File:A.R.L.A.R.D_Colt_1851_Navy-9.jpeg|thumb|none|600px|Ward's aide (Fabrizio Moresco) knows he was spotted by Pembroke's group, so he cowardly hides while waiting for someone to get too close.]] |
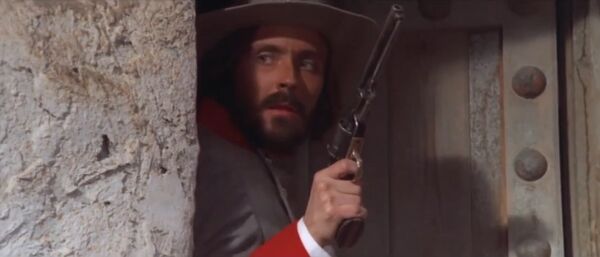
| − | [[File:A.R.L.A.R.D_Colt_1851_Navy-10.jpeg|thumb|none|600px|Pembroke points his Colt 1851 Navy ( | + | [[File:A.R.L.A.R.D_Colt_1851_Navy-10.jpeg|thumb|none|600px|Pembroke points his Colt 1851 Navy (cartridge conversion) at Ward who has already accepted his defeat and leaves his fate in Pembroke's hands.]] |
| − | ==Colt | + | ==Colt Single Action Army== |
| − | To a greater extent, the [[Colt Single Action Army]] is seen more than the [[Colt_1851_Navy#Colt_1851_.28Cartridge_Conversion.29|Colt 1851 Navy ( | + | To a greater extent, the [[Colt Single Action Army]] is seen more than the [[Colt_1851_Navy#Colt_1851_.28Cartridge_Conversion.29|Colt 1851 Navy (cartridge conversion)]]. It is only seen in its "Cavalry" and "Artillery" variants, mainly used by the members of Pembroke's group. Considering that the film is set during the American Civil War (1861-65), the appearance of the [[Single Action Army]] is historically incorrect. |
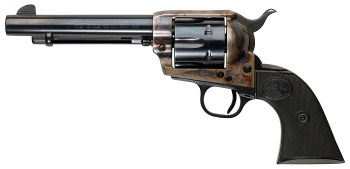
| − | [[File:ColtSAALongBarrel.jpg|thumb|none|350px|Colt | + | [[File:ColtSAALongBarrel.jpg|thumb|none|350px|Colt Single Action Army w/ 7.5" barrel - .45 Long Colt]] |
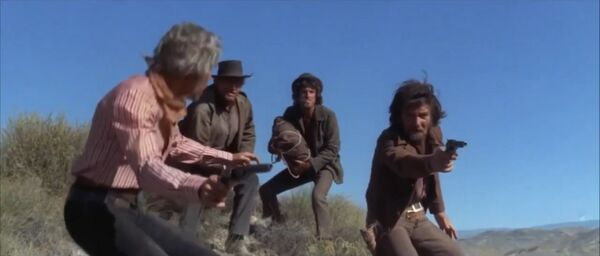
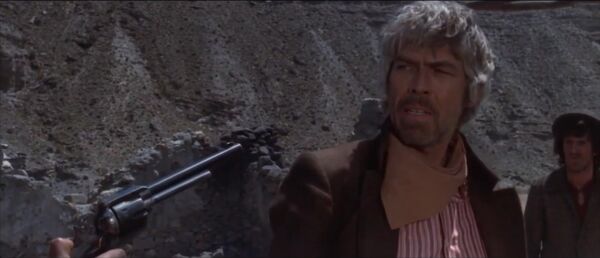
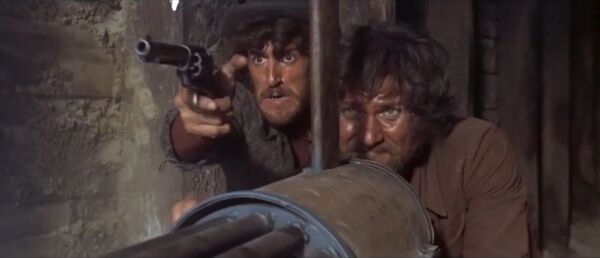
| − | [[File:A.R.L.A.R.D_Colt_S.A.A-1.jpeg|thumb|none|600px|Pembroke is threatened by his entire group for his strict character, and everyone points their Colt | + | [[File:A.R.L.A.R.D_Colt_S.A.A-1.jpeg|thumb|none|600px|Pembroke is threatened by his entire group for his strict character, and everyone points their Colt SAAs at him.]] |
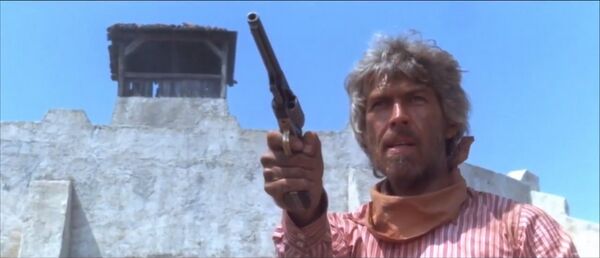
| − | [[File:A.R.L.A.R.D_Colt_S.A.A-2.jpeg|thumb|none|600px|Jeremy (Joe Pollini), despite being the most sensible of the group, also points his Colt | + | [[File:A.R.L.A.R.D_Colt_S.A.A-2.jpeg|thumb|none|600px|Jeremy (Joe Pollini), despite being the most sensible of the group, also points his Colt SAA toward Pembroke.]] |
| − | [[File:A.R.L.A.R.D_Colt_S.A.A-3.jpeg|thumb|none|600px|In a continuity error, Brent points at Pembroke with a Colt | + | [[File:A.R.L.A.R.D_Colt_S.A.A-3.jpeg|thumb|none|600px|In a continuity error, Brent points at Pembroke with a Colt SAA instead of his Colt 1851 Navy, although he most likely substituted the latter since who would prefer a percussion revolver instead of a cartridge revolver?]] |
| − | [[File:A.R.L.A.R.D_Colt_S.A.A-6.jpeg|thumb|none|600px|A Confederate soldier, after Sergeant Spike is wounded by one of Pembroke's men, pulls out an | + | [[File:A.R.L.A.R.D_Colt_S.A.A-6.jpeg|thumb|none|600px|A Confederate soldier, after Sergeant Spike is wounded by one of Pembroke's men, pulls out an SAA Colt to execute the latter.]] |
| − | [[File:ColtSingleActionArmy.jpg|thumb|none|350px|Colt | + | [[File:ColtSingleActionArmy.jpg|thumb|none|350px|Colt Single Action Army w/ 5.5" barrel - .45 Long Colt]] |
| − | [[File:A.R.L.A.R.D_Colt_S.A.A-4.jpeg|thumb|none|600px|Samuel fires his Colt | + | [[File:A.R.L.A.R.D_Colt_S.A.A-4.jpeg|thumb|none|600px|Samuel fires his Colt SAA at some Confederate soldiers carrying a Gatling Gun, taking advantage of the perfect opportunity to weaken the Confederate ranks.]] |
| − | [[File:A.R.L.A.R.D_Colt_S.A.A-5.jpeg|thumb|none|600px|Samuel, after causing heavy casualties at the fort, takes cover while firing his Colt | + | [[File:A.R.L.A.R.D_Colt_S.A.A-5.jpeg|thumb|none|600px|Samuel, after causing heavy casualties at the fort, takes cover while firing his Colt SAA.<BR> Note that the variant seen on screen is the 5.5" barrel inch one, rather than the 7.5" barrel inch variant, which was supposedly the one he chose previously.]] |
| − | =Rifles | + | =Rifles= |
==Charleville Musket Mle. 1766== | ==Charleville Musket Mle. 1766== | ||
| − | During the quest of Pembroke and his group from Union Fort Bowie to Confederate Fort Holman, the latter requests a brief stay at the ranch of a farmer ([[Francisco Sanz]]), who, upon noticing the group, arms himself with an[[ Charleville_Musket | Charleville Musket Mle. 1766]] | + | During the quest of Pembroke and his group from Union Fort Bowie to Confederate Fort Holman, the latter requests a brief stay at the ranch of a farmer ([[Francisco Sanz]]), who, upon noticing the group, arms himself with an [[Charleville_Musket|Charleville Musket Mle. 1766]]. |
| − | [[File:Charlie.jpg|thumb|none|450px|Charleville Musket Mle. 1766 - .69 | + | [[File:Charlie.jpg|thumb|none|450px|Charleville Musket Mle. 1766 - .69 caliber]] |
[[File:A.R.L.A.R.D_Charleville_Musket_Mle._1766-2.jpg|thumb|none|600px|The farmer, noticing that Pembroke and his party are on his property, arms himself with his Charleville Musket Mle. 1766 to protect it. Pembroke later justified his stay there, needing brief lodging before reaching Fort Holman.]] | [[File:A.R.L.A.R.D_Charleville_Musket_Mle._1766-2.jpg|thumb|none|600px|The farmer, noticing that Pembroke and his party are on his property, arms himself with his Charleville Musket Mle. 1766 to protect it. Pembroke later justified his stay there, needing brief lodging before reaching Fort Holman.]] | ||
| Line 65: | Line 65: | ||
==Remington 1863 Zouave== | ==Remington 1863 Zouave== | ||
| − | The rifle | + | The most commonly seen rifle in the film is the [[Remington 1863 Zouave]], used primarily by the Confederacy. Considering that the film takes place during the American Civil War in 1862, the [[Remington 1863 Zouave]] is historically incorrect since this rifle was released a year later and was never used in any armed conflict. However, it was widely sold to reenactors in the decades after the war and was often used as a substitute for period rifles in both reenactments and films in the days before replicas of rifles like the [[Springfield 1861]] become widely available. In some scenes, some [[Remington 1863 Zouave]]s appear to have the barrel and forend grip cut. |
[[File:Remingtonzouave.jpg|thumb|none|450px|Remington 1863 Zouave - .58 Minie Ball]] | [[File:Remingtonzouave.jpg|thumb|none|450px|Remington 1863 Zouave - .58 Minie Ball]] | ||
[[File:A.R.L.A.R.D Remington 1863 Zouave-6.jpeg|thumb|none|600px|At the beginning of the film, two soldiers are seen carrying two sawed-off Remington 1863 Zouave rifles as Pembroke selects his team to go and recapture Fort Holman.<BR> Note the brass trigger guard and the grip band of the Remington 1863 Zouave.]] | [[File:A.R.L.A.R.D Remington 1863 Zouave-6.jpeg|thumb|none|600px|At the beginning of the film, two soldiers are seen carrying two sawed-off Remington 1863 Zouave rifles as Pembroke selects his team to go and recapture Fort Holman.<BR> Note the brass trigger guard and the grip band of the Remington 1863 Zouave.]] | ||
| − | [[File:A.R.L.A.R.D Remington 1863 Zouave-1.jpeg|thumb|none|600px|One of the Confederate | + | [[File:A.R.L.A.R.D Remington 1863 Zouave-1.jpeg|thumb|none|600px|One of the Confederate guardsmen carries a Remington 1863 Zouave at Fort Holman while guarding Major Ward's passage toward the fort's main base.<BR> Note that this and all Remington 1863 Zouaves used by the Confederacy have an adjustable bayonet on the barrel of the rifle.]] |
| − | [[File:A.R.L.A.R.D Remington 1863 Zouave-2.jpeg|thumb|none|600px|When | + | [[File:A.R.L.A.R.D Remington 1863 Zouave-2.jpeg|thumb|none|600px|When Fort Holman alerts all Confederate soldiers of the threat from Pembroke and his group, several soldiers are seen carrying Remington 1863 Zouave rifles to defend the fort.]] |
| − | [[File:A.R.L.A.R.D Remington 1863 Zouave-3.jpeg|thumb|none|600px|Because Pembroke's group has seized all the Gatling | + | [[File:A.R.L.A.R.D Remington 1863 Zouave-3.jpeg|thumb|none|600px|Because Pembroke's group has seized all the Gatling Guns in the fort, the best the soldiers can do is take cover to avoid being mowed down by a literal hail of bullets. Major Ward does not tolerate this attitude of cowardice on the part of his soldiers.]] |
| − | [[File:A.R.L.A.R.D Remington 1863 Zouave-4.jpeg|thumb|none|600px|Despite being shot by a Colt | + | [[File:A.R.L.A.R.D Remington 1863 Zouave-4.jpeg|thumb|none|600px|Despite being shot by a Colt SAA, a member of Pembroke's group refuses to die. However, another Confederate soldier finishes him off with the bayonet of the Remington 1863 Zouave.]] |
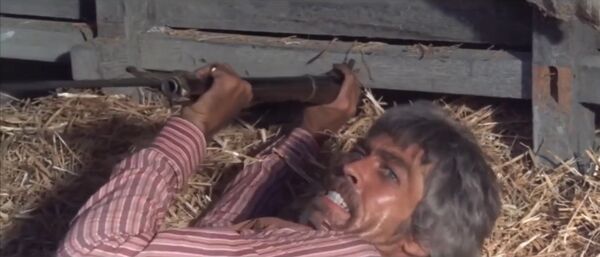
[[File:A.R.L.A.R.D Remington 1863 Zouave-5.jpeg|thumb|none|600px|Pembroke, during a struggle with a soldier from the fort, manages to get hold of his Remington 1863 Zouave, using the rifle's bayonet to stab him instead of shooting him as expected, considering that the soldier carrying it did not fire at any time.]] | [[File:A.R.L.A.R.D Remington 1863 Zouave-5.jpeg|thumb|none|600px|Pembroke, during a struggle with a soldier from the fort, manages to get hold of his Remington 1863 Zouave, using the rifle's bayonet to stab him instead of shooting him as expected, considering that the soldier carrying it did not fire at any time.]] | ||
| − | =Machine Guns | + | =Machine Guns= |
==M1865 Gatling Gun== | ==M1865 Gatling Gun== | ||
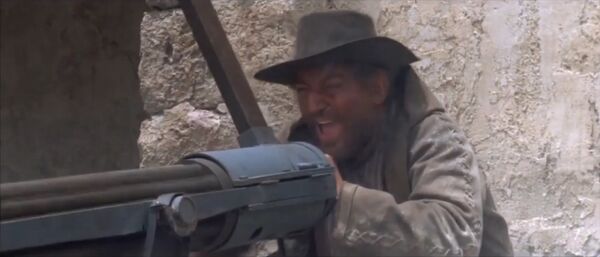
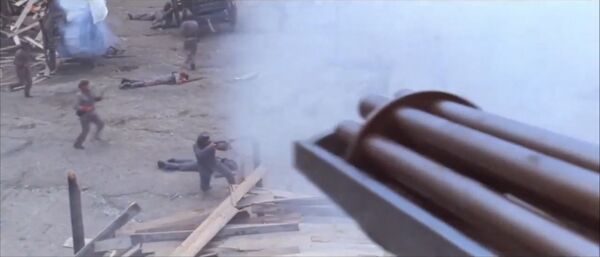
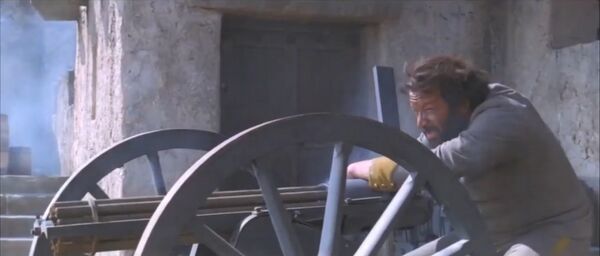
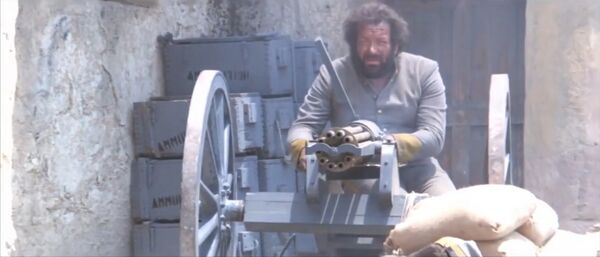
| − | During the climax of the film, several [[Gatling Gun]]s are seen | + | During the climax of the film, several [[Gatling Gun]]s are seen throughout Fort Holman during the climax, used by Eli Sampson ([[Bud Spencer]]) and Samuel Picket ([[Benito Stefanelli]]), among others. Technically its appearance is an anachronism since although the film is set in 1862 and the Gatling was patented that year, Gatling Guns saw usage between 1864-65. |
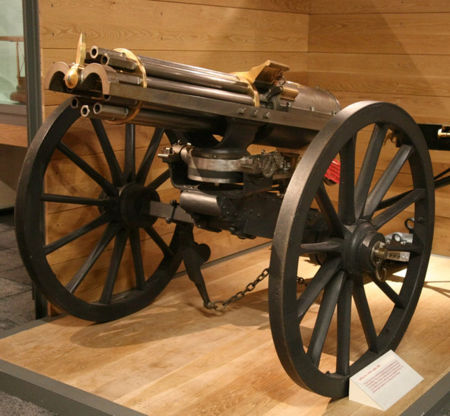
| − | [[File:Gatling gun 1865.jpg|thumb|none|450px|M1865 Gatling Gun - .58 Rimfire (RF)/.50-70 | + | [[File:Gatling gun 1865.jpg|thumb|none|450px|M1865 Gatling Gun - .58 Rimfire (RF)/.50-70 Government]] |
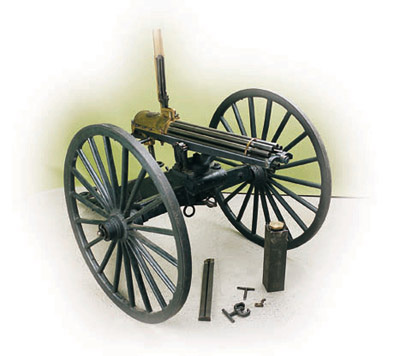
| − | [[File:Gatling.jpg|thumb|none|450px|Colt Gatling Gun - .45-70 | + | [[File:Gatling.jpg|thumb|none|450px|Colt Gatling Gun - .45-70 Government]] |
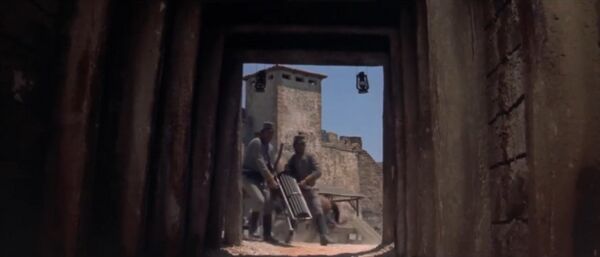
| − | [[File:A.R.L.A.R.D Gatling Gun-1.jpeg|thumb|none|600px|Two Confederate soldiers are seen carrying a Gatling | + | [[File:A.R.L.A.R.D Gatling Gun-1.jpeg|thumb|none|600px|Two Confederate soldiers are seen carrying a Gatling Gun at the mine exit toward the main base of Fort Holman, presumably to isolate Pembroke's men. This decision was the one that condemned the entire fort, since Samuel Picket managed to make it work and execute a large number of soldiers.]] |
| − | [[File:A.R.L.A.R.D Gatling Gun-3.jpeg|thumb|none|600px|Samuel prepares the Gatling | + | [[File:A.R.L.A.R.D Gatling Gun-3.jpeg|thumb|none|600px|Samuel prepares the Gatling Gun to fire while his comrades cover him from the Confederate soldiers.]] |
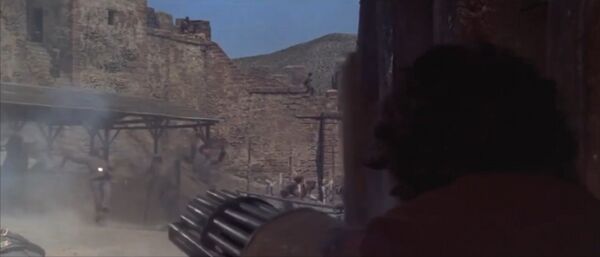
| − | [[File:A.R.L.A.R.D Gatling Gun-2.jpeg|thumb|none|600px|Piggot activates the crank mechanism of the Gatling | + | [[File:A.R.L.A.R.D Gatling Gun-2.jpeg|thumb|none|600px|Piggot activates the crank mechanism of the Gatling Gun to fire a burst at the Confederates.<BR >What is unofficially known as the "Django Effect" is when a scene in a Spaghetti Western (or movie in general) relies solely on one character using a machine gun to wipe out an entire horde of characters.]] |
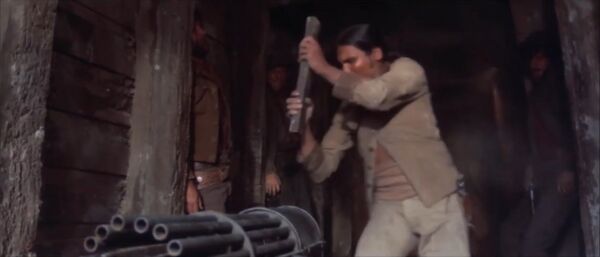
[[File:A.R.L.A.R.D Gatling Gun-4.jpeg|thumb|none|600px|After Samuel leaves the Gatling Gun out of ammunition, Jeremy attempts to install a new magazine, but fails because he ends up wounded by a gunshot.]] | [[File:A.R.L.A.R.D Gatling Gun-4.jpeg|thumb|none|600px|After Samuel leaves the Gatling Gun out of ammunition, Jeremy attempts to install a new magazine, but fails because he ends up wounded by a gunshot.]] | ||
| − | [[File:A.R.L.A.R.D Gatling Gun-6.jpeg|thumb|none|600px|Sergeant | + | [[File:A.R.L.A.R.D Gatling Gun-6.jpeg|thumb|none|600px|Sergeant Brent manages to get his hands on a Gatling Gun during the chaos caused by Samuel Picket and Eli Sampson. Noticeably excited, Brent begins firing the Gatling Gun without thinking about the Confederates, not even those asking for mercy, which upsets Eli Sampson.]] |
| − | [[File:A.R.L.A.R.D Gatling Gun-7.jpeg|thumb|none|600px| | + | [[File:A.R.L.A.R.D Gatling Gun-7.jpeg|thumb|none|600px|A close-up view of the Gatling Gun.]] |
| − | [[File:A.R.L.A.R.D Gatling Gun-9.jpeg|thumb|none|600px| | + | [[File:A.R.L.A.R.D Gatling Gun-9.jpeg|thumb|none|600px|A good side shot of the Gatling Gun being used by Eli Sampson during the climactic battle against the Confederates in Fort Holman.]] |
| − | [[File:A.R.L.A.R.D Gatling Gun-10.jpeg|thumb|none|600px|Eli Sampson got tired of Brent and his crazy attitude with the Gatling Gun, what broke his patience was that he wanted to interrupt the dramatic confrontation between Pembroke and Ward, so he uses his Gatling Gun to get rid of him.<BR> | + | [[File:A.R.L.A.R.D Gatling Gun-10.jpeg|thumb|none|600px|Eli Sampson got tired of Brent and his crazy attitude with the Gatling Gun, what broke his patience was that he wanted to interrupt the dramatic confrontation between Pembroke and Ward, so he uses his Gatling Gun to get rid of him.<BR> A perfect front shot of the Gatling Gun.]] |
[[Category:Movie]] | [[Category:Movie]] | ||
Latest revision as of 15:01, 21 February 2024
| ||||||||||||||||||||||||||||||||||
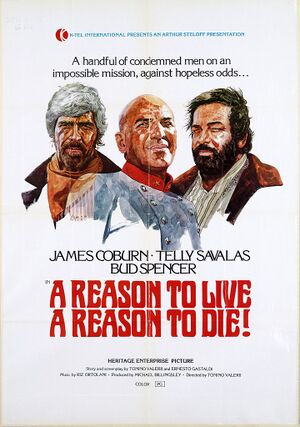
The following weapons were used in the film A Reason to Live, A Reason to Die:
Revolvers
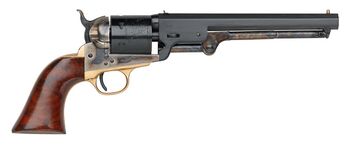
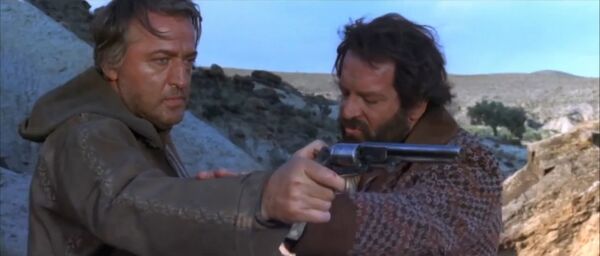
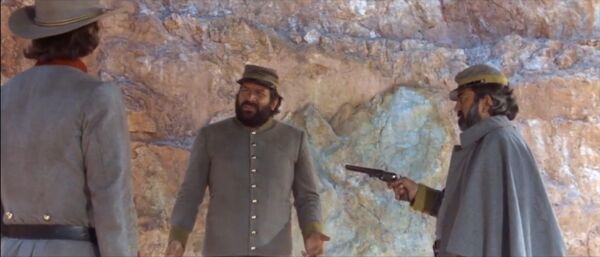
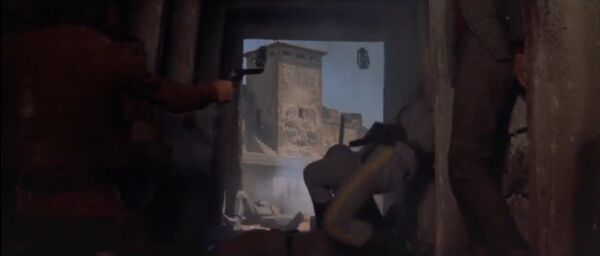
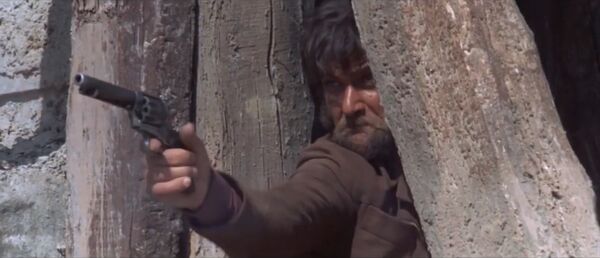
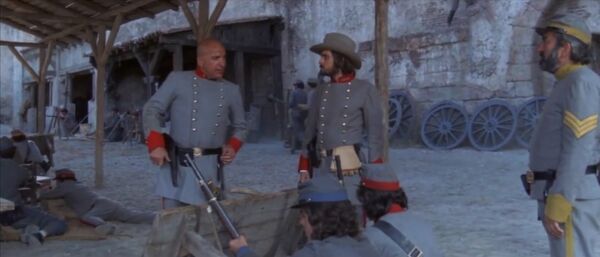
The Colt 1851 Navy (cartridge conversion) is used by the film's main characters, such as Colonel Pembroke (James Coburn), Eli Sampson (Bud Spencer), and Major Ward Telly Savalas) and his aide (Fabrizio Moresco). It is also seen in the hands of other minor characters.
Colt Single Action Army
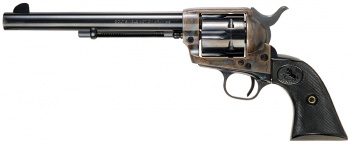
To a greater extent, the Colt Single Action Army is seen more than the Colt 1851 Navy (cartridge conversion). It is only seen in its "Cavalry" and "Artillery" variants, mainly used by the members of Pembroke's group. Considering that the film is set during the American Civil War (1861-65), the appearance of the Single Action Army is historically incorrect.
Rifles
Charleville Musket Mle. 1766
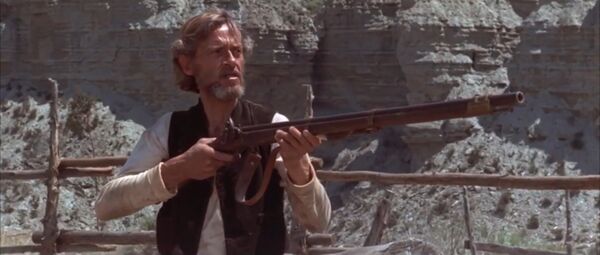
During the quest of Pembroke and his group from Union Fort Bowie to Confederate Fort Holman, the latter requests a brief stay at the ranch of a farmer (Francisco Sanz), who, upon noticing the group, arms himself with an Charleville Musket Mle. 1766.
Pedersoli Kentucky Flintlock Rifle
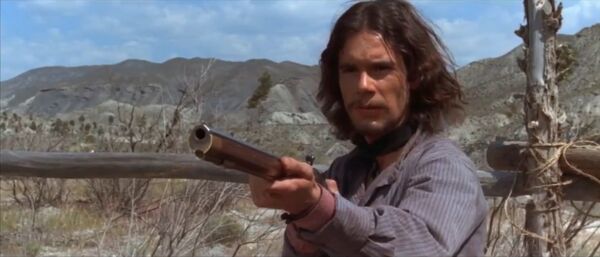
When his father warns him of an unexpected visit from strangers, the farmer's son arms himself with a Pedersoli replica of the Kentucky Flintlock Rifle.
Remington 1863 Zouave
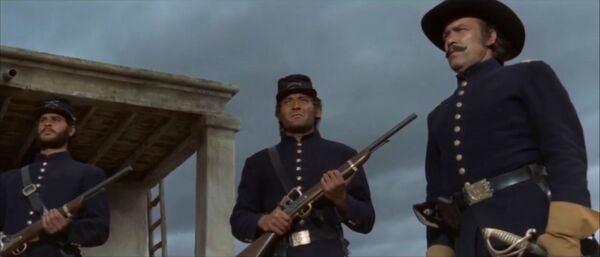
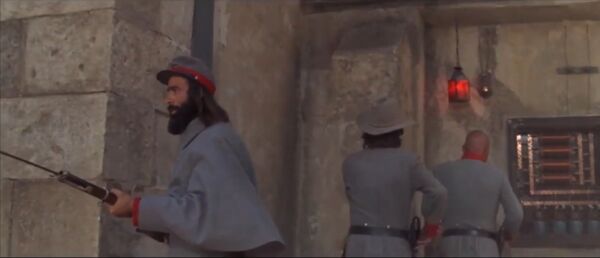
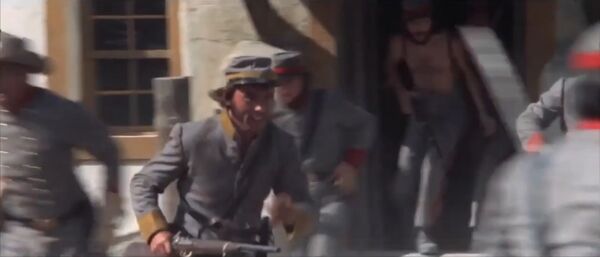
The most commonly seen rifle in the film is the Remington 1863 Zouave, used primarily by the Confederacy. Considering that the film takes place during the American Civil War in 1862, the Remington 1863 Zouave is historically incorrect since this rifle was released a year later and was never used in any armed conflict. However, it was widely sold to reenactors in the decades after the war and was often used as a substitute for period rifles in both reenactments and films in the days before replicas of rifles like the Springfield 1861 become widely available. In some scenes, some Remington 1863 Zouaves appear to have the barrel and forend grip cut.
Machine Guns
M1865 Gatling Gun
During the climax of the film, several Gatling Guns are seen throughout Fort Holman during the climax, used by Eli Sampson (Bud Spencer) and Samuel Picket (Benito Stefanelli), among others. Technically its appearance is an anachronism since although the film is set in 1862 and the Gatling was patented that year, Gatling Guns saw usage between 1864-65.
