| If you have been locked out of your account you can request a password reset here. |
Difference between revisions of "Wild 7"
Commando552 (talk | contribs) |
|||
| (7 intermediate revisions by 3 users not shown) | |||
| Line 1: | Line 1: | ||
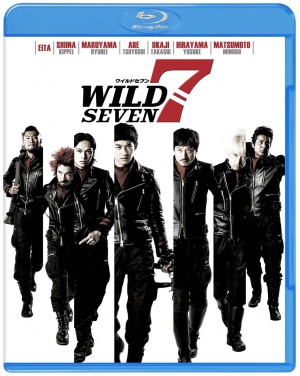
[[File:Wild 7 cover.jpg|thumb|right|300px|Wild 7 (2011).]] | [[File:Wild 7 cover.jpg|thumb|right|300px|Wild 7 (2011).]] | ||
| − | |||
| − | |||
{{Film Title|Wild 7}} | {{Film Title|Wild 7}} | ||
| Line 8: | Line 6: | ||
=Pistols= | =Pistols= | ||
| − | |||
==Beretta 92F== | ==Beretta 92F== | ||
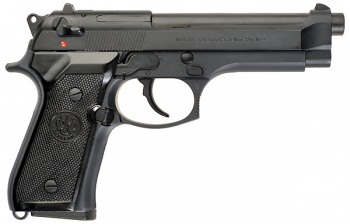
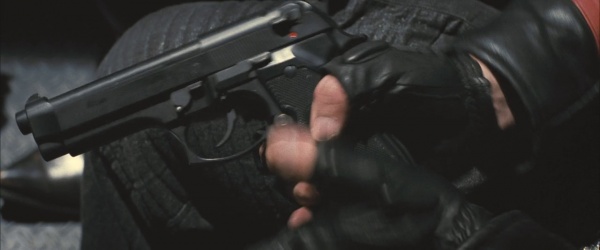
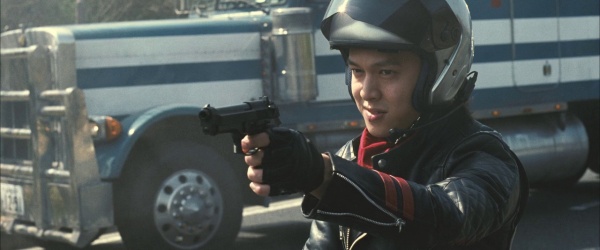
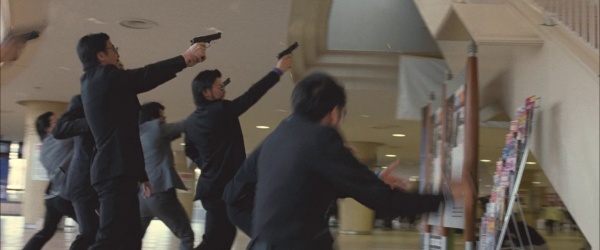
| − | Pyro ([[Ryuhei Maruyama]]) uses a Beretta 92F as his main sidearm throughout the movie. Numerous bad guys use the 92F as their main sidearm during a shootout in a mall. Special Investigation Team offices use them near the end of the movie when Wild 7's big rig truck is seen heading to the Public Security Unit building. | + | Pyro ([[Ryuhei Maruyama]]) uses a [[Beretta 92F]] as his main sidearm throughout the movie. Numerous bad guys use the 92F as their main sidearm during a shootout in a mall. Special Investigation Team offices use them near the end of the movie when Wild 7's big rig truck is seen heading to the Public Security Unit building. |
| − | + | [[Image:Beretta92F EarlyModel.jpg|thumb|350px|none|Beretta 92F (Early Model) - 9x19mm]] | |
| − | [[Image:Beretta92F EarlyModel.jpg|thumb|350px|none|Beretta 92F (Early Model) - 9x19mm | ||
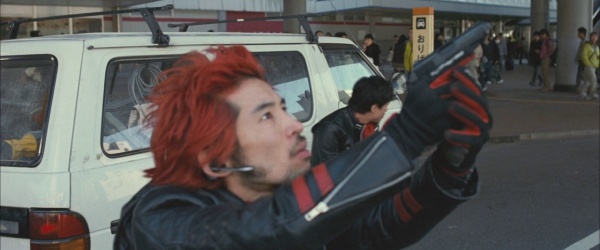
[[File:W7M 10.jpg|thumb|none|600px|Pyro loads up on the 92F after being mobilized.]] | [[File:W7M 10.jpg|thumb|none|600px|Pyro loads up on the 92F after being mobilized.]] | ||
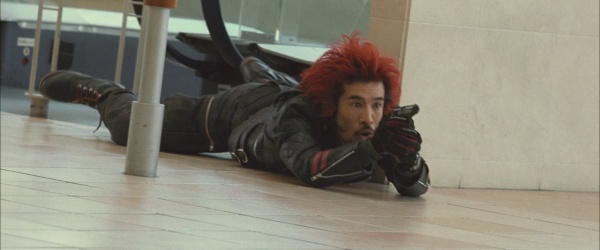
[[File:W7M 30.jpg|thumb|none|600px|The 92F being fired by Pyro at armed criminals after they refuse to surrender.]] | [[File:W7M 30.jpg|thumb|none|600px|The 92F being fired by Pyro at armed criminals after they refuse to surrender.]] | ||
| Line 19: | Line 15: | ||
==Colt MK IV Series 70== | ==Colt MK IV Series 70== | ||
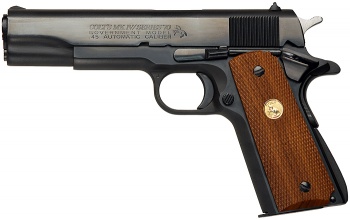
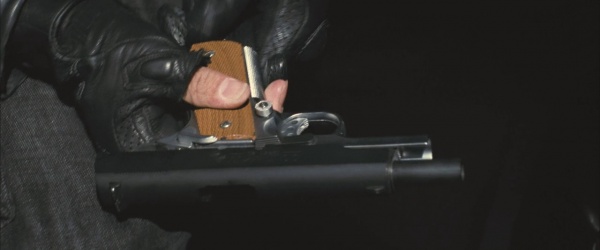
| − | Sox ([[Tsuyoshi Abe]]) uses a Colt MK IV Series 70 as his main sidearm throughout the movie. | + | Sox ([[Tsuyoshi Abe]]) uses a [[Colt MK IV Series 70]] as his main sidearm throughout the movie. |
| − | + | [[Image:ColtMkIVSeries70.jpg|thumb|none|350px|Colt MK IV Series 70 M1911A1 - .45 ACP.]] | |
| − | [[Image:ColtMkIVSeries70.jpg|thumb|none| | ||
[[File:W7M 33.jpg|thumb|none|600px|Sox loads the MK IV Series 70 after being mobilized.]] | [[File:W7M 33.jpg|thumb|none|600px|Sox loads the MK IV Series 70 after being mobilized.]] | ||
[[File:W7M 36.jpg|thumb|none|600px|Sox's MK IV is drawn out at a mall during a shootout.]] | [[File:W7M 36.jpg|thumb|none|600px|Sox's MK IV is drawn out at a mall during a shootout.]] | ||
==Colt Woodsman== | ==Colt Woodsman== | ||
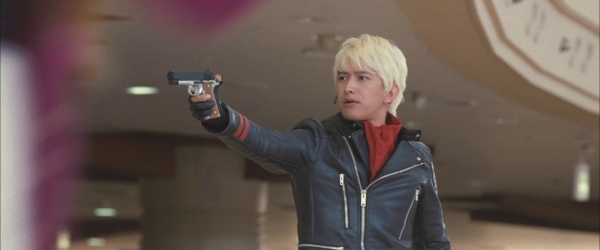
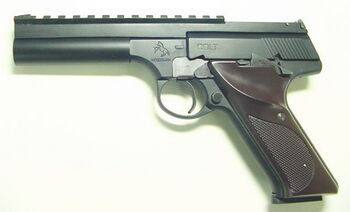
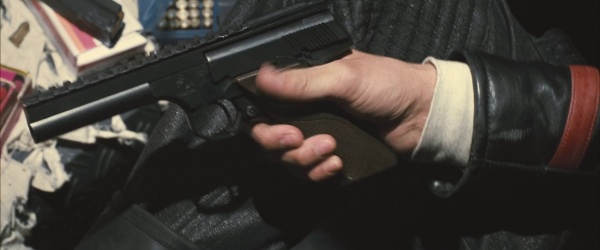
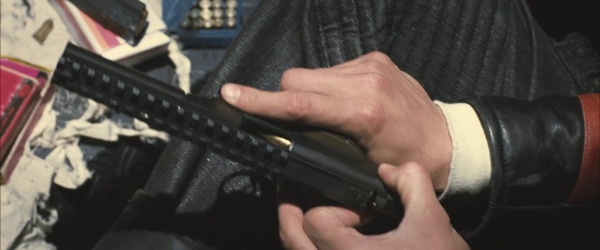
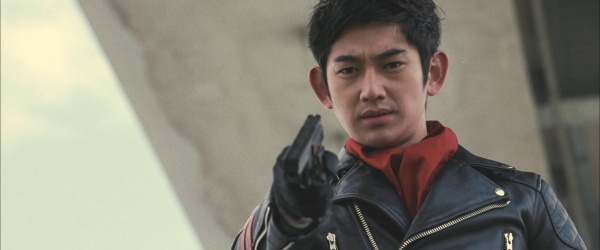
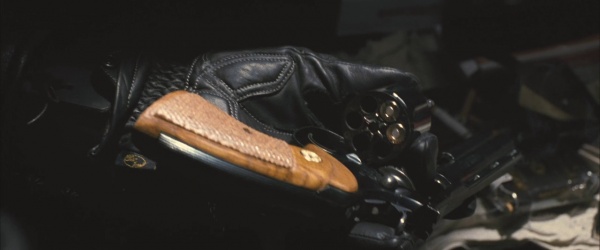
| − | A Colt Woodsman modified with a picatinny railing over the barrel is used by Dairoku Hiba ([[Eita Nagayama]]) throughout the movie as his main sidearm. | + | A [[Colt Woodsman]] modified with a picatinny railing over the barrel is used by Dairoku Hiba ([[Eita Nagayama]]) throughout the movie as his main sidearm. |
| − | + | [[File:Custom Colt Woodsman.jpg|thumb|350px|none|Custom Colt Woodsman replica with picatinny railing similarly to the one used in the Wild 7 movie.]] | |
| − | [[File:Custom Colt Woodsman.jpg|thumb| | ||
[[File:W7M 11.jpg|thumb|none|600px|Hiba arming himself with the the modified Colt Woodsman after Wild 7 is mobilized.]] | [[File:W7M 11.jpg|thumb|none|600px|Hiba arming himself with the the modified Colt Woodsman after Wild 7 is mobilized.]] | ||
[[File:W7M 32.jpg|thumb|none|600px|A brass check being done on the modified Woodsman. You can see the .22 LR bullet in the chamber.]] | [[File:W7M 32.jpg|thumb|none|600px|A brass check being done on the modified Woodsman. You can see the .22 LR bullet in the chamber.]] | ||
| Line 34: | Line 28: | ||
==Glock 17== | ==Glock 17== | ||
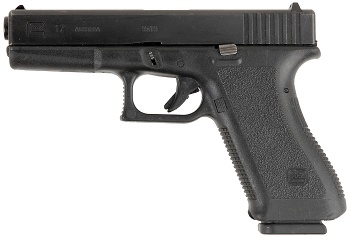
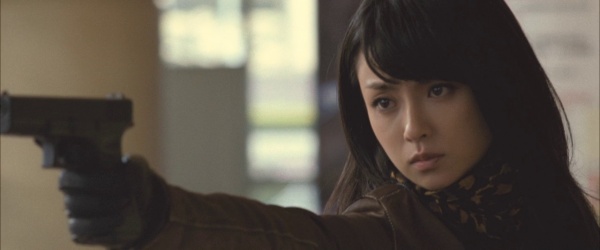
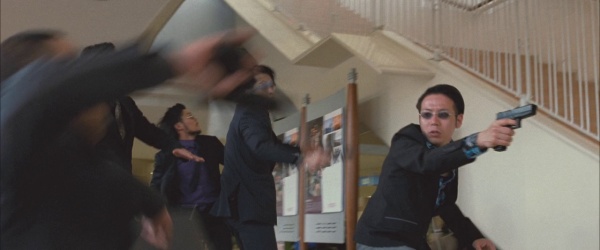
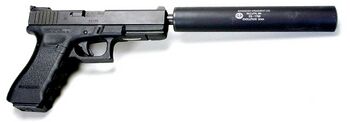
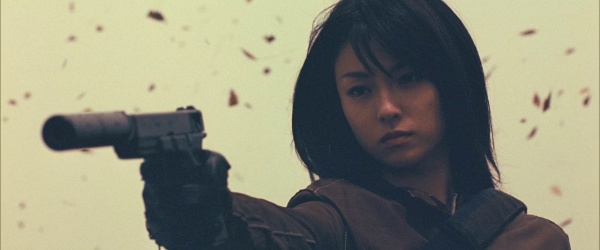
| − | Yuki Honma ([[Kyoko Fukada]]) uses a Glock 17 as her main sidearm while as a vigilante. One of the bad guys in the mall shootout also uses it as his personal sidearm. | + | Yuki Honma ([[Kyoko Fukada]]) uses a [[Glock 17]] as her main sidearm while as a vigilante. One of the bad guys in the mall shootout also uses it as his personal sidearm. |
| + | [[Image:Glock17EarlyModel.jpg|thumb|none|350px|2nd Generation Glock 17 - 9x19mm. This model added finger stepping and cuts to the backstrap of the frame to make it easier to hold than the Generation 1 model.]] | ||
| + | [[File:W7M 40.jpg|thumb|none|600px|Yuki takes aim with her Glock 17 in the aftermath of the mall shootout.]] | ||
| + | [[File:W7M 38.jpg|thumb|none|600px|The gunman on the right is armed with a Glock 17 when the shootout erupts at the mall.]] | ||
| − | [[ | + | [[File:Glock 17 with Evolution suppressor.jpg|thumb|none|350px|Suppressed Glock 17 (3rd Gen) - 9x19mm Parabellum]] |
| − | |||
| − | |||
[[File:W7M 80.jpg|thumb|none|600px|At a flashback, Yuki fires a silenced Glock 17 at the culprit of a bombing attack that she was involved in as a victim.]] | [[File:W7M 80.jpg|thumb|none|600px|At a flashback, Yuki fires a silenced Glock 17 at the culprit of a bombing attack that she was involved in as a victim.]] | ||
| − | |||
===CAA Tactical RONI-G1=== | ===CAA Tactical RONI-G1=== | ||
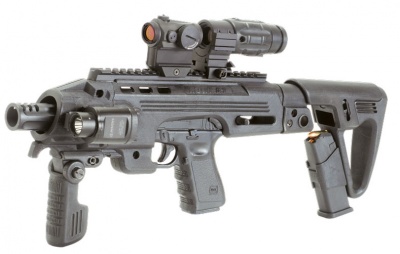
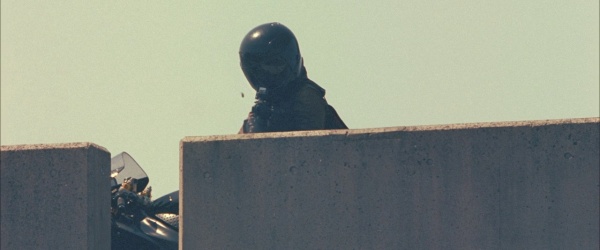
| − | Yuki uses a CAA Tactical RONI-G1 carbine when she uses it to assassinate a target responsible for the bombing attack she was involved in years ago. | + | Yuki uses a [[CAA Tactical RONI-G1]] carbine when she uses it to assassinate a target responsible for the bombing attack she was involved in years ago. |
| − | |||
[[Image:CAA.Tactical-RONI-G1.jpg|thumb|none|400px|Glock 17 mounted in CAA Tactical RONI-G1.]] | [[Image:CAA.Tactical-RONI-G1.jpg|thumb|none|400px|Glock 17 mounted in CAA Tactical RONI-G1.]] | ||
[[File:W7M 83.jpg|thumb|none|600px|Yuki aims the mounted holographic sight on the RONI-G1 at a target before it is fired.]] | [[File:W7M 83.jpg|thumb|none|600px|Yuki aims the mounted holographic sight on the RONI-G1 at a target before it is fired.]] | ||
==Heckler & Koch USP== | ==Heckler & Koch USP== | ||
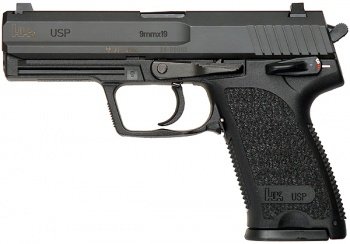
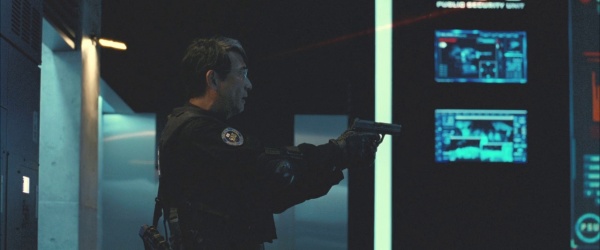
| − | Ex-Tokyo Metropolitan Police Department Inspector Masaru Kusanami ([[Kiichi Nakai]]) uses a Heckler & Koch USP while disguised as a Special Assault Team operator near the end of the movie. | + | Ex-Tokyo Metropolitan Police Department Inspector Masaru Kusanami ([[Kiichi Nakai]]) uses a [[Heckler & Koch USP]] while disguised as a Special Assault Team operator near the end of the movie. |
| − | |||
[[Image:USP9mm.jpg|thumb|none|350px|Heckler & Koch USP - 9x19mm.]] | [[Image:USP9mm.jpg|thumb|none|350px|Heckler & Koch USP - 9x19mm.]] | ||
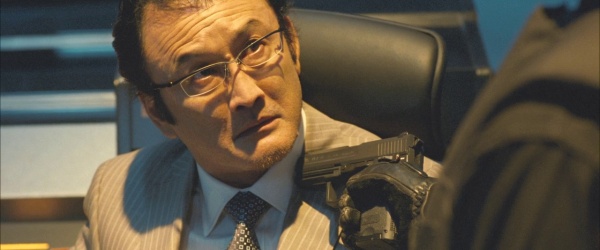
[[File:W7M 73.jpg|thumb|none|600px|Kusanami aims the USP at Hiba after firing a shot at his direction.]] | [[File:W7M 73.jpg|thumb|none|600px|Kusanami aims the USP at Hiba after firing a shot at his direction.]] | ||
| Line 56: | Line 48: | ||
==IMI Desert Eagle== | ==IMI Desert Eagle== | ||
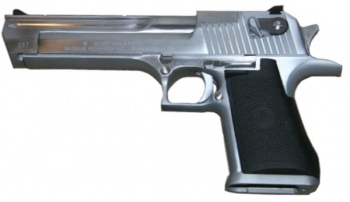
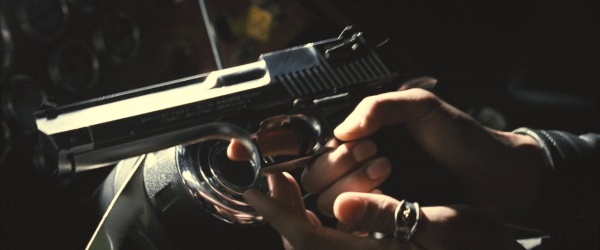
| − | A stainless steel IMI Desert Eagle is used by Hebopie ([[Yusuke Hirayama]]) as his main sidearm throughout the movie. | + | A stainless steel [[IMI Desert Eagle]] is used by Hebopie ([[Yusuke Hirayama]]) as his main sidearm throughout the movie. |
| − | |||
[[Image:Desert Eagle Mark XIX 357 Magnum.jpg|thumb|none|350px|Desert Eagle Mark XIX with magazine removed - .357 Magnum.]] | [[Image:Desert Eagle Mark XIX 357 Magnum.jpg|thumb|none|350px|Desert Eagle Mark XIX with magazine removed - .357 Magnum.]] | ||
[[File:W7M 08.jpg|thumb|none|600px|The Desert Eagle is loaded with a fresh magazine by Hebopie after Wild 7 is called into action.]] | [[File:W7M 08.jpg|thumb|none|600px|The Desert Eagle is loaded with a fresh magazine by Hebopie after Wild 7 is called into action.]] | ||
| Line 64: | Line 55: | ||
==Intractec TEC-9== | ==Intractec TEC-9== | ||
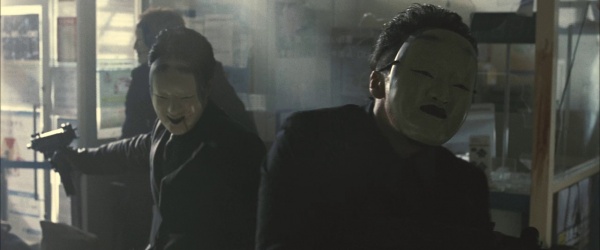
| − | A masked criminal uses an Intratec TEC-9 in the prologue of the movie, which is notably used to execute hostages during a bank heist. | + | A masked criminal uses an [[Intratec TEC-9]] in the prologue of the movie, which is notably used to execute hostages during a bank heist. |
| − | |||
[[image:TEC-9.jpg|thumb|none|350px|Intratec TEC-9 - 9x19mm.]] | [[image:TEC-9.jpg|thumb|none|350px|Intratec TEC-9 - 9x19mm.]] | ||
[[File:W7M 00.jpg|thumb|none|600px|The masked criminal executes a hostage with the TEC-9.]] | [[File:W7M 00.jpg|thumb|none|600px|The masked criminal executes a hostage with the TEC-9.]] | ||
| Line 72: | Line 62: | ||
==M1911A1== | ==M1911A1== | ||
| − | Sekai ([[Kippei Shina]]) uses a M1911A1 as his main sidearm throughout the whole movie. | + | Sekai ([[Kippei Shina]]) uses a [[M1911A1]] as his main sidearm throughout the whole movie. |
| − | + | [[Image:Colt-M1911A1.jpg|thumb|none|350px|M1911A1 - .45 ACP.]] | |
| − | [[Image:Colt-M1911A1.jpg|thumb|none|350px| | ||
[[File:W7M 31.jpg|thumb|none|600px|Sekai opens fire with the M1911A1 at the armed criminals after they refuse to surrender.]] | [[File:W7M 31.jpg|thumb|none|600px|Sekai opens fire with the M1911A1 at the armed criminals after they refuse to surrender.]] | ||
[[File:W7M 35.jpg|thumb|none|600px|The M1911A1 used by Sekai as he aims the pistol at the suspicion mini-van. Note the installed skeleton-type hammer and trigger.]] | [[File:W7M 35.jpg|thumb|none|600px|The M1911A1 used by Sekai as he aims the pistol at the suspicion mini-van. Note the installed skeleton-type hammer and trigger.]] | ||
| − | ==Norinco Type 54 | + | ==Norinco Type 54== |
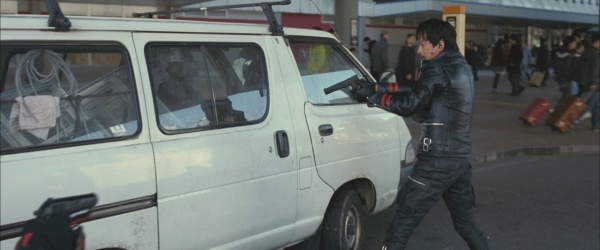
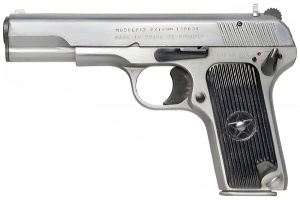
| − | An armed criminal during a Wild 7 operation is armed with a stainless steel Norinco Type 54, but it was never fired. | + | An armed criminal during a Wild 7 operation is armed with a stainless steel [[Norinco Type 54]], but it was never fired. |
| − | |||
[[Image:Tokarev NorincoM213SS.jpg|thumb|none|300px|Norinco Type 54 Model 213 with stainless steel finish - 9x19mm.]] | [[Image:Tokarev NorincoM213SS.jpg|thumb|none|300px|Norinco Type 54 Model 213 with stainless steel finish - 9x19mm.]] | ||
[[File:W7M 71.jpg|thumb|none|600px|The armed criminal armed with the stainless steel Norinco Type 54.]] | [[File:W7M 71.jpg|thumb|none|600px|The armed criminal armed with the stainless steel Norinco Type 54.]] | ||
==Walther PPK== | ==Walther PPK== | ||
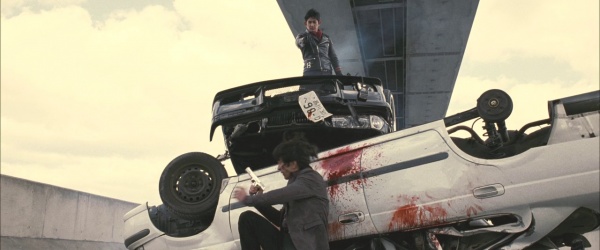
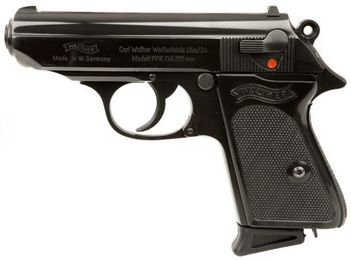
| − | BBQ ([[Minoru Matsumoto]]) loads up on the Walther PPK throughout the entire movie, serving as his main sidearm. | + | BBQ ([[Minoru Matsumoto]]) loads up on the [[Walther PPK]] throughout the entire movie, serving as his main sidearm. |
| − | |||
[[Image:Waltherppk32acp.jpg|thumb|351px|none|Walther PPK - 7.65 mm Browning aka .32 ACP]] | [[Image:Waltherppk32acp.jpg|thumb|351px|none|Walther PPK - 7.65 mm Browning aka .32 ACP]] | ||
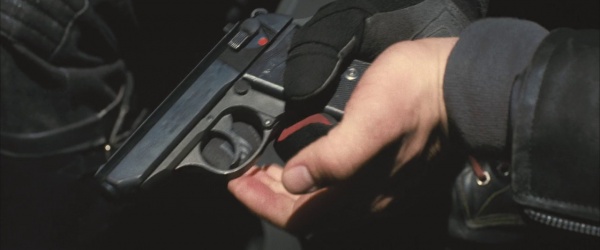
[[File:W7M 09.jpg|thumb|none|600px|BBQ slaps a loaded magazine into the PPK after being mobilized.]] | [[File:W7M 09.jpg|thumb|none|600px|BBQ slaps a loaded magazine into the PPK after being mobilized.]] | ||
| Line 93: | Line 80: | ||
=Revolvers= | =Revolvers= | ||
| − | |||
==Colt Python== | ==Colt Python== | ||
| − | Oyabun ([[Takashi Ukaji]]) uses a Colt Python as his main sidearm throughout the movie. | + | Oyabun ([[Takashi Ukaji]]) uses a [[Colt Python]] as his main sidearm throughout the movie. |
| − | |||
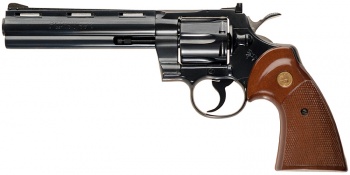
[[Image:ColtPython6In.jpg|thumb|350px|none|Colt Python with 6" Barrel - .357 Magnum.]] | [[Image:ColtPython6In.jpg|thumb|350px|none|Colt Python with 6" Barrel - .357 Magnum.]] | ||
[[File:W7M 12.jpg|thumb|none|600px|Oyabun inserts .357 Magnum rounds into the Python's revolver chamber after Wild 7 is mobilized.]] | [[File:W7M 12.jpg|thumb|none|600px|Oyabun inserts .357 Magnum rounds into the Python's revolver chamber after Wild 7 is mobilized.]] | ||
| Line 104: | Line 89: | ||
==Smith & Wesson Model 36== | ==Smith & Wesson Model 36== | ||
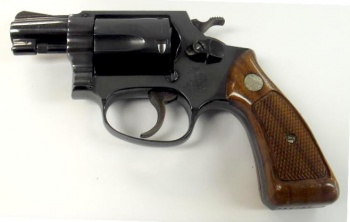
| − | Plainclothes police officers use Smith & Wesson Model | + | Plainclothes police officers use [[Smith & Wesson Model 36]]s when they are ordered to confront the rogue Wild 7 team. The revolver is used by the National Police Agency as an authorized sidearm even though they are allowed to use semi-automatics. |
| − | |||
[[Image:S%26Wmodel36square.jpg|thumb|none|350px|Smith & Wesson Model 36 revolver with square butt - .38 Special.]] | [[Image:S%26Wmodel36square.jpg|thumb|none|350px|Smith & Wesson Model 36 revolver with square butt - .38 Special.]] | ||
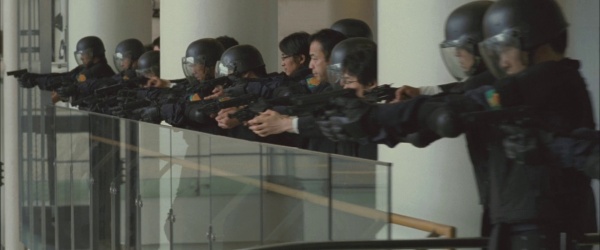
[[File:W7M 70.jpg|thumb|none|600px|Plainclothes police officers aim their loaded Smith & Wesson Model 36s at the deserted PSU building lobby.]] | [[File:W7M 70.jpg|thumb|none|600px|Plainclothes police officers aim their loaded Smith & Wesson Model 36s at the deserted PSU building lobby.]] | ||
| Line 112: | Line 96: | ||
==Beretta PM12S== | ==Beretta PM12S== | ||
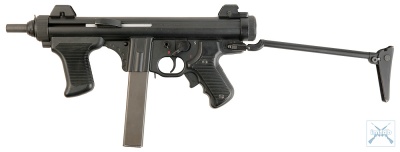
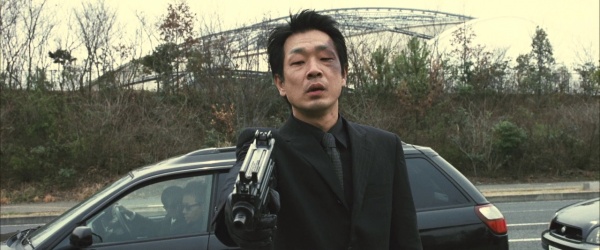
| − | Masked criminals during a Wild 7 operation on a highway were armed with Beretta PM12S submachine guns. | + | Masked criminals during a Wild 7 operation on a highway were armed with [[Beretta PM12S]] submachine guns. |
| − | |||
[[Image:BerettaPM12S.jpg|thumb|none|400px|Beretta PM12S - 9x19mm.]] | [[Image:BerettaPM12S.jpg|thumb|none|400px|Beretta PM12S - 9x19mm.]] | ||
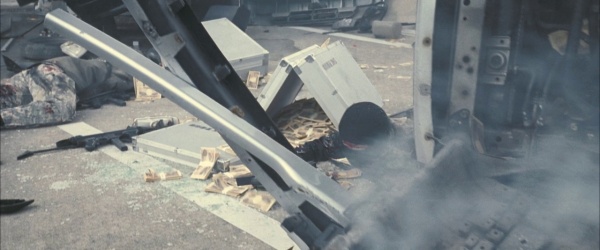
[[File:W7M 75.jpg|thumb|none|600px|A wounded criminals tries to reach for the PM12S before being shot by Hiba.]] | [[File:W7M 75.jpg|thumb|none|600px|A wounded criminals tries to reach for the PM12S before being shot by Hiba.]] | ||
==Heckler & Koch MP5A2== | ==Heckler & Koch MP5A2== | ||
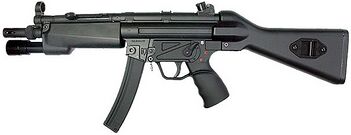
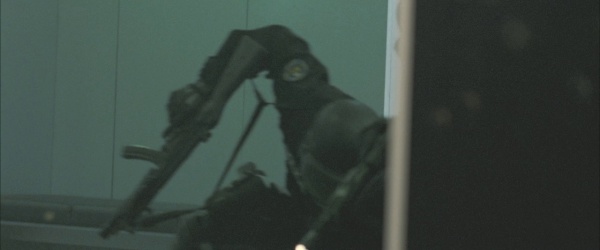
| − | A Special Assault Team operator uses a Heckler & Koch MP5A2 with a mounted weaponlight during the shootout at the PSU building. | + | A Special Assault Team operator uses a [[Heckler & Koch MP5A2]] with a mounted weaponlight during the shootout at the PSU building. |
| − | + | [[Image:2MP5A2.jpg|thumb|none|351px|Heckler & Koch MP5A2 with Surefire 628 dedicated forend weaponlight - 9x19mm.]] | |
| − | [[Image:2MP5A2.jpg|thumb|none| | ||
[[File:W7M 52.jpg|thumb|none|600px|A SAT operator takes cover from the grenade barrage during the raid on the PSU building.]] | [[File:W7M 52.jpg|thumb|none|600px|A SAT operator takes cover from the grenade barrage during the raid on the PSU building.]] | ||
==Heckler & Koch MP5A3== | ==Heckler & Koch MP5A3== | ||
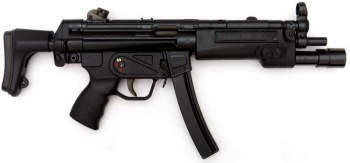
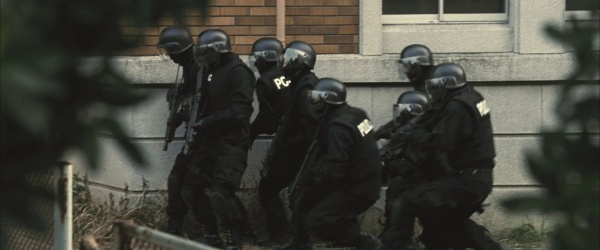
| − | Special Assault Team operators are armed with Heckler & Koch | + | Special Assault Team operators are armed with [[Heckler & Koch MP5A3]]s as the main submachine gun in the movie. |
| − | + | [[File:HKMP5A3.jpg|thumb|none|350px|Heckler & Koch MP5A3 with Surefire Weaponlight and "F" style stock - 9x19mm]] | |
| − | [[File:HKMP5A3.jpg|thumb|none| | ||
[[File:W7M 02.jpg|thumb|none|600px|SAT operators stack up armed with MP5A3s near the bank during a hostage siege.]] | [[File:W7M 02.jpg|thumb|none|600px|SAT operators stack up armed with MP5A3s near the bank during a hostage siege.]] | ||
[[File:W7M 07.jpg|thumb|none|600px|A SAT operator checks on the corpses of the hostages after the robbers flee.]] | [[File:W7M 07.jpg|thumb|none|600px|A SAT operator checks on the corpses of the hostages after the robbers flee.]] | ||
| Line 133: | Line 114: | ||
==Heckler & Koch MP5K== | ==Heckler & Koch MP5K== | ||
| − | BBQ uses a Heckler & Koch MP5K from the Wild 7 hideout during the raid on the PSU building in a shootout with the Special Assault Team. | + | BBQ uses a [[Heckler & Koch MP5K]] from the Wild 7 hideout during the raid on the PSU building in a shootout with the Special Assault Team. |
| − | + | [[Image:MP5KA3.jpg|thumb|none|350px|Heckler & Koch MP5KN - 9x19mm.]] | |
| − | [[Image:MP5KA3.jpg|thumb|none| | ||
[[File:W7M 69.jpg|thumb|none|600px|BBQ clutching onto the MP5K with the M4A1 and the AT4 tube.]] | [[File:W7M 69.jpg|thumb|none|600px|BBQ clutching onto the MP5K with the M4A1 and the AT4 tube.]] | ||
[[File:W7M 46.jpg|thumb|none|600px|BBQ prepares to load the MP5K during a shootout with the SAT.]] | [[File:W7M 46.jpg|thumb|none|600px|BBQ prepares to load the MP5K during a shootout with the SAT.]] | ||
| Line 142: | Line 122: | ||
==IMI Uzi== | ==IMI Uzi== | ||
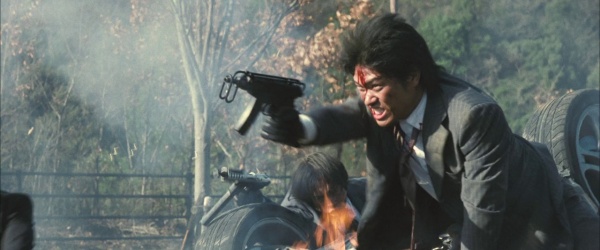
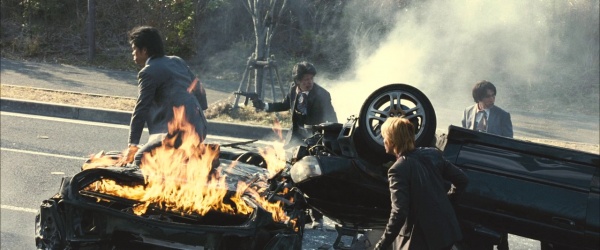
| − | A couple of criminals uses IMI | + | A couple of criminals uses [[IMI Uzi]]s after being wounded from a car crash at the start of the movie. |
| − | |||
[[Image:Uzi-1.jpg|thumb|none|400px|IMI Uzi with collapsible buttstock extended - 9x19mm.]] | [[Image:Uzi-1.jpg|thumb|none|400px|IMI Uzi with collapsible buttstock extended - 9x19mm.]] | ||
[[File:W7M 15.jpg|thumb|none|600px|The wounded criminals opens fire with the Uzi at the Wild 7 bikers.]] | [[File:W7M 15.jpg|thumb|none|600px|The wounded criminals opens fire with the Uzi at the Wild 7 bikers.]] | ||
| Line 149: | Line 128: | ||
==IMI Micro Uzi Pistol== | ==IMI Micro Uzi Pistol== | ||
| − | A masked criminal uses an IMI Micro Uzi Pistol during a bank robbery at the start of the movie. | + | A masked criminal uses an [[Micro Uzi|IMI Micro Uzi Pistol]] during a bank robbery at the start of the movie. |
| − | |||
[[Image:MicroUziPistol.jpg|thumb|none|305px|IMI Micro Uzi with 15 round magazine - 9x19mm.]] | [[Image:MicroUziPistol.jpg|thumb|none|305px|IMI Micro Uzi with 15 round magazine - 9x19mm.]] | ||
[[File:W7M 03.jpg|thumb|none|600px|The masked criminal holds the pistol grip of the IMI Micro Uzi Pistol with his right hand.]] | [[File:W7M 03.jpg|thumb|none|600px|The masked criminal holds the pistol grip of the IMI Micro Uzi Pistol with his right hand.]] | ||
| Line 156: | Line 134: | ||
==Sa. Vz.61 Skorpion== | ==Sa. Vz.61 Skorpion== | ||
| − | A couple of criminals use | + | A couple of criminals use [[Sa. Vz.61 Skorpion]]s when they were ambushed by the Wild 7 big rig truck. |
| − | |||
[[Image:Skorpion-ZA-VZ61 side.jpg|thumb|350px|none|Sa. Vz. 61 Skorpion with 10 round magazine and stock extended - .32 ACP.]] | [[Image:Skorpion-ZA-VZ61 side.jpg|thumb|350px|none|Sa. Vz. 61 Skorpion with 10 round magazine and stock extended - .32 ACP.]] | ||
[[File:W7M 26.jpg|thumb|none|600px|One of the wounded criminals open fire with the Skorpion at the Wild 7 big rig truck.]] | [[File:W7M 26.jpg|thumb|none|600px|One of the wounded criminals open fire with the Skorpion at the Wild 7 big rig truck.]] | ||
| Line 164: | Line 141: | ||
==Steyr TMP== | ==Steyr TMP== | ||
| − | Hiba uses a Steyr TMP as his primary weapon during the raid on the PSU building after the Special Assault Team is deployed to secure the area. Sox later uses it to fend off the SAT as Hiba attempts to get into the building's control room. | + | Hiba uses a [[Steyr TMP]] as his primary weapon during the raid on the PSU building after the Special Assault Team is deployed to secure the area. Sox later uses it to fend off the SAT as Hiba attempts to get into the building's control room. |
| − | |||
[[Image:SteyrTMP.jpg|thumb|350px|none|Steyr TMP - 9x19mm.]] | [[Image:SteyrTMP.jpg|thumb|350px|none|Steyr TMP - 9x19mm.]] | ||
[[File:W7M 43.jpg|thumb|none|600px|Hiba loads the Steyr TMP after SAT teams begin to breach the building.]] | [[File:W7M 43.jpg|thumb|none|600px|Hiba loads the Steyr TMP after SAT teams begin to breach the building.]] | ||
| Line 173: | Line 149: | ||
=Assault Rifles= | =Assault Rifles= | ||
| − | |||
==Colt Commando== | ==Colt Commando== | ||
| − | A Colt Commando can be seen in a newspaper clipping in Yuki Honma's hideout. | + | A [[Colt Commando]] can be seen in a newspaper clipping in Yuki Honma's hideout. |
| − | |||
[[Image:ColtModel610-XM177.jpg|thumb|none|400px|Colt Model 610 aka The USAF GAU-5/A - 5.56mm. The USAF used the first pattern slab side carbine for many years, and was the reason why shows depicting the U.S. Airforce like ''Stargate: SG1'' utilized modified Colt Sporter Carbine (as well as other manufacturer's carbines) to create XM177 style rifles.]] | [[Image:ColtModel610-XM177.jpg|thumb|none|400px|Colt Model 610 aka The USAF GAU-5/A - 5.56mm. The USAF used the first pattern slab side carbine for many years, and was the reason why shows depicting the U.S. Airforce like ''Stargate: SG1'' utilized modified Colt Sporter Carbine (as well as other manufacturer's carbines) to create XM177 style rifles.]] | ||
[[File:W7M 18.jpg|thumb|none|600px|A newspaper clipping that depicts a USAF soldier opens fire with a Colt Commando. Note that the photo appears to be [https://upload.wikimedia.org/wikipedia/commons/b/bf/USAF_MP_with_Colt_Commando.JPEG taken from this Wikipedia photo.]]] | [[File:W7M 18.jpg|thumb|none|600px|A newspaper clipping that depicts a USAF soldier opens fire with a Colt Commando. Note that the photo appears to be [https://upload.wikimedia.org/wikipedia/commons/b/bf/USAF_MP_with_Colt_Commando.JPEG taken from this Wikipedia photo.]]] | ||
==Colt M4A1== | ==Colt M4A1== | ||
| − | + | [[M4A1]]s are seen in the movie, seen in the Wild 7 hideout before the unit took them on the raid at the PSU building after the group was declared as a rogue police unit. | |
| − | |||
[[File:M4A1 ACOG.jpg|thumb|none|400px|Colt M4A1 with 4 position collapsible stock, RIS foregrip, folding rear sight, and ACOG scope - 5.56x45mm.]] | [[File:M4A1 ACOG.jpg|thumb|none|400px|Colt M4A1 with 4 position collapsible stock, RIS foregrip, folding rear sight, and ACOG scope - 5.56x45mm.]] | ||
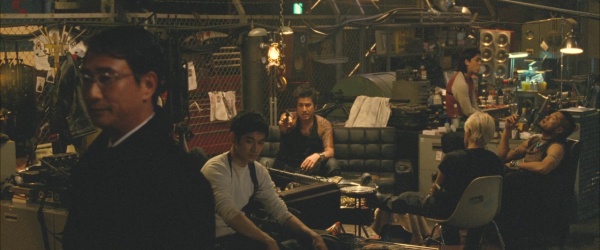
[[File:W7M 62.jpg|thumb|none|600px|The M4A1s (highlighted in red rectangles) as seen in the Wild 7 hideout.]] | [[File:W7M 62.jpg|thumb|none|600px|The M4A1s (highlighted in red rectangles) as seen in the Wild 7 hideout.]] | ||
| Line 191: | Line 164: | ||
=Shotguns= | =Shotguns= | ||
| − | |||
==Benelli M4== | ==Benelli M4== | ||
| − | Photos of the Benelli M4 are seen in Yuki Honma's hideout. It appears that the photos were based on the ones uploaded to IMFDB. | + | Photos of the [[Benelli M4]] are seen in Yuki Honma's hideout. It appears that the photos were based on the ones uploaded to IMFDB. |
| − | |||
[[Image:M4Super90.jpg|thumb|none|450px|Benelli M4 Super 90 with 7-shot tube - 12 Gauge.]] | [[Image:M4Super90.jpg|thumb|none|450px|Benelli M4 Super 90 with 7-shot tube - 12 Gauge.]] | ||
[[Image:BenelliM4FSC.jpg|thumb|none|450px|Benelli M4 NFA with collapsed stock (short barreled version) - 12 Gauge]] | [[Image:BenelliM4FSC.jpg|thumb|none|450px|Benelli M4 NFA with collapsed stock (short barreled version) - 12 Gauge]] | ||
| Line 200: | Line 171: | ||
=Sniper Rifles= | =Sniper Rifles= | ||
| − | |||
==Remington 700PSS== | ==Remington 700PSS== | ||
| − | Special Assault Team snipers are armed with the Remington 700PSS, first seen in the prologue as the sniper teams conduct overwatch on the bank. | + | Special Assault Team snipers are armed with the [[Remington 700PSS]], first seen in the prologue as the sniper teams conduct overwatch on the bank. |
| − | |||
[[Image:RemingtonPSS700.jpg|thumb|none|400px|Remington 700PSS .300 Win Mag with Leupold Mark 4 scope and Harris bipod.]] | [[Image:RemingtonPSS700.jpg|thumb|none|400px|Remington 700PSS .300 Win Mag with Leupold Mark 4 scope and Harris bipod.]] | ||
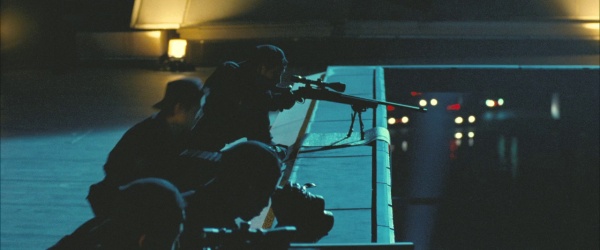
[[File:W7M 04.jpg|thumb|none|600px|A SAT sniper (foreground) aim the 700PSS towards the bank entrance from the roof of a neighboring building.]] | [[File:W7M 04.jpg|thumb|none|600px|A SAT sniper (foreground) aim the 700PSS towards the bank entrance from the roof of a neighboring building.]] | ||
| Line 210: | Line 179: | ||
==Remington 700SPS Tactical== | ==Remington 700SPS Tactical== | ||
| − | A Special Assault Team sniper is armed with what appears to be a Remington 700SPS Tactical, first seen in the prologue as the sniper teams conduct overwatch on the bank. | + | A Special Assault Team sniper is armed with what appears to be a [[Remington 700SPS]] Tactical, first seen in the prologue as the sniper teams conduct overwatch on the bank. |
| − | |||
[[File:Rem700SPS.jpg|thumb|none|450px|Remington 700 SPS Tactical.]] | [[File:Rem700SPS.jpg|thumb|none|450px|Remington 700 SPS Tactical.]] | ||
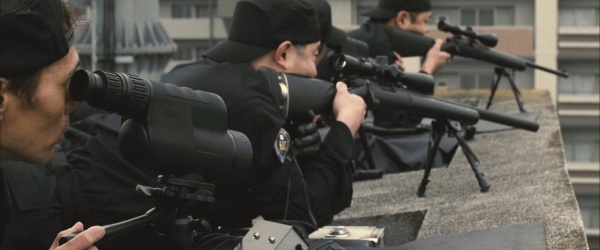
[[File:W7M 05.jpg|thumb|none|600px|The front view of the SAT sniper team (left) aiming the SPS Tactical towards the bank entrance.]] | [[File:W7M 05.jpg|thumb|none|600px|The front view of the SAT sniper team (left) aiming the SPS Tactical towards the bank entrance.]] | ||
| Line 217: | Line 185: | ||
=Machine Guns= | =Machine Guns= | ||
| − | |||
==M60== | ==M60== | ||
| − | A M60 is seen on a coffee table with a belt of 7.62 NATO ammo in front of Oyabun and Sox at the Wild 7 hideout. | + | A [[M60]] is seen on a coffee table with a belt of 7.62 NATO ammo in front of Oyabun and Sox at the Wild 7 hideout. |
| − | |||
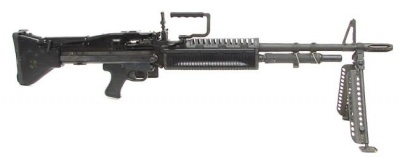
[[Image:M60_01.jpg|thumb|none|400px|M60 7.62x51mm NATO]] | [[Image:M60_01.jpg|thumb|none|400px|M60 7.62x51mm NATO]] | ||
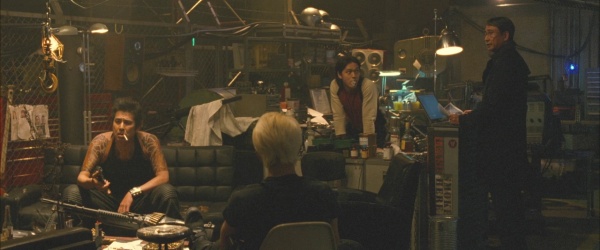
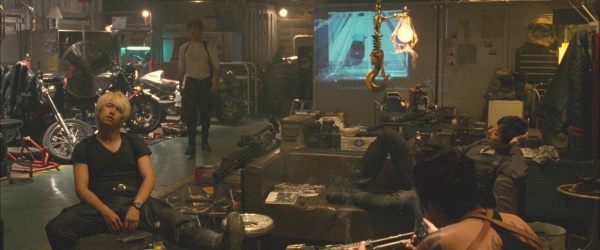
[[File:W7M 23.jpg|thumb|none|600px|The M60 on the coffee table near Oyabun and Sox.]] | [[File:W7M 23.jpg|thumb|none|600px|The M60 on the coffee table near Oyabun and Sox.]] | ||
==M134== | ==M134== | ||
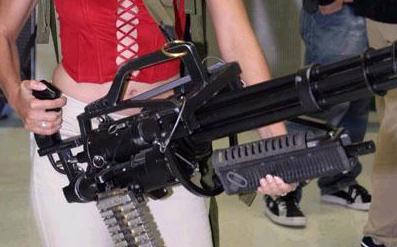
| − | A handheld M134 is seen near Sox at the Wild 7 hideout. | + | A handheld [[M134 Minigun]] is seen near Sox at the Wild 7 hideout. |
| − | |||
[[Image:Minigun 1.JPG|thumb|none|400px|"Ol' Painless" Handheld M134 Minigun with M60 Handguard, as seen in ''Predator''.]] | [[Image:Minigun 1.JPG|thumb|none|400px|"Ol' Painless" Handheld M134 Minigun with M60 Handguard, as seen in ''Predator''.]] | ||
[[File:W7M 25.jpg|thumb|none|600px|The handheld M134 near Sox.]] | [[File:W7M 25.jpg|thumb|none|600px|The handheld M134 near Sox.]] | ||
==Sumitomo M2HB== | ==Sumitomo M2HB== | ||
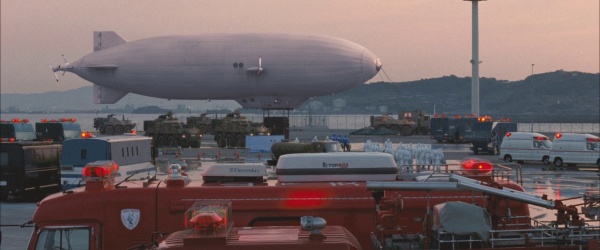
| − | The Sumitomo M2HB is used as an anti-personnel weapon, mounted on Japanese Ground Self-Defense Forces Mitsubishi Type 82s. One of them is seen in the Wild 7 hideout. | + | The [[Browning M2HB|Sumitomo M2HB]] is used as an anti-personnel weapon, mounted on Japanese Ground Self-Defense Forces Mitsubishi Type 82s. One of them is seen in the Wild 7 hideout. |
| − | |||
[[Image:BrowningM2_plain.jpg|thumb|none|400px|Sumitomo M2HB - .50 BMG.]] | [[Image:BrowningM2_plain.jpg|thumb|none|400px|Sumitomo M2HB - .50 BMG.]] | ||
[[File:W7M 82.jpg|thumb|none|600px|Type 82s with mounted Sumitomo M2HBs as the blimp is secured by the JGSDF and the Tokyo Metropolitan Police Department.]] | [[File:W7M 82.jpg|thumb|none|600px|Type 82s with mounted Sumitomo M2HBs as the blimp is secured by the JGSDF and the Tokyo Metropolitan Police Department.]] | ||
| Line 238: | Line 202: | ||
=Grenades= | =Grenades= | ||
| − | + | ==AN/M8 HC smoke grenade== | |
| − | ==AN/M8 smoke grenade== | + | Pyro uses a [[AN/M8 HC smoke grenade]] to fend off an incoming Special Assault Team attack as he and Hiba charge for the control room. |
| − | Pyro uses a AN/ | ||
| − | |||
[[Image:AN-M8.jpg|thumb|none|300px|AN/M8 smoke grenade]] | [[Image:AN-M8.jpg|thumb|none|300px|AN/M8 smoke grenade]] | ||
[[File:W7M 58.jpg|thumb|none|600px|The primed AN/M8 smoke grenade discharging smoke.]] | [[File:W7M 58.jpg|thumb|none|600px|The primed AN/M8 smoke grenade discharging smoke.]] | ||
| Line 248: | Line 210: | ||
==Smoke Grenades== | ==Smoke Grenades== | ||
Special Assault Team operators use smoke grenades after they breach into the besieged PSU building near the end of the movie. Unfortunately, a SAT assaulter kicks it away after they realize that they're being blinded by smoke. | Special Assault Team operators use smoke grenades after they breach into the besieged PSU building near the end of the movie. Unfortunately, a SAT assaulter kicks it away after they realize that they're being blinded by smoke. | ||
| − | |||
[[File:W7M 42.jpg|thumb|none|600px|The primed smoke grenade releases gray smoke.]] | [[File:W7M 42.jpg|thumb|none|600px|The primed smoke grenade releases gray smoke.]] | ||
=Grenade Launchers= | =Grenade Launchers= | ||
| − | |||
==CAW 40mm Grenade Launcher== | ==CAW 40mm Grenade Launcher== | ||
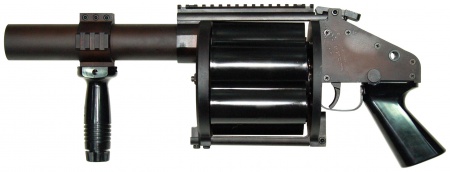
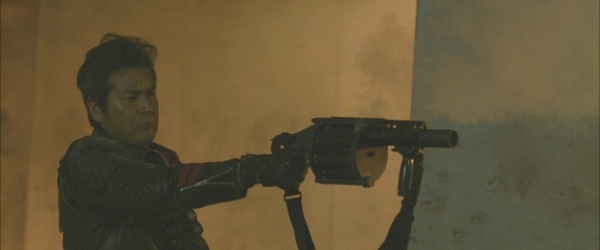
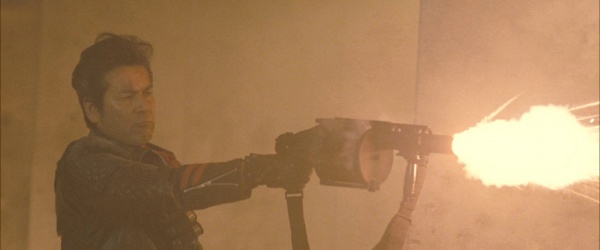
A [[CAW 40mm Grenade Launcher|Craft Apple Works (CAW) 40mm airsoft launcher]] is used by Oyabun during the PSU building raid to fend off incoming SAT teams. Note that the depiction of it firing 40mm grenades is done by using special effects. It's equipped with a RIS assembly, a foregrip and a sling. | A [[CAW 40mm Grenade Launcher|Craft Apple Works (CAW) 40mm airsoft launcher]] is used by Oyabun during the PSU building raid to fend off incoming SAT teams. Note that the depiction of it firing 40mm grenades is done by using special effects. It's equipped with a RIS assembly, a foregrip and a sling. | ||
| − | |||
[[Image:CAWlauncher.jpg|thumb|none|450px|CAW Airsoft Launcher - (fake) 40mm.]] | [[Image:CAWlauncher.jpg|thumb|none|450px|CAW Airsoft Launcher - (fake) 40mm.]] | ||
[[File:W7M 74.jpg|thumb|none|600px|The CAW grenade launcher on Oyabun's lap. Note the RIS assembly attached.]] | [[File:W7M 74.jpg|thumb|none|600px|The CAW grenade launcher on Oyabun's lap. Note the RIS assembly attached.]] | ||
| Line 263: | Line 222: | ||
==Tokyo Marui Tactical Launcher== | ==Tokyo Marui Tactical Launcher== | ||
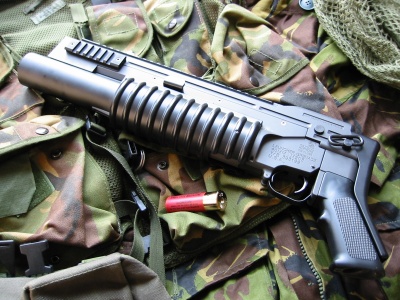
Pyro uses a Tokyo Marui M203 Tactical Launcher to fire off a flash grenade at a last measure to assist Hiba in getting to the control room. | Pyro uses a Tokyo Marui M203 Tactical Launcher to fire off a flash grenade at a last measure to assist Hiba in getting to the control room. | ||
| − | |||
[[File:TM Tactical Launcher.jpg|thumb|none|400px|Tokyo Marui Tactical Launcher.]] | [[File:TM Tactical Launcher.jpg|thumb|none|400px|Tokyo Marui Tactical Launcher.]] | ||
[[File:W7M 65.jpg|thumb|none|600px|The TM Tactical Launcher slung on Pyro's back when Wild 7 storms the PSU building entrance. Also note the M4A1 slung on his back as well.]] | [[File:W7M 65.jpg|thumb|none|600px|The TM Tactical Launcher slung on Pyro's back when Wild 7 storms the PSU building entrance. Also note the M4A1 slung on his back as well.]] | ||
| Line 269: | Line 227: | ||
=Rocket Launchers= | =Rocket Launchers= | ||
| − | |||
==AT4== | ==AT4== | ||
| − | BBQ holds onto a AT4 rocket launcher when the Wild 7 big rig is driven to the PSU building. A couple of AT4 rocket launchers are used by Hebopie during the raid on the PSU building. He only uses it once with the other one never used he was subdued by the Special Assault Team. | + | BBQ holds onto a [[AT4]] rocket launcher when the Wild 7 big rig is driven to the PSU building. A couple of AT4 rocket launchers are used by Hebopie during the raid on the PSU building. He only uses it once with the other one never used he was subdued by the Special Assault Team. |
| − | |||
[[Image:AT-4Launcher.jpg|thumb|none|400px|M136 AT4 84mm.]] | [[Image:AT-4Launcher.jpg|thumb|none|400px|M136 AT4 84mm.]] | ||
[[File:W7M 69.jpg|thumb|none|600px|BBQ clutching onto the AT4 tube with the M4A1 and the MP5K.]] | [[File:W7M 69.jpg|thumb|none|600px|BBQ clutching onto the AT4 tube with the M4A1 and the MP5K.]] | ||
| Line 281: | Line 237: | ||
==Custom Rocket Launcher== | ==Custom Rocket Launcher== | ||
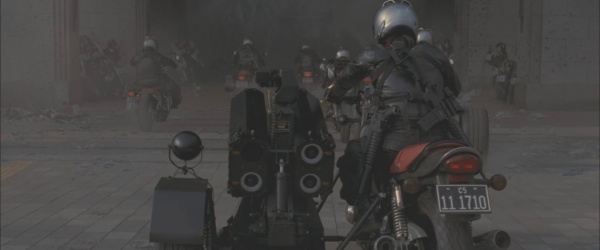
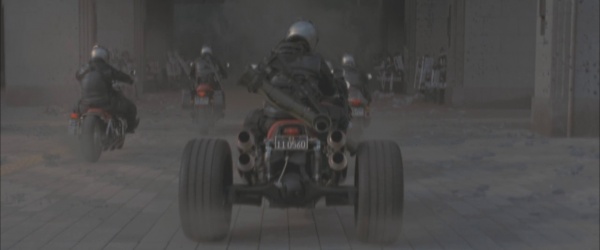
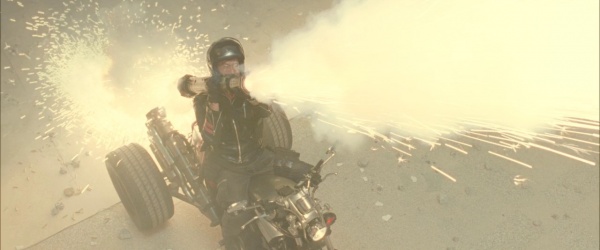
A custom rocket launcher is seen mounted on Pyro's motorbike throughout the entire movie. | A custom rocket launcher is seen mounted on Pyro's motorbike throughout the entire movie. | ||
| − | |||
[[File:W7M 65.jpg|thumb|none|600px|The custom rocket launcher attached on Pyro's bike when Wild 7 storms the PSU building entrance. Note the absence of a loaded missile since it was previously used to breach the entrance.]] | [[File:W7M 65.jpg|thumb|none|600px|The custom rocket launcher attached on Pyro's bike when Wild 7 storms the PSU building entrance. Note the absence of a loaded missile since it was previously used to breach the entrance.]] | ||
[[File:W7M 67.jpg|thumb|none|600px|A good closeup of the rocket launcher's missile tubes, mini-spotlight and laser designator.]] | [[File:W7M 67.jpg|thumb|none|600px|A good closeup of the rocket launcher's missile tubes, mini-spotlight and laser designator.]] | ||
| Line 287: | Line 242: | ||
=Others= | =Others= | ||
| − | |||
==Automated Turrets== | ==Automated Turrets== | ||
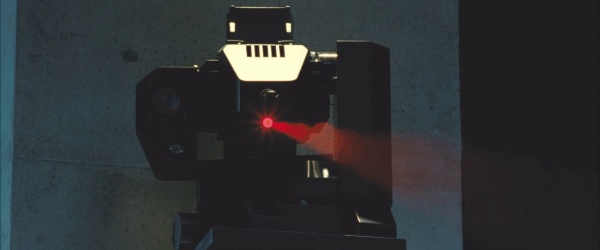
Automated turrets are installed in the Public Security Unit control room as an anti-personnel security measure, prominently used when the Wild 7 unit storms the PSU building in order to confront Kiryu. | Automated turrets are installed in the Public Security Unit control room as an anti-personnel security measure, prominently used when the Wild 7 unit storms the PSU building in order to confront Kiryu. | ||
| − | |||
[[File:W7M 20.jpg|thumb|none|600px|The automated turret controlled by Kiryu opens fire above Hiba's head.]] | [[File:W7M 20.jpg|thumb|none|600px|The automated turret controlled by Kiryu opens fire above Hiba's head.]] | ||
[[File:W7M 72.jpg|thumb|none|600px|The laser sight trained on Hiba's forehead after he enters the PSU control room.]] | [[File:W7M 72.jpg|thumb|none|600px|The laser sight trained on Hiba's forehead after he enters the PSU control room.]] | ||
Latest revision as of 17:50, 8 March 2023
The following weapons were used in the film Wild 7:
Pistols
Beretta 92F
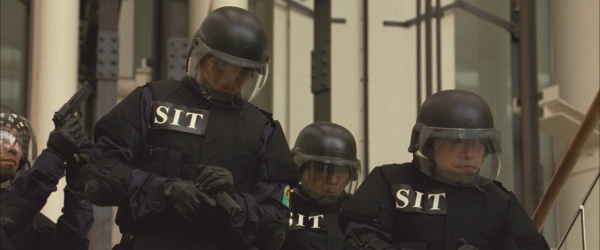
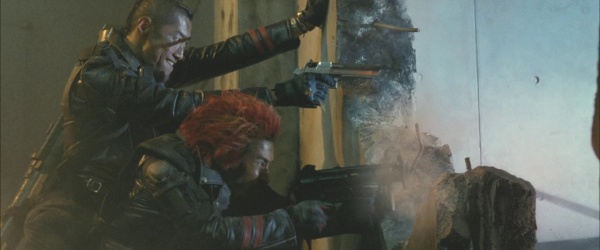
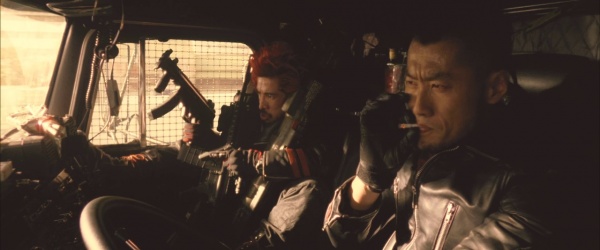
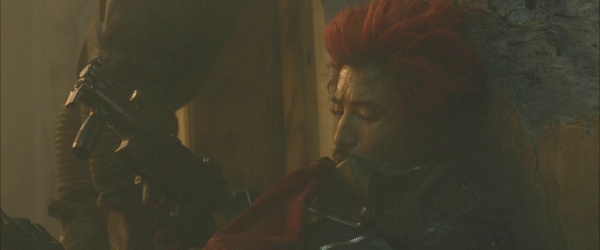
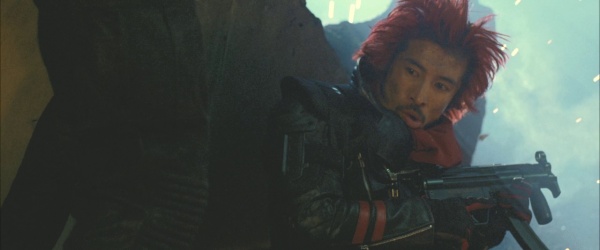
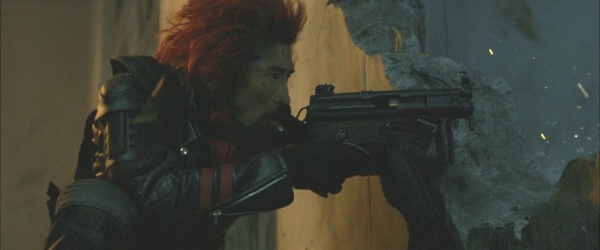
Pyro (Ryuhei Maruyama) uses a Beretta 92F as his main sidearm throughout the movie. Numerous bad guys use the 92F as their main sidearm during a shootout in a mall. Special Investigation Team offices use them near the end of the movie when Wild 7's big rig truck is seen heading to the Public Security Unit building.
Colt MK IV Series 70
Sox (Tsuyoshi Abe) uses a Colt MK IV Series 70 as his main sidearm throughout the movie.
Colt Woodsman
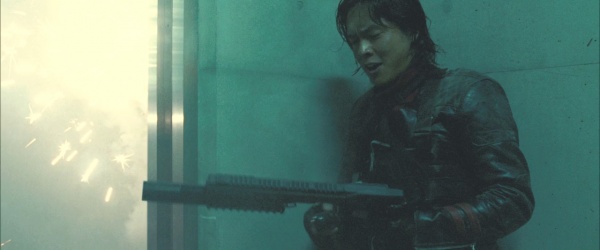
A Colt Woodsman modified with a picatinny railing over the barrel is used by Dairoku Hiba (Eita Nagayama) throughout the movie as his main sidearm.
Glock 17
Yuki Honma (Kyoko Fukada) uses a Glock 17 as her main sidearm while as a vigilante. One of the bad guys in the mall shootout also uses it as his personal sidearm.
CAA Tactical RONI-G1
Yuki uses a CAA Tactical RONI-G1 carbine when she uses it to assassinate a target responsible for the bombing attack she was involved in years ago.
Heckler & Koch USP
Ex-Tokyo Metropolitan Police Department Inspector Masaru Kusanami (Kiichi Nakai) uses a Heckler & Koch USP while disguised as a Special Assault Team operator near the end of the movie.
IMI Desert Eagle
A stainless steel IMI Desert Eagle is used by Hebopie (Yusuke Hirayama) as his main sidearm throughout the movie.
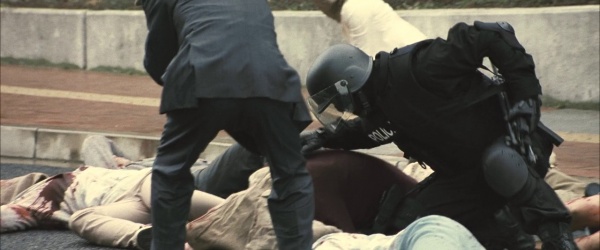
Intractec TEC-9
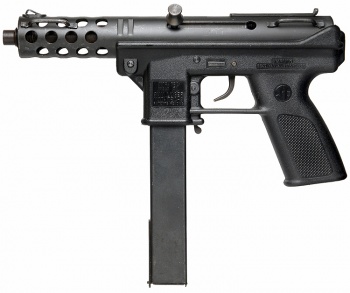
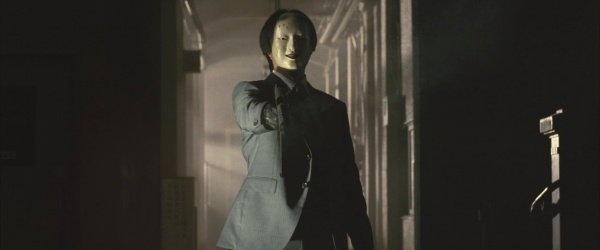
A masked criminal uses an Intratec TEC-9 in the prologue of the movie, which is notably used to execute hostages during a bank heist.
M1911A1
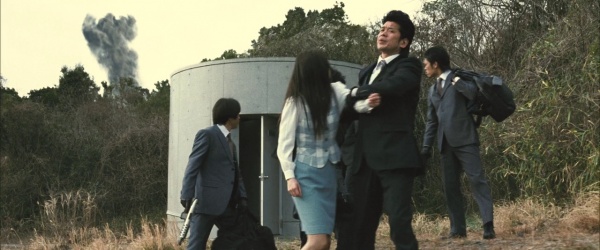
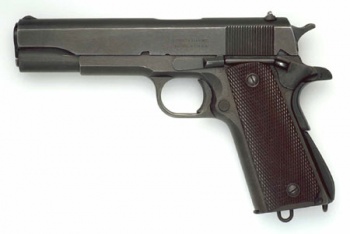
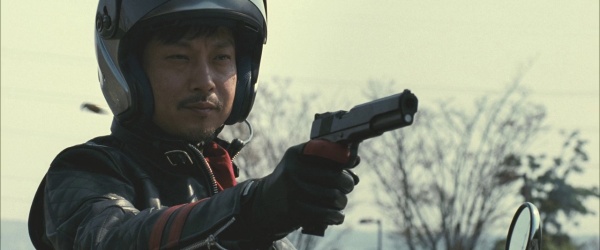
Sekai (Kippei Shina) uses a M1911A1 as his main sidearm throughout the whole movie.
Norinco Type 54
An armed criminal during a Wild 7 operation is armed with a stainless steel Norinco Type 54, but it was never fired.
Walther PPK
BBQ (Minoru Matsumoto) loads up on the Walther PPK throughout the entire movie, serving as his main sidearm.
Revolvers
Colt Python
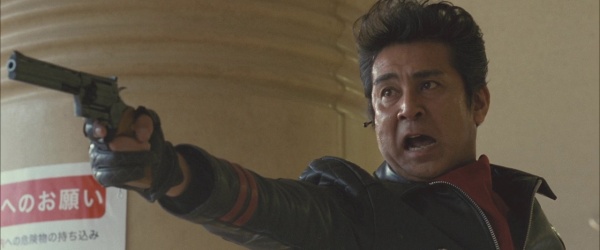
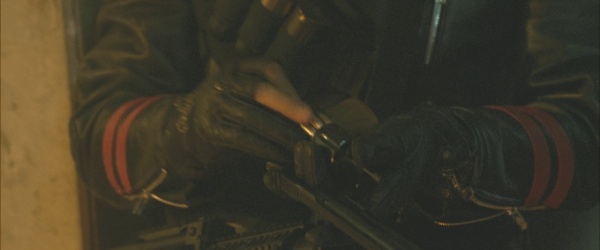
Oyabun (Takashi Ukaji) uses a Colt Python as his main sidearm throughout the movie.
Smith & Wesson Model 36
Plainclothes police officers use Smith & Wesson Model 36s when they are ordered to confront the rogue Wild 7 team. The revolver is used by the National Police Agency as an authorized sidearm even though they are allowed to use semi-automatics.
Submachine Guns
Beretta PM12S
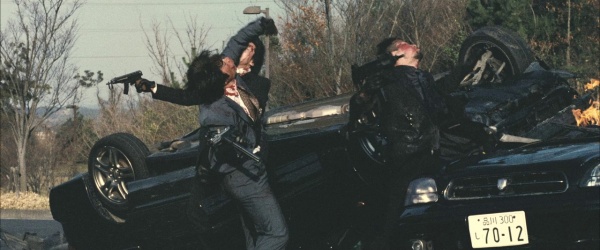
Masked criminals during a Wild 7 operation on a highway were armed with Beretta PM12S submachine guns.
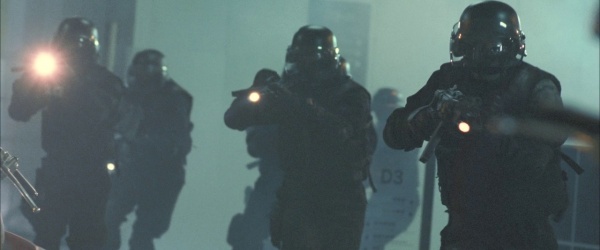
Heckler & Koch MP5A2
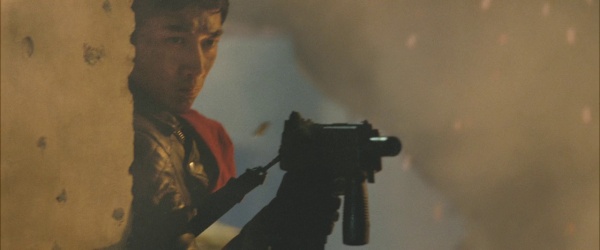
A Special Assault Team operator uses a Heckler & Koch MP5A2 with a mounted weaponlight during the shootout at the PSU building.
Heckler & Koch MP5A3
Special Assault Team operators are armed with Heckler & Koch MP5A3s as the main submachine gun in the movie.
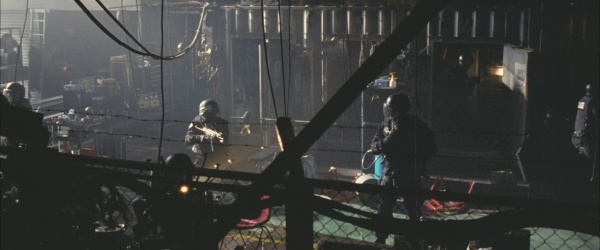
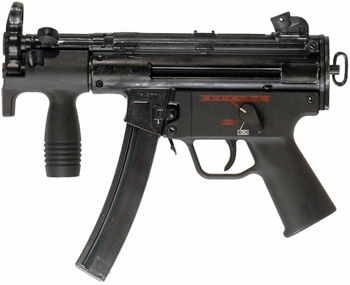
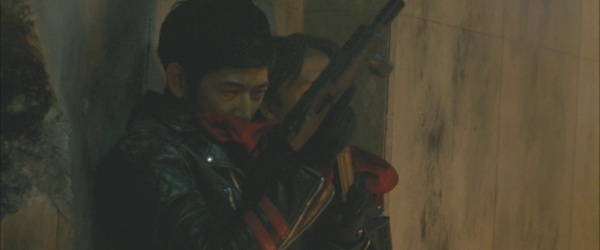
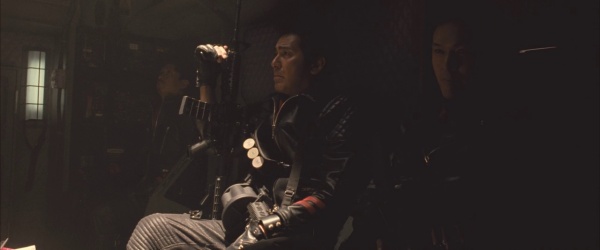
Heckler & Koch MP5K
BBQ uses a Heckler & Koch MP5K from the Wild 7 hideout during the raid on the PSU building in a shootout with the Special Assault Team.
IMI Uzi
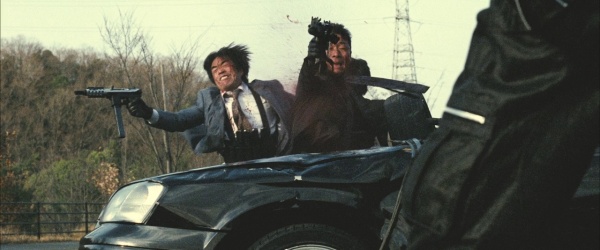
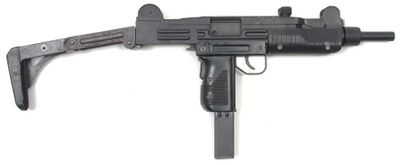
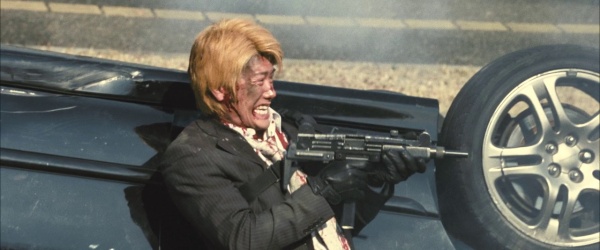
A couple of criminals uses IMI Uzis after being wounded from a car crash at the start of the movie.
IMI Micro Uzi Pistol
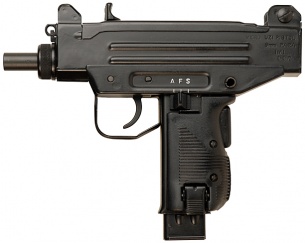
A masked criminal uses an IMI Micro Uzi Pistol during a bank robbery at the start of the movie.
Sa. Vz.61 Skorpion
A couple of criminals use Sa. Vz.61 Skorpions when they were ambushed by the Wild 7 big rig truck.
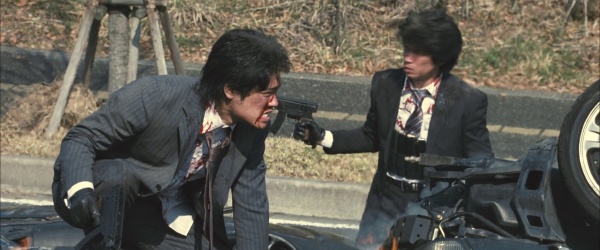
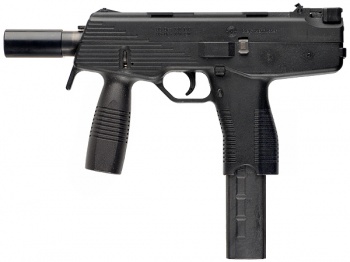
Steyr TMP
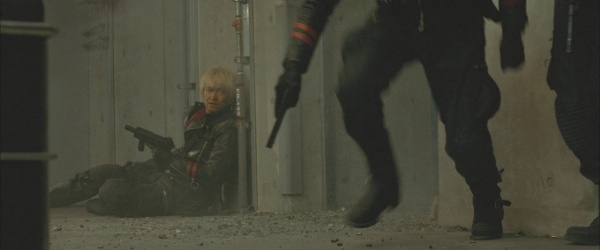
Hiba uses a Steyr TMP as his primary weapon during the raid on the PSU building after the Special Assault Team is deployed to secure the area. Sox later uses it to fend off the SAT as Hiba attempts to get into the building's control room.
Assault Rifles
Colt Commando
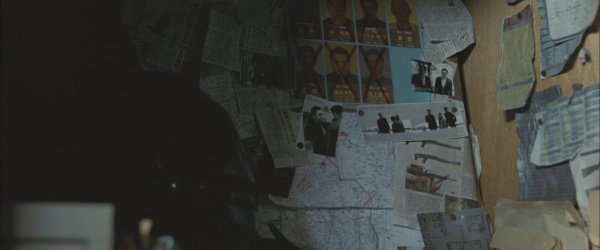
A Colt Commando can be seen in a newspaper clipping in Yuki Honma's hideout.
Colt M4A1
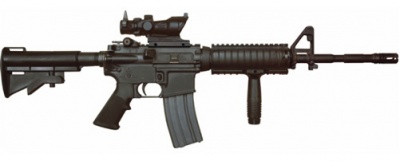
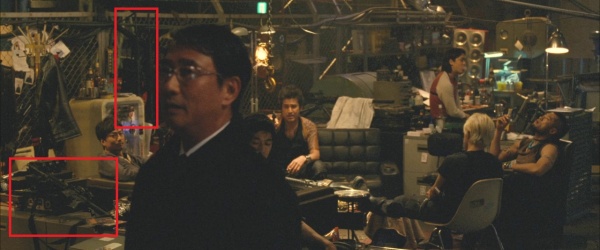
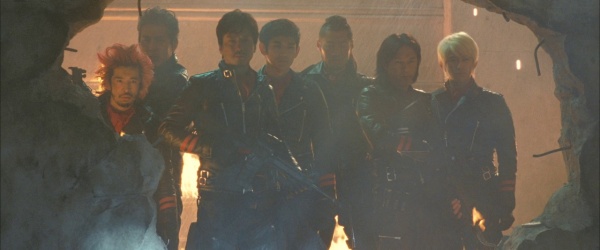
M4A1s are seen in the movie, seen in the Wild 7 hideout before the unit took them on the raid at the PSU building after the group was declared as a rogue police unit.
Shotguns
Benelli M4
Photos of the Benelli M4 are seen in Yuki Honma's hideout. It appears that the photos were based on the ones uploaded to IMFDB.
Sniper Rifles
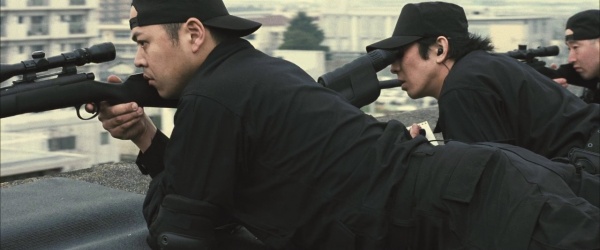
Remington 700PSS
Special Assault Team snipers are armed with the Remington 700PSS, first seen in the prologue as the sniper teams conduct overwatch on the bank.
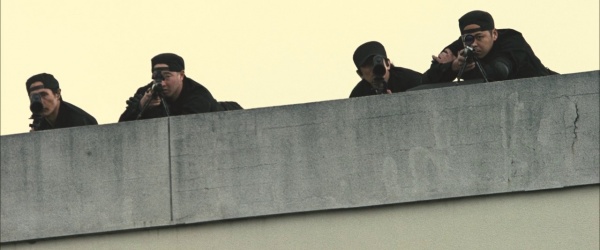
Remington 700SPS Tactical
A Special Assault Team sniper is armed with what appears to be a Remington 700SPS Tactical, first seen in the prologue as the sniper teams conduct overwatch on the bank.
Machine Guns
M60
A M60 is seen on a coffee table with a belt of 7.62 NATO ammo in front of Oyabun and Sox at the Wild 7 hideout.
M134
A handheld M134 Minigun is seen near Sox at the Wild 7 hideout.
Sumitomo M2HB
The Sumitomo M2HB is used as an anti-personnel weapon, mounted on Japanese Ground Self-Defense Forces Mitsubishi Type 82s. One of them is seen in the Wild 7 hideout.
Grenades
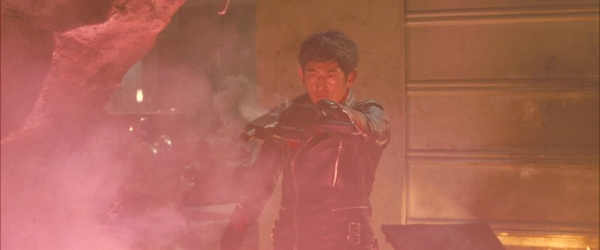
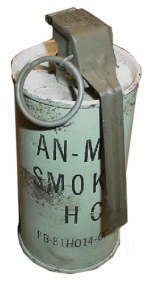
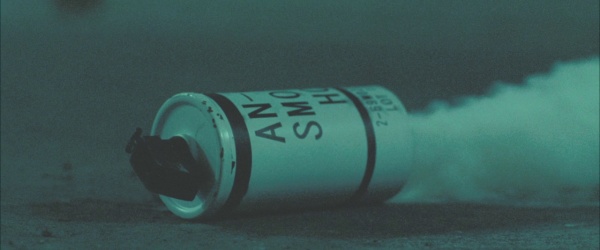
AN/M8 HC smoke grenade
Pyro uses a AN/M8 HC smoke grenade to fend off an incoming Special Assault Team attack as he and Hiba charge for the control room.
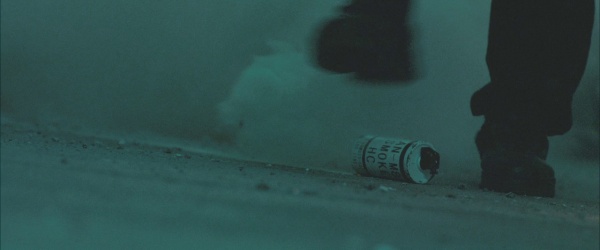
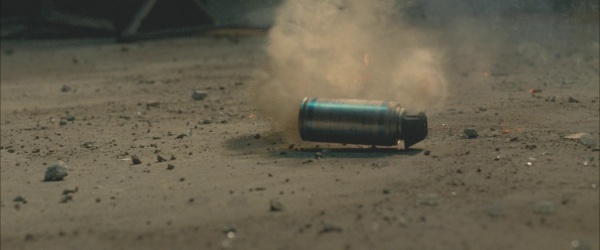
Smoke Grenades
Special Assault Team operators use smoke grenades after they breach into the besieged PSU building near the end of the movie. Unfortunately, a SAT assaulter kicks it away after they realize that they're being blinded by smoke.
Grenade Launchers
CAW 40mm Grenade Launcher
A Craft Apple Works (CAW) 40mm airsoft launcher is used by Oyabun during the PSU building raid to fend off incoming SAT teams. Note that the depiction of it firing 40mm grenades is done by using special effects. It's equipped with a RIS assembly, a foregrip and a sling.
Tokyo Marui Tactical Launcher
Pyro uses a Tokyo Marui M203 Tactical Launcher to fire off a flash grenade at a last measure to assist Hiba in getting to the control room.
Rocket Launchers
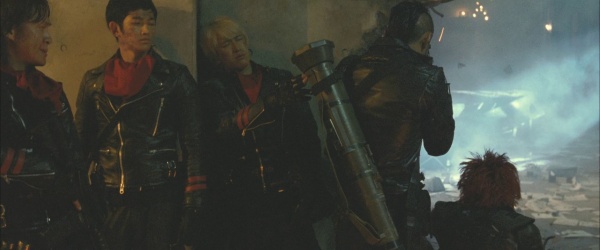
AT4
BBQ holds onto a AT4 rocket launcher when the Wild 7 big rig is driven to the PSU building. A couple of AT4 rocket launchers are used by Hebopie during the raid on the PSU building. He only uses it once with the other one never used he was subdued by the Special Assault Team.
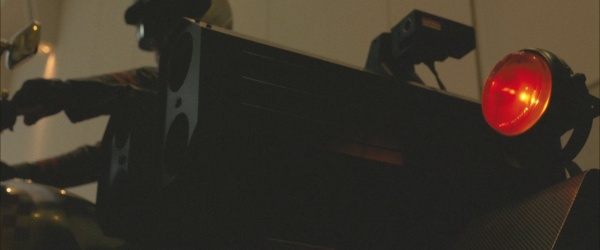
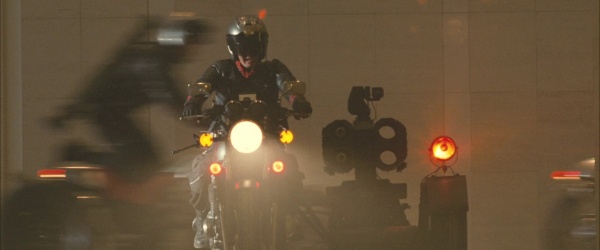
Custom Rocket Launcher
A custom rocket launcher is seen mounted on Pyro's motorbike throughout the entire movie.
Others
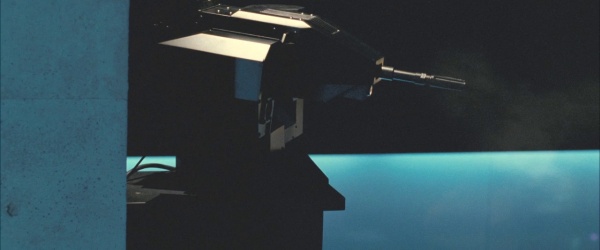
Automated Turrets
Automated turrets are installed in the Public Security Unit control room as an anti-personnel security measure, prominently used when the Wild 7 unit storms the PSU building in order to confront Kiryu.
