| If you have been locked out of your account you can request a password reset here. |
Difference between revisions of "Strike Back - Season 3"
Gunfan2818 (talk | contribs) |
|||
| Line 17: | Line 17: | ||
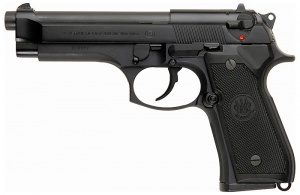
[[File:BerettaM92FS.jpg|thumb|none|300px|Beretta 92FS - 9x19mm.]] | [[File:BerettaM92FS.jpg|thumb|none|300px|Beretta 92FS - 9x19mm.]] | ||
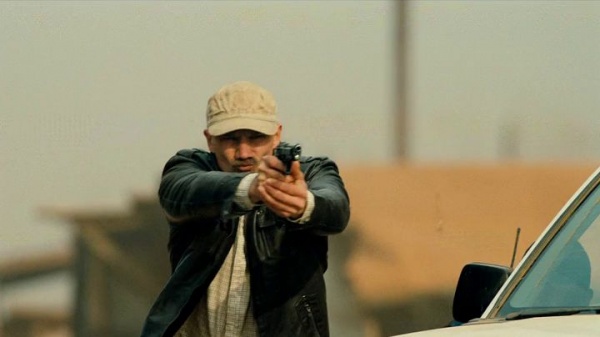
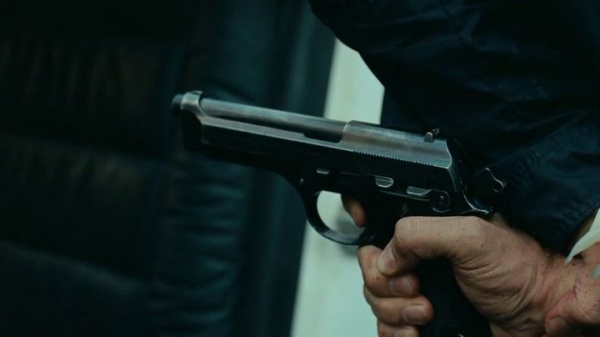
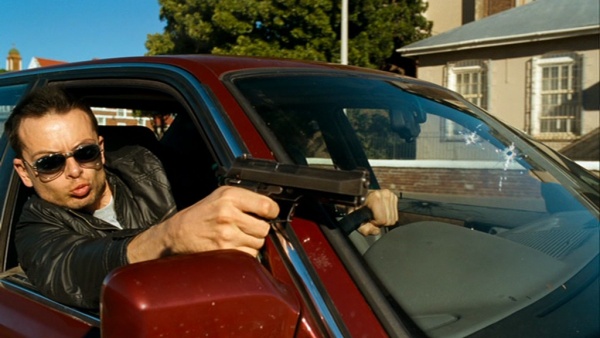
| − | [[File:SBS3-92FS-1.jpg|thumb|none| | + | [[File:SBS3-92FS-1.jpg|thumb|none|600px|A plain-clothes SAPS officer fires a Beretta 92FS at a truck containing a stolen nuclear warhead in episode 9.]] |
==Beretta 92SB== | ==Beretta 92SB== | ||
| Line 24: | Line 24: | ||
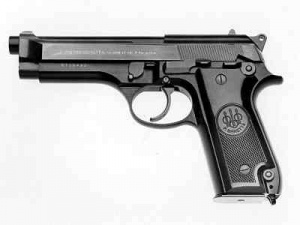
[[File:BerettaM92SB.jpg|thumb|none|300px|Beretta Model 92SB - 9x19mm (note rounded trigger guard and flat bottom magazine).]] | [[File:BerettaM92SB.jpg|thumb|none|300px|Beretta Model 92SB - 9x19mm (note rounded trigger guard and flat bottom magazine).]] | ||
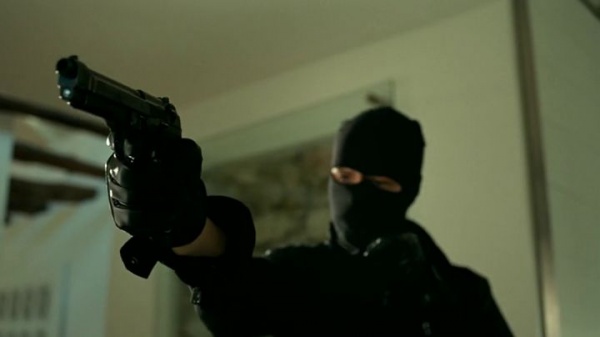
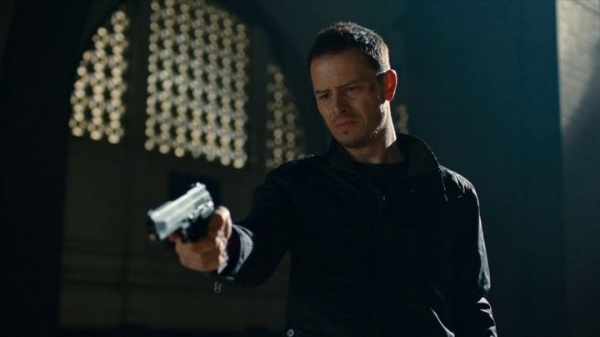
| − | [[File:SBS3-92SB-1.jpg|thumb|none| | + | [[File:SBS3-92SB-1.jpg|thumb|none|600px|Craig Hanson pulls off his mask while holding a Beretta 92SB.]] |
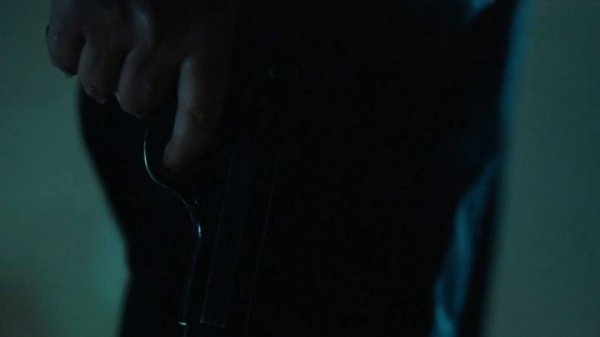
| − | [[File:SBS3-92SB-2.jpg|thumb|none| | + | [[File:SBS3-92SB-2.jpg|thumb|none|600px|A mercenary holds a Beretta 92SB.]] |
==Beretta 92== | ==Beretta 92== | ||
| Line 32: | Line 32: | ||
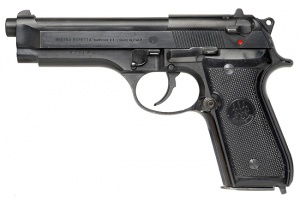
[[File:Beretta92oldest.jpg|thumb|none|300px|Beretta 92 - 9x19mm]] | [[File:Beretta92oldest.jpg|thumb|none|300px|Beretta 92 - 9x19mm]] | ||
| − | [[File:SBS3-92-1.jpg|thumb|none| | + | [[File:SBS3-92-1.jpg|thumb|none|600px|Hanson fires the Beretta 92 while restrained by a pair of flex cuffs.]] |
==Glock 17== | ==Glock 17== | ||
| Line 39: | Line 39: | ||
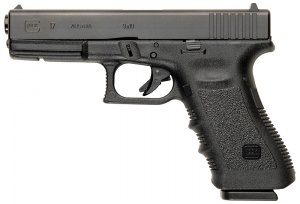
[[Image:Glock173rdGen.jpg|thumb|none|300px|Glock 17 (3rd Gen) - 9x19mm]] | [[Image:Glock173rdGen.jpg|thumb|none|300px|Glock 17 (3rd Gen) - 9x19mm]] | ||
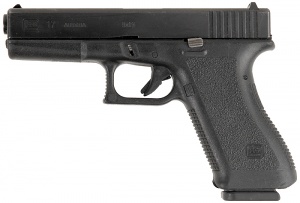
| − | [[Image: | + | [[Image:Glock17EarlyModel.jpg|thumb|none|300px|Glock 17 (2nd Gen) - 9x19mm]] |
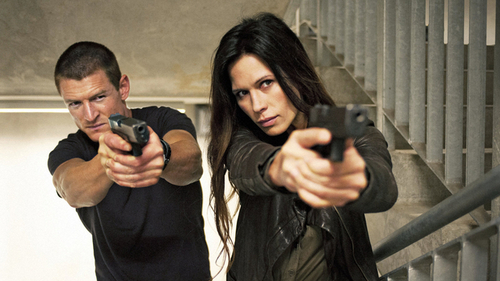
| − | [[Image:Tumblr_maaoq2SwjF1qj00dno1_500.jpg|thumb|none|600px| Stonebridge and Dalton with their Glocks.]] | + | [[Image:Tumblr_maaoq2SwjF1qj00dno1_500.jpg|thumb|none|600px|A publicity still of Stonebridge and Dalton with their Glocks.]] |
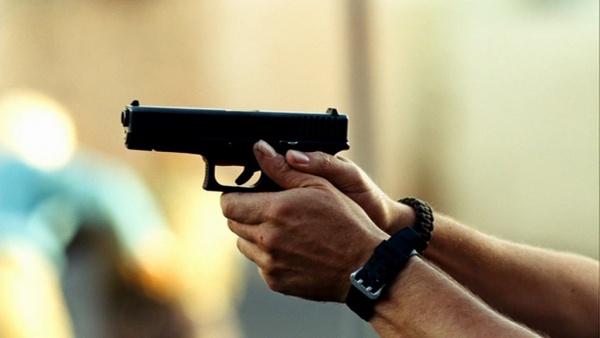
| − | [[File: | + | [[Image:StrikeBackS3E051.jpg|thumb|none|600px|Sgt. Michael Stonebridge firing his [[Glock 17]] in (S3E05).]] |
| − | [[File:SBS3-G17-3.jpg|thumb|none| | + | [[File:StrikeBackS3E052.jpg|thumb|none|600px|A close up of Scott fring his Glock in S3E05).]] |
| − | [[File:SBS3-G17-2.jpg|thumb|none| | + | [[Image:StrikeBackS3E054.jpg|thumb|none|600px|Stonebridge reloads his Glock in (S3E05).]] |
| + | [[Image:StrikeBackS3E055.jpg|thumb|none|600px|Stonebridge firing his Glock in (S3E05).]] | ||
| + | [[Image:StrikeBackS3E061.jpg|thumb|none|600px|Scott aiming his Glock in (S3E06).]] | ||
| + | [[Image:StrikeBackS3E071.jpg|thumb|none|600px|Sgt. Julia Richmond ([[Michelle Lukes]])firing Scott's Glock in (S3E07).]] | ||
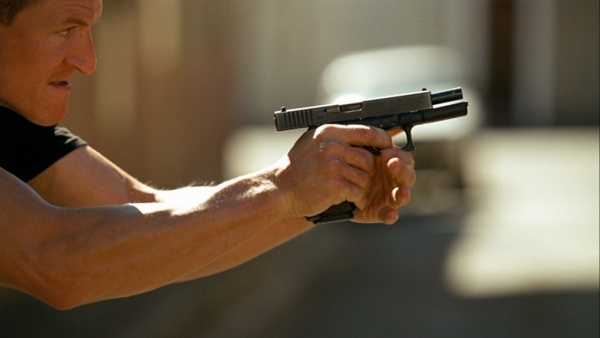
| + | [[File:SBS3-G17-1.jpg|thumb|none|600px|Richmond holds a Glock 17.]] | ||
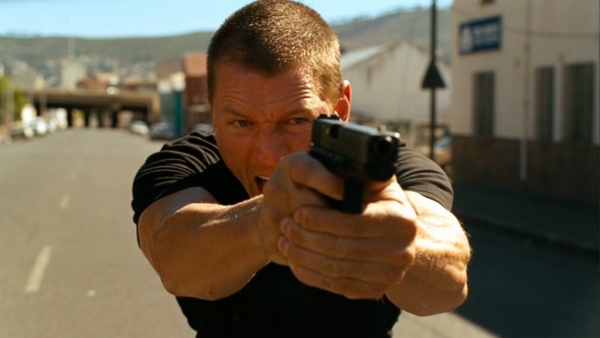
| + | [[File:SBS3-G17-3.jpg|thumb|none|600px|Sgt. Damien Scott ([[Sullivan Stapleton]]) aims a suppressed Glock 17.]] | ||
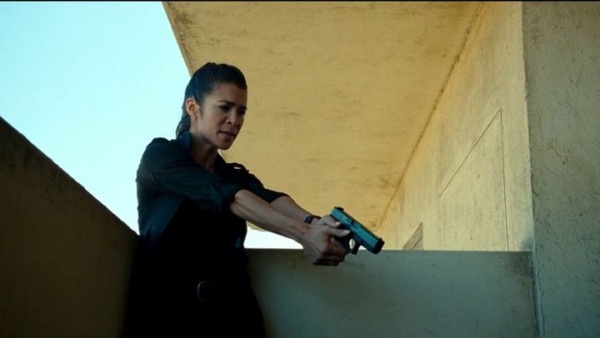
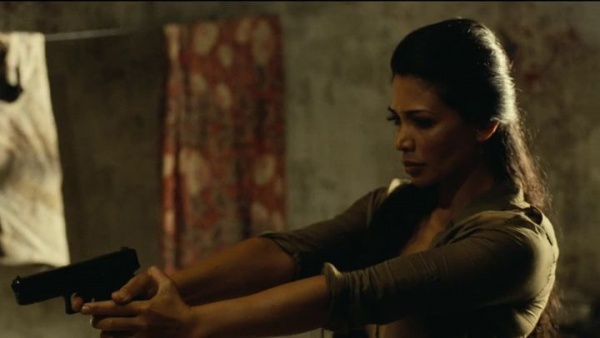
| + | [[File:SBS3-G17-2.jpg|thumb|none|600px|Jessica Kohl ([[Natalie Becker]]) points a Glock 17 at a militant.]] | ||
==Desert Eagle Mark VII == | ==Desert Eagle Mark VII == | ||
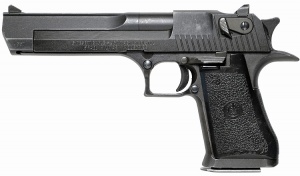
| Line 50: | Line 56: | ||
[[Image:DesertEagle357Black.jpg|thumb|300px|none|Desert Eagle MK VII - .357 Magnum. This is the most commonly seen Desert Eagle pistol in films before 1999.]] | [[Image:DesertEagle357Black.jpg|thumb|300px|none|Desert Eagle MK VII - .357 Magnum. This is the most commonly seen Desert Eagle pistol in films before 1999.]] | ||
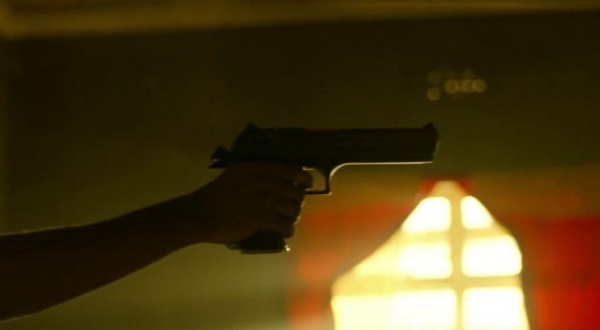
| − | [[File:SBS3-DE-1.jpg|thumb|none| | + | [[File:SBS3-DE-1.jpg|thumb|none|600px|Waabri fires his Desert Eagle.]] |
==Colt M1911A1== | ==Colt M1911A1== | ||
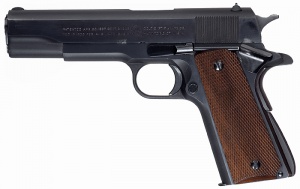
| Line 57: | Line 63: | ||
[[Image:Colt1911A1PreWar.jpg|thumb|300px|none|Pre-War Colt M1911A1 Pistol Commercial - .45 ACP]] | [[Image:Colt1911A1PreWar.jpg|thumb|300px|none|Pre-War Colt M1911A1 Pistol Commercial - .45 ACP]] | ||
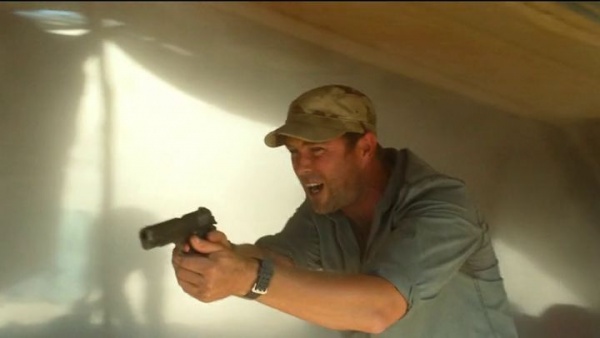
| − | [[File:SBS3-M1911-1.jpg|thumb|none| | + | [[File:SBS3-M1911-1.jpg|thumb|none|600px|Scott holds Markunda's M1911A1 after surviving a militant suicide bombing attack at the Tuareg camp.]] |
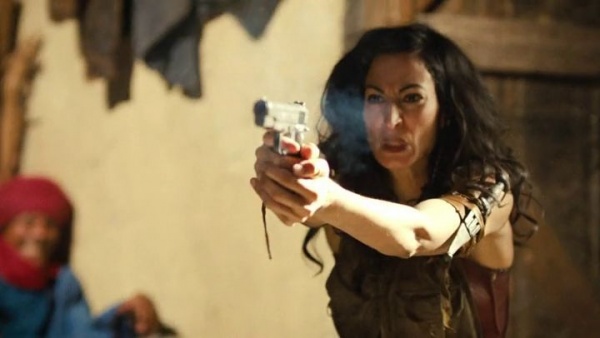
| − | [[File:SBS3-M1911-2.jpg|thumb|none| | + | [[File:SBS3-M1911-2.jpg|thumb|none|600px|Markunda guns down a militant with her M1911A1.]] |
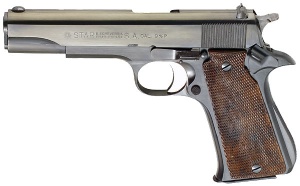
==Star Model BS/Model Super== | ==Star Model BS/Model Super== | ||
| Line 65: | Line 71: | ||
[[File:B-super-large.jpg|thumb|none|300px|Star Model BS/Model Super - 9x19mm.]] | [[File:B-super-large.jpg|thumb|none|300px|Star Model BS/Model Super - 9x19mm.]] | ||
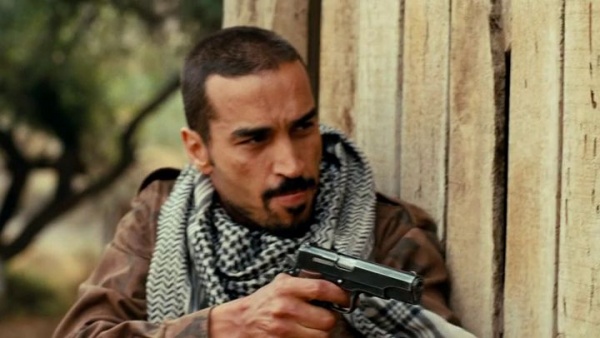
| − | [[File:SBS3-StarBS-1.jpg|thumb|none| | + | [[File:SBS3-StarBS-1.jpg|thumb|none|600px|El Soldat prepares to enter a farmhouse with a Star Model Super in hand.]] |
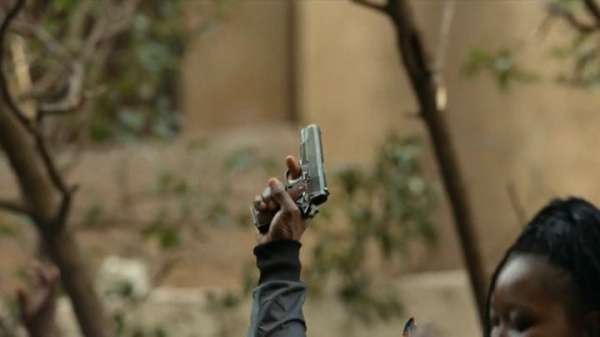
| − | [[File:SBS3-StarBS-2.jpg|thumb|none| | + | [[File:SBS3-StarBS-2.jpg|thumb|none|600px|A Nigerian waves his Star Model Super.]] |
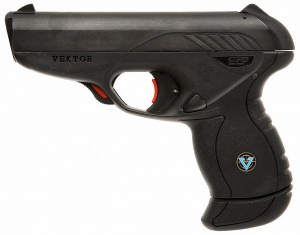
==Vektor CP1== | ==Vektor CP1== | ||
| Line 73: | Line 79: | ||
[[Image:VectorCP1PistolOtherSide.jpg |thumb|none|300px|Vektor CP1 - 9x19mm]] | [[Image:VectorCP1PistolOtherSide.jpg |thumb|none|300px|Vektor CP1 - 9x19mm]] | ||
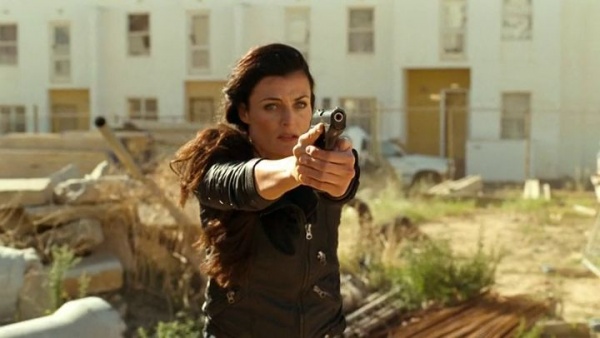
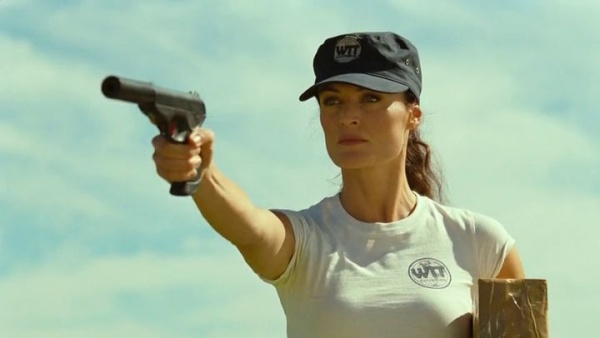
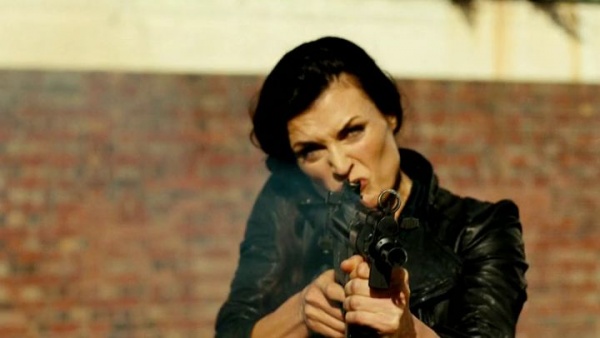
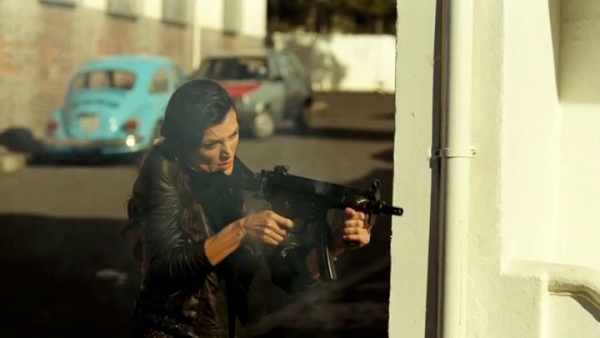
| − | [[File:SBS3-CP1-1.jpg|thumb|none| | + | [[File:SBS3-CP1-1.jpg|thumb|none|600px|Rebecca points the CP1 towards Scott.]] |
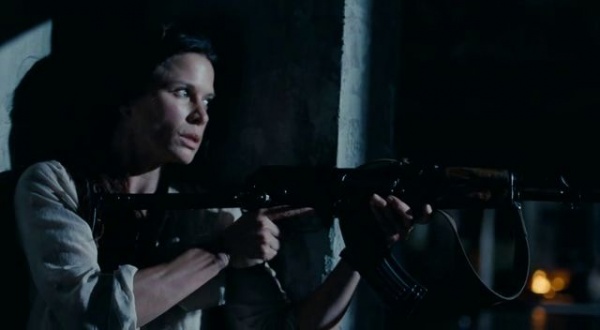
| − | [[File:SBS3-CP1-2.jpg|thumb|none| | + | [[File:SBS3-CP1-2.jpg|thumb|none|600px|Rebecca opens fire with a suppressed Vektor CP1.]] |
==Vektor SP1== | ==Vektor SP1== | ||
| Line 81: | Line 87: | ||
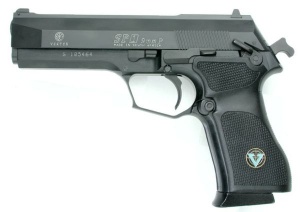
[[Image:Vektor_SP.jpg|thumb|none|300px|Vektor SP1 - 9x19mm]] | [[Image:Vektor_SP.jpg|thumb|none|300px|Vektor SP1 - 9x19mm]] | ||
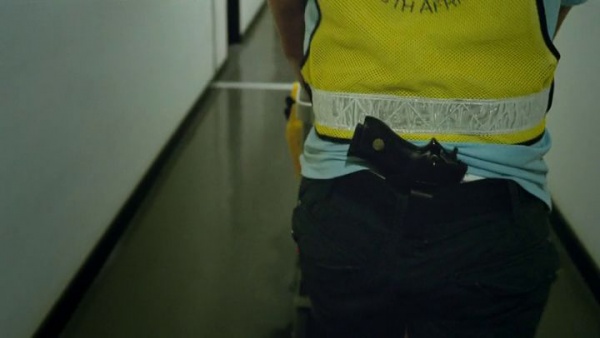
| − | [[File:SBS3-SP1-1.jpg|thumb|none| | + | [[File:SBS3-SP1-1.jpg|thumb|none|600px|A Vektor SP1 tucked into an assassin's waistband.]] |
| − | [[File:SBS3-SP1-2.jpg|thumb|none| | + | [[File:StrikeBackS3E053.jpg|thumb|none|600px|Craig Hanson fires his Vektor SP1.]] |
| − | [[File:SBS3-SP1-3.jpg|thumb|none| | + | [[File:SBS3-SP1-2.jpg|thumb|none|600px|Craig Hanson holds a Vektor SP1.]] |
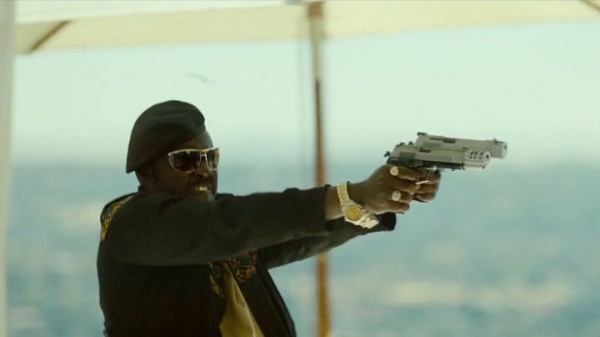
| + | [[File:SBS3-SP1-3.jpg|thumb|none|600px|The Nigerian warlord blasts away with dual SP1s.]] | ||
==Browning Hi-Power== | ==Browning Hi-Power== | ||
| Line 90: | Line 97: | ||
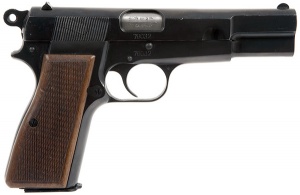
[[Image:BrowningHiPowerPistol9mm.jpg|thumb|none|300px|Classic Commercial Browning Hi-Power (Belgian Mfg) - 9x19mm]] | [[Image:BrowningHiPowerPistol9mm.jpg|thumb|none|300px|Classic Commercial Browning Hi-Power (Belgian Mfg) - 9x19mm]] | ||
| − | [[File:SBS3-BHP-1.jpg|thumb|none| | + | [[File:SBS3-BHP-1.jpg|thumb|none|600px|The assassin holds his Hi-Power while fleeing from the scene.]] |
==Smith & Wesson Model 10 HB== | ==Smith & Wesson Model 10 HB== | ||
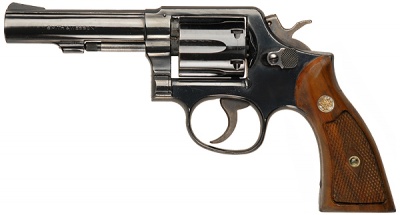
| Line 96: | Line 103: | ||
[[File:S&WModel10HB.jpg|thumb|400px|none|Smith & Wesson Model 10 HB, 4" barrel - .38 Special]] | [[File:S&WModel10HB.jpg|thumb|400px|none|Smith & Wesson Model 10 HB, 4" barrel - .38 Special]] | ||
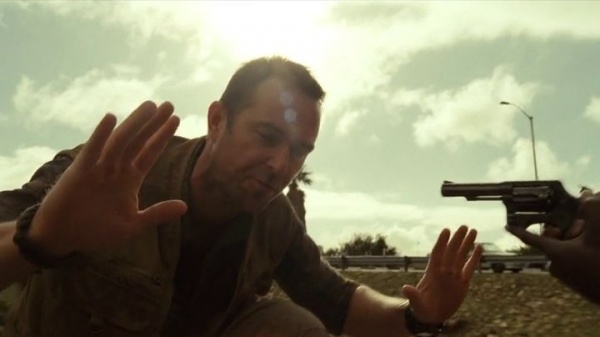
| − | [[File:SBS3-rev-2.jpg|thumb| | + | [[File:SBS3-rev-2.jpg|thumb|600px|none|A revolver is pointed at Scott in Episode 7.]] |
==CZ-75B== | ==CZ-75B== | ||
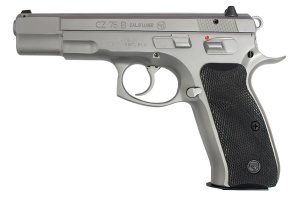
| Line 103: | Line 110: | ||
[[Image:CZ75BSS.jpg|thumb|none|300px|CZ 75B with stainless steel finish - 9x19mm]] | [[Image:CZ75BSS.jpg|thumb|none|300px|CZ 75B with stainless steel finish - 9x19mm]] | ||
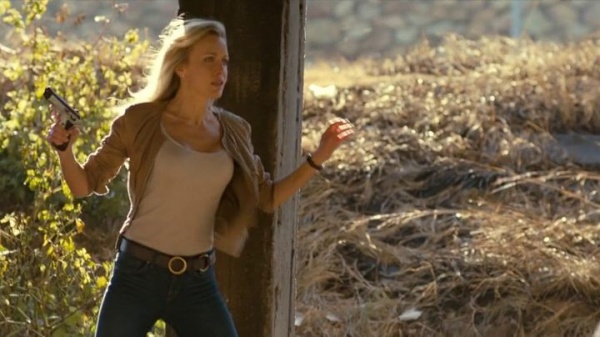
| − | [[File:SBS3-CZ75-1.jpg|thumb|none| | + | [[File:SBS3-CZ75-1.jpg|thumb|none|600px|Bryant holds a two-tone CZ-75B.]] |
=Submachine Guns= | =Submachine Guns= | ||
| Line 111: | Line 118: | ||
Scott uses an [[Armscor BXP]] while defending a British diplomatic convoy from an attack by Somali militants in episode 1. He also uses a BXP with a reflex sight while infiltrating into Mogadishu to search for Dalton and Patrick Burton (Tim Pigott-Smith) after they were kidnapped in the attack. Later in the same episode, one of Matlock's mercenaries uses a BXP with an EOTech sight. A Mossad assassin in episode 5 also fires a BXP, and a Nigerian militant in episode 10 uses a BXP to cover his fleeing boss. | Scott uses an [[Armscor BXP]] while defending a British diplomatic convoy from an attack by Somali militants in episode 1. He also uses a BXP with a reflex sight while infiltrating into Mogadishu to search for Dalton and Patrick Burton (Tim Pigott-Smith) after they were kidnapped in the attack. Later in the same episode, one of Matlock's mercenaries uses a BXP with an EOTech sight. A Mossad assassin in episode 5 also fires a BXP, and a Nigerian militant in episode 10 uses a BXP to cover his fleeing boss. | ||
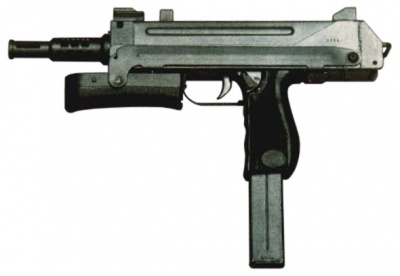
| − | [[Image:MilkorBXP.jpg|thumb|none| | + | [[Image:MilkorBXP.jpg|thumb|none|400px|Armscorp BXP - 9x19mm.]] |
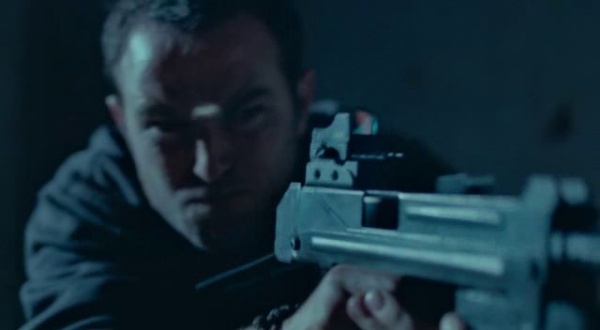
| − | [[File:SBS3-BXP-1.jpg|thumb|none| | + | [[File:SBS3-BXP-1.jpg|thumb|none|600px|Scott opens fire with his BXP in episode 1.]] |
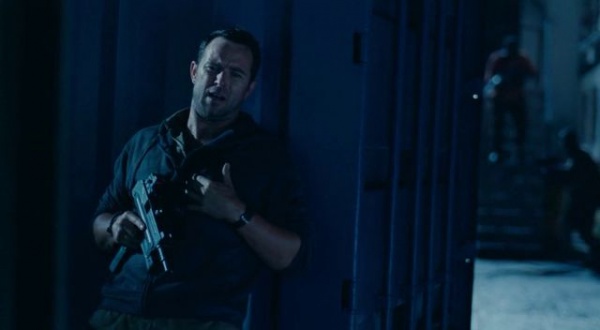
| − | [[File:SBS3-BXP-2.jpg|thumb|none| | + | [[File:SBS3-BXP-2.jpg|thumb|none|600px|Scott holds the BXP while reporting his position.]] |
| − | [[File:SBS3-BXP-4.jpg|thumb|none| | + | [[File:SBS3-BXP-4.jpg|thumb|none|600px|A Mossad assassin fires a BXP.]] |
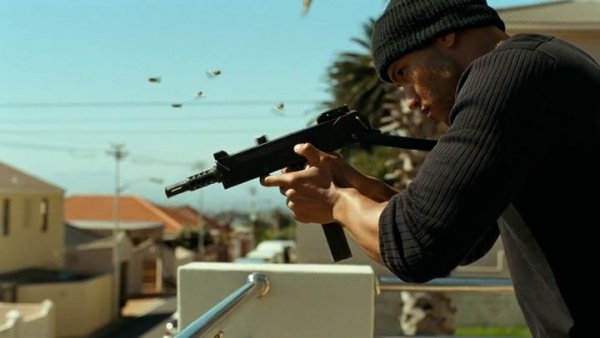
| − | [[File:SBS3-BXP-3.jpg|thumb|none| | + | [[File:SBS3-BXP-3.jpg|thumb|none|600px|A Nigerian fires a BXP in episode 10.]] |
==Heckler & Koch MP5A3 == | ==Heckler & Koch MP5A3 == | ||
| Line 122: | Line 129: | ||
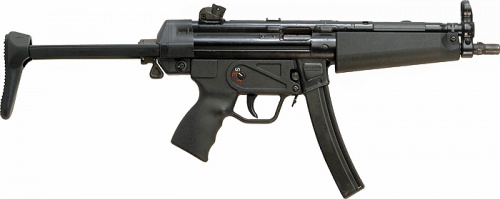
[[File:MP5A3.jpg|thumb|none|500px|Heckler & Koch MP5A3 with "tropical" (wide) forearm and stock extended - 9x19mm.]] | [[File:MP5A3.jpg|thumb|none|500px|Heckler & Koch MP5A3 with "tropical" (wide) forearm and stock extended - 9x19mm.]] | ||
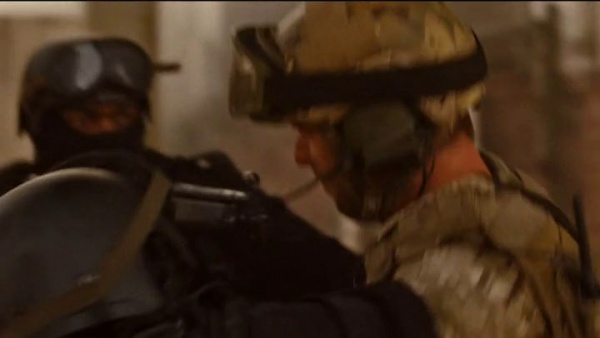
| − | [[File:SBS3-MP5-1.jpg|thumb|none| | + | [[File:SBS3-MP5-1.jpg|thumb|none|600px|Nigerien special forces troops arrest Scott.]] |
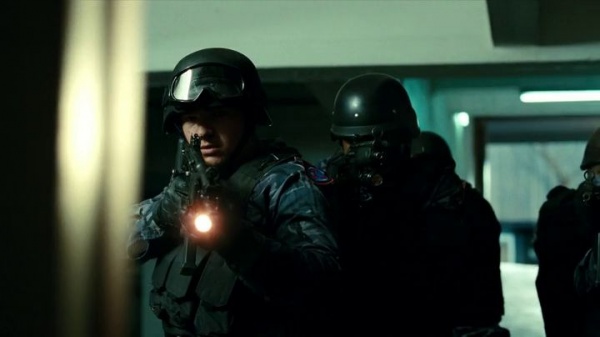
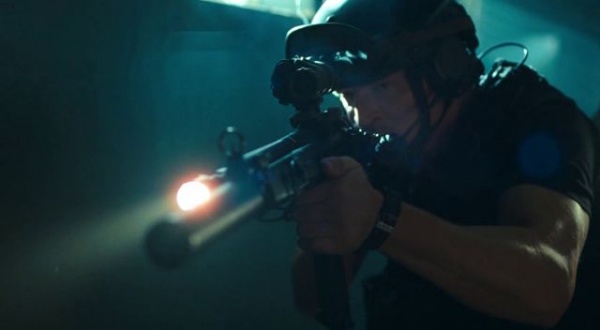
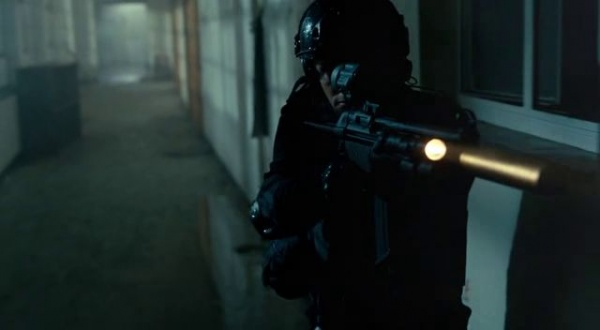
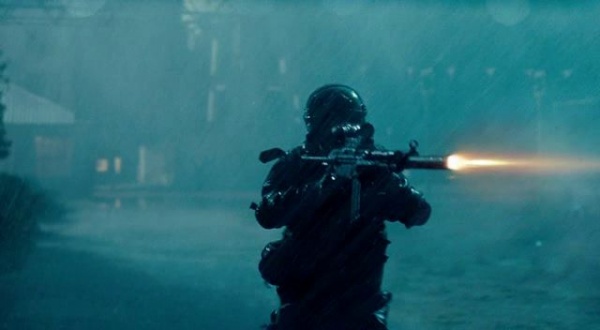
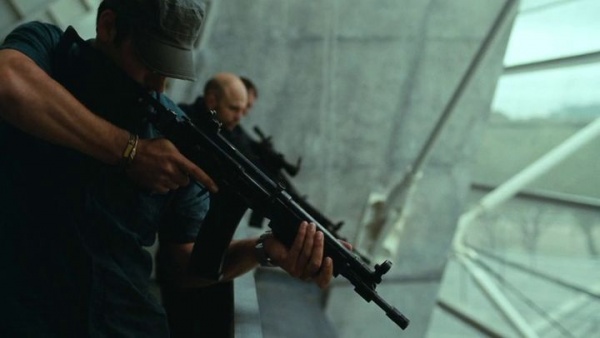
| − | [[File:SBS3-MP5-2.jpg|thumb|none| | + | [[File:SBS3-MP5-2.jpg|thumb|none|600px|A STF officer aims a MP5A3 while searching a building.]] |
==Heckler & Koch MP5K-PDW== | ==Heckler & Koch MP5K-PDW== | ||
| Line 130: | Line 137: | ||
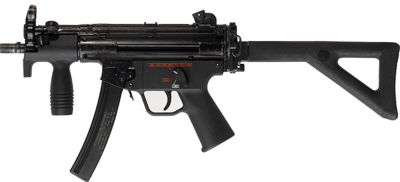
[[Image:MP5K-PDW.jpg|thumb|none|400px|MP5K-PDW with its extended barrel with 3 lugs & folding stock - 9x19mm ]] | [[Image:MP5K-PDW.jpg|thumb|none|400px|MP5K-PDW with its extended barrel with 3 lugs & folding stock - 9x19mm ]] | ||
| − | [[File:SBS3-MP5K-1.jpg|thumb|none| | + | [[File:SBS3-MP5K-1.jpg|thumb|none|600px|Rebecca opens fire with a MP5K-PDW.]] |
| − | [[File:SBS3-MP5K-2.jpg|thumb|none| | + | [[File:SBS3-MP5K-2.jpg|thumb|none|600px|Rebecca exchanges fire with Stonebridge and Scott.]] |
==MAT-49== | ==MAT-49== | ||
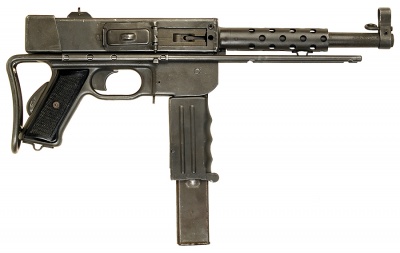
| Line 138: | Line 145: | ||
[[Image:MAT-49.jpg|thumb|none|400px|MAT-49 Submachine Gun - 9x19mm]] | [[Image:MAT-49.jpg|thumb|none|400px|MAT-49 Submachine Gun - 9x19mm]] | ||
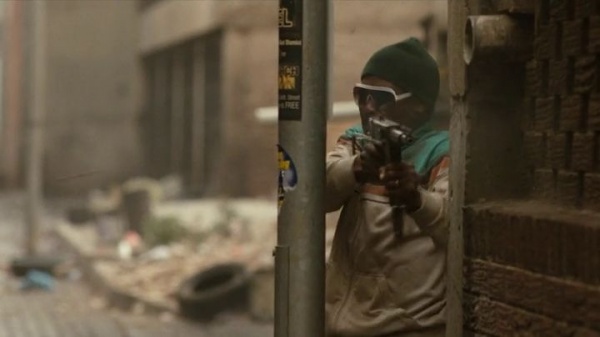
| − | [[File:SBS3-MAT49-1.jpg|thumb|none| | + | [[File:SBS3-MAT49-1.jpg|thumb|none|600px|A Nigerian opens fire with a MAT-49.]] |
| − | [[File:SBS3-MAT49-2.jpg|thumb|none| | + | [[File:SBS3-MAT49-2.jpg|thumb|none|600px|Another angle.]] |
==PPS-43== | ==PPS-43== | ||
| Line 146: | Line 153: | ||
[[Image:PPSh-43-Submachine-Gun.jpg|thumb|none|400px|Soviet PPS-43 Submachine Gun - 7.62x25mm Tokarev]] | [[Image:PPSh-43-Submachine-Gun.jpg|thumb|none|400px|Soviet PPS-43 Submachine Gun - 7.62x25mm Tokarev]] | ||
| − | [[File:SBS3-PPS-1.jpg|thumb|none| | + | [[File:SBS3-PPS-1.jpg|thumb|none|600px|A Nigerian attempts to pick up his PPS-43 when Section 20 commandos attack.]] |
| − | [[File:SBS3-PPS-2.jpg|thumb|none| | + | [[File:SBS3-PPS-2.jpg|thumb|none|600px|A Nigerian drops his PPS-43.]] |
==Walther MPK== | ==Walther MPK== | ||
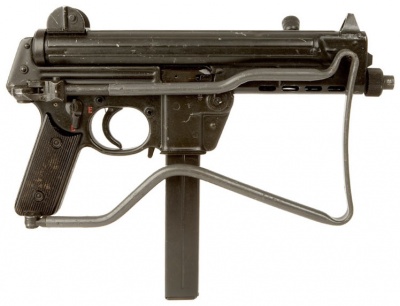
| Line 154: | Line 161: | ||
[[File:WaltherMPK-2.jpg|thumb|none|400px|Walther MPK with stock folded - 9x19mm]] | [[File:WaltherMPK-2.jpg|thumb|none|400px|Walther MPK with stock folded - 9x19mm]] | ||
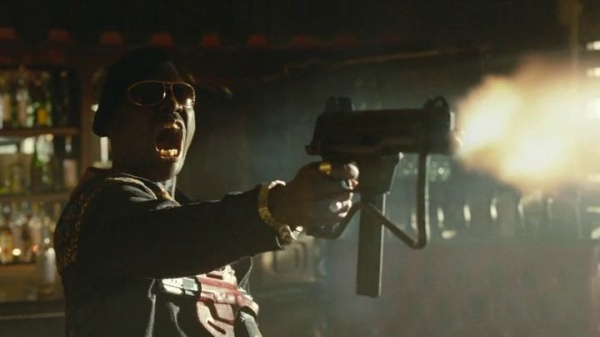
| − | [[File:SBS3-MPL-1.jpg|thumb|none| | + | [[File:SBS3-MPL-1.jpg|thumb|none|600px|The warlord yells as he fires the MPK.]] |
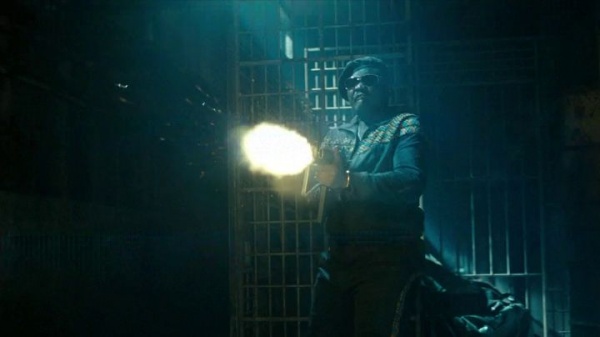
| − | [[File:SBS3-MPK-1.jpg|thumb|none| | + | [[File:SBS3-MPK-1.jpg|thumb|none|600px|The MPK is fired in the drainage tunnels under Johannesburg.]] |
| Line 164: | Line 171: | ||
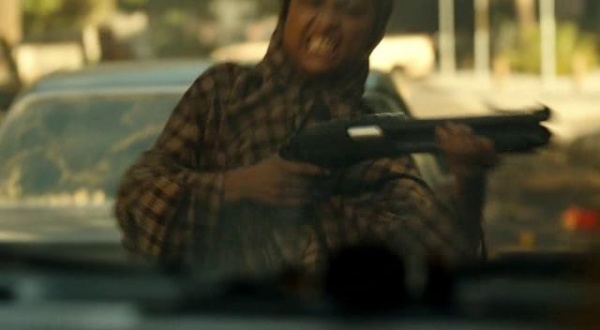
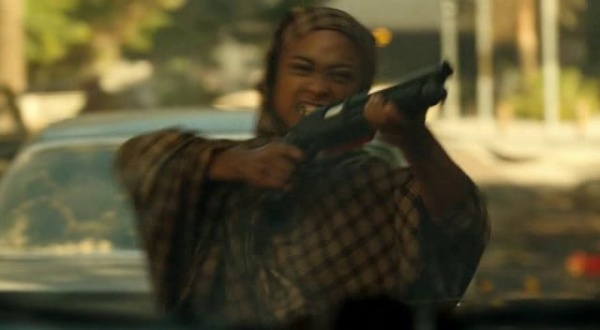
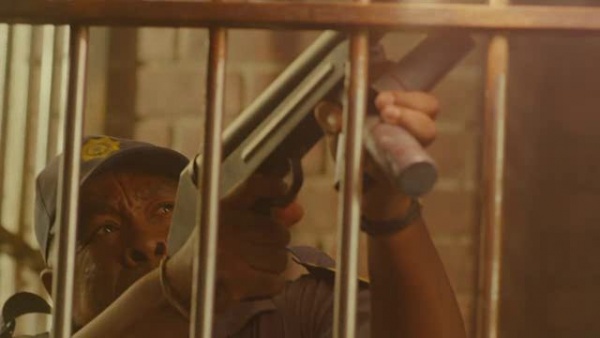
A female attacker uses a compact pump action shotgun during the convoy ambush in episode 1. The shotgun appears to be the same one used during the [http://www.imfdb.org/wiki/Talk:Chris_Ryan%27s_Strike_Back the first series.] | A female attacker uses a compact pump action shotgun during the convoy ambush in episode 1. The shotgun appears to be the same one used during the [http://www.imfdb.org/wiki/Talk:Chris_Ryan%27s_Strike_Back the first series.] | ||
| − | [[File:SBS3-shotgun-1.jpg|thumb|none| | + | [[File:SBS3-shotgun-1.jpg|thumb|none|600px|The attacker pumps her shotgun.]] |
| − | [[File:SBS3-shotgun-2.jpg|thumb|none| | + | [[File:SBS3-shotgun-2.jpg|thumb|none|600px|The shotgun is fired.]] |
==12 Gauge Double-Barreled Shotgun== | ==12 Gauge Double-Barreled Shotgun== | ||
| Line 172: | Line 179: | ||
[[Image:CharlesParker1878Shotgun.jpg|thumb|none|400px|Charles Parker 1878 Side by Side Shotgun - 12 Gauge. The Parker Gun Company was absorbed into Remington in 1934.]] | [[Image:CharlesParker1878Shotgun.jpg|thumb|none|400px|Charles Parker 1878 Side by Side Shotgun - 12 Gauge. The Parker Gun Company was absorbed into Remington in 1934.]] | ||
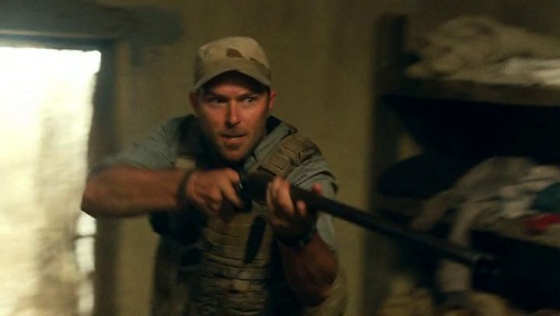
| − | [[File:SBS3-shotgun-3.jpg|thumb|none| | + | [[File:SBS3-shotgun-3.jpg|thumb|none|560px|Scott holds the double barreled shotgun.]] |
==Mossberg 500== | ==Mossberg 500== | ||
| Line 179: | Line 186: | ||
[[Image:Mossberg500.jpg|thumb|none|400px|Mossberg 500 "Persuader" with standard five-shot magazine tube - 12 Gauge. This is the most commonly produced version of the 500 series today.]] | [[Image:Mossberg500.jpg|thumb|none|400px|Mossberg 500 "Persuader" with standard five-shot magazine tube - 12 Gauge. This is the most commonly produced version of the 500 series today.]] | ||
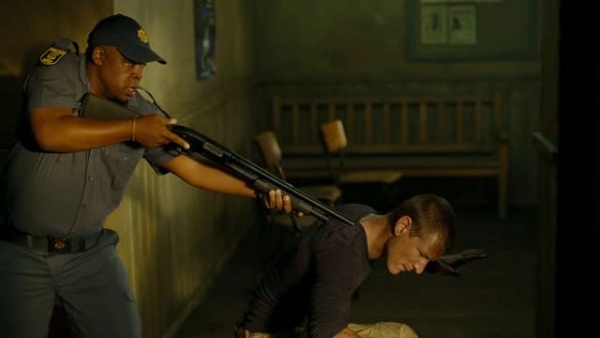
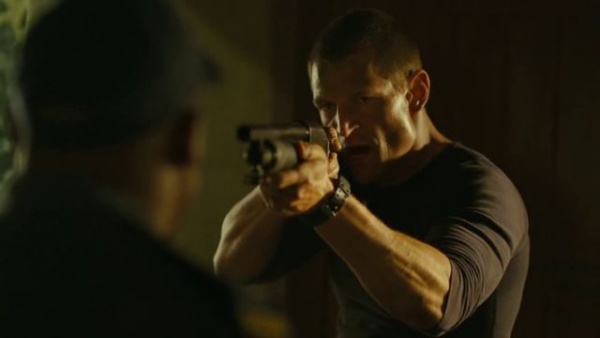
| − | [[File:SBS3-shotgun-4.jpg|thumb|none| | + | [[File:SBS3-shotgun-4.jpg|thumb|none|600px|Sgt. Tekere holds the Mossberg on Stonebridge.]] |
| − | [[File:SBS3-shotgun-5.jpg|thumb|none| | + | [[File:SBS3-shotgun-5.jpg|thumb|none|600px|Stonebridge holds the shotgun after taking it from Tekere.]] |
==Taser X12== | ==Taser X12== | ||
| Line 186: | Line 193: | ||
[[File:TaserX12.jpg|thumb|none|400px|Taser X12]] | [[File:TaserX12.jpg|thumb|none|400px|Taser X12]] | ||
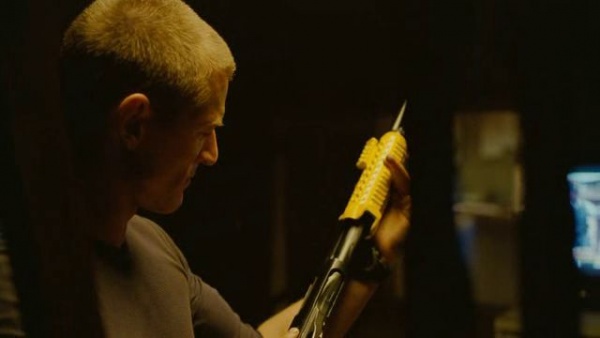
| − | [[File:SBS3-Tasersg-1.jpg|thumb|none| | + | [[File:SBS3-Tasersg-1.jpg|thumb|none|600px|Stonebridge examines the less-lethal shotgun.]] |
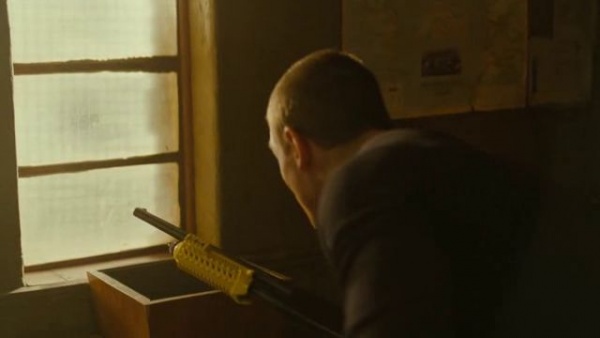
| − | [[File:SBS3-Tasersg-2.jpg|thumb|none| | + | [[File:SBS3-Tasersg-2.jpg|thumb|none|600px|Stonebridge grabs the shotgun as the protesters approach.]] |
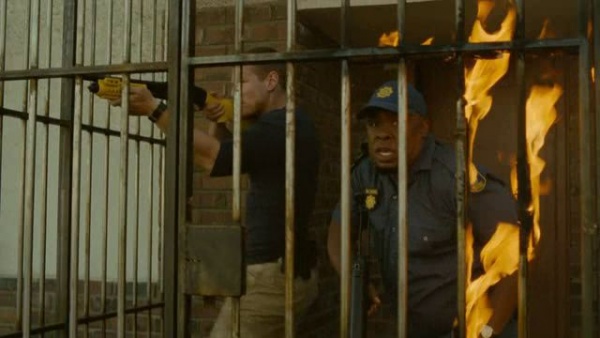
| − | [[File:SBS3-shotgun-6.jpg|thumb|none| | + | [[File:SBS3-shotgun-6.jpg|thumb|none|600px|]] |
==Armsel Striker== | ==Armsel Striker== | ||
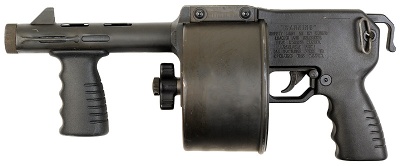
| Line 194: | Line 201: | ||
[[File:Striker.jpg|thumb|none|400px|Armsel Striker Shotgun - 12 Gauge.]] | [[File:Striker.jpg|thumb|none|400px|Armsel Striker Shotgun - 12 Gauge.]] | ||
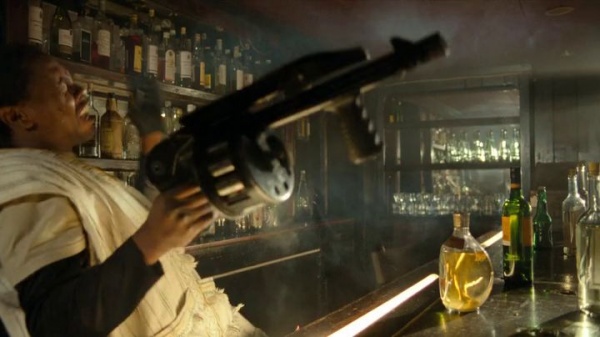
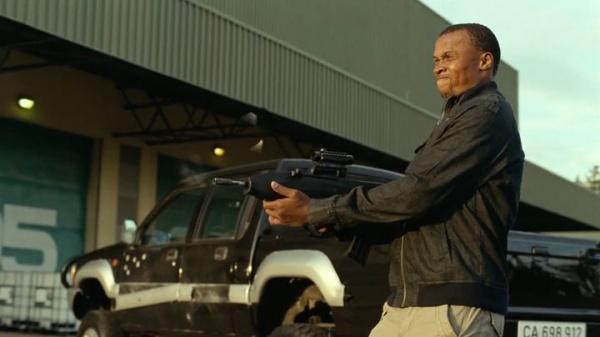
| − | [[File:SBS3-striker-1.jpg|thumb|none| | + | [[File:SBS3-striker-1.jpg|thumb|none|600px|The Nigerian dies while firing the Striker.]] |
=Rifles= | =Rifles= | ||
| Line 202: | Line 209: | ||
[[File:HK33K.jpg|thumb|none|400px|Heckler & Koch HK33KA3 - 5.56x45mm]] | [[File:HK33K.jpg|thumb|none|400px|Heckler & Koch HK33KA3 - 5.56x45mm]] | ||
| − | [[File:SBS3-G3-1.jpg|thumb|none| | + | [[File:SBS3-G3-1.jpg|thumb|none|600px|Stonebridge practices room clearing with a HK33.]] |
| − | [[File:SBS3-G3-2.jpg|thumb|none| | + | [[File:SBS3-G3-2.jpg|thumb|none|600px|Jake Hanson (Cerith Flinn) advances with a HK33.]] |
| − | [[File:SBS3-G3-3.jpg|thumb|none| | + | [[File:SBS3-G3-3.jpg|thumb|none|600px|A crazed Hanson attempts to shoot a fellow recruit with his rifle.]] |
==Heckler & Koch G3A4 (Customized)== | ==Heckler & Koch G3A4 (Customized)== | ||
| Line 210: | Line 217: | ||
[[Image:G3A4.jpg|400px|thumb|none|Heckler & Koch G3A4 - 7.62x51mm NATO]] | [[Image:G3A4.jpg|400px|thumb|none|Heckler & Koch G3A4 - 7.62x51mm NATO]] | ||
| − | |||
| − | |||
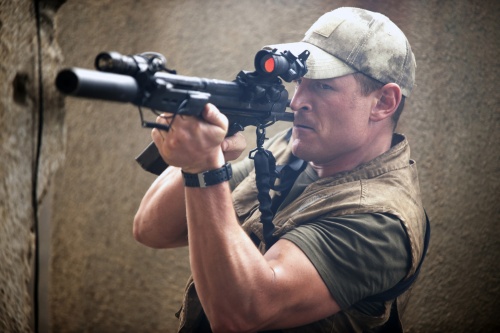
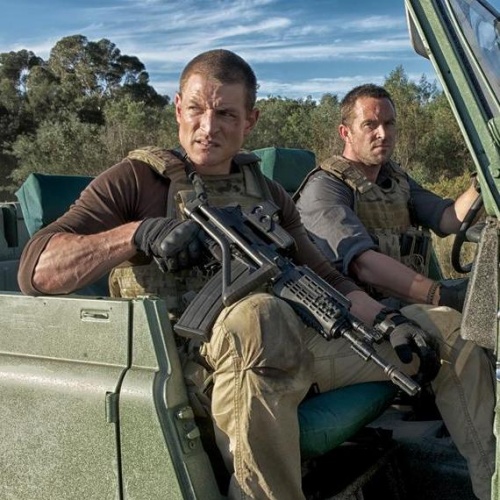
[[Image:Philip-Winchester-in-STRIKE-BACK-Episode-3.01.jpg|thumb|none|500px|Promo still of Stonebridge (Philip Winchester) with the G3A4]] | [[Image:Philip-Winchester-in-STRIKE-BACK-Episode-3.01.jpg|thumb|none|500px|Promo still of Stonebridge (Philip Winchester) with the G3A4]] | ||
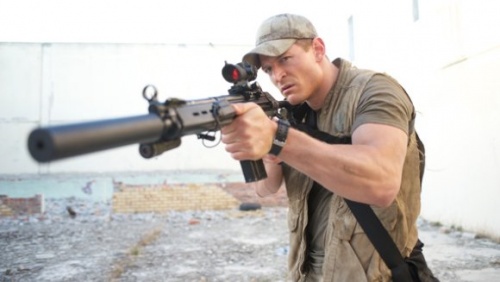
[[Image:Strike_Back_Vengeance.jpg|thumb|none|500px| Another still of Stonebridge with the G3]] | [[Image:Strike_Back_Vengeance.jpg|thumb|none|500px| Another still of Stonebridge with the G3]] | ||
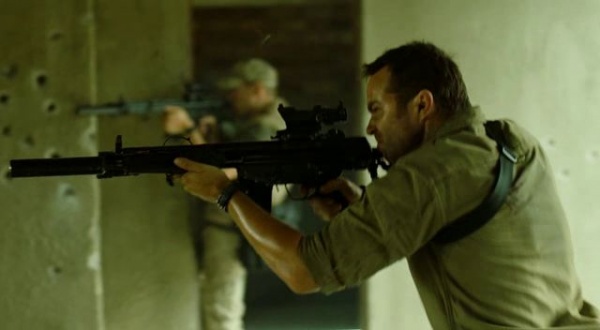
| + | [[File:SBS3-G3-4.jpg|thumb|none|600px|Scott fires a G3A4.]] | ||
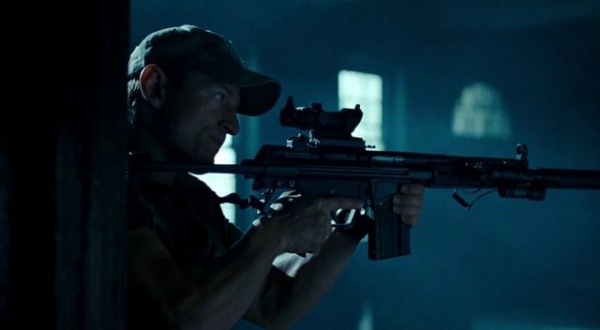
| + | [[File:SBS3-G3-5.jpg|thumb|none|600px|Stonebridge searches a building.]] | ||
==M4A1 Carbine== | ==M4A1 Carbine== | ||
| Line 219: | Line 226: | ||
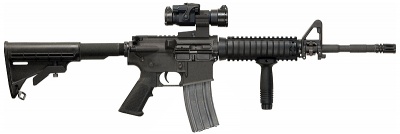
[[Image:ColtM4.jpg|thumb|none|400px|Colt M4A1 Carbine with M68 Aimpoint reflex optic and Knight's Armament RAS railed handguard and vertical forward grip - 5.56x45mm]] | [[Image:ColtM4.jpg|thumb|none|400px|Colt M4A1 Carbine with M68 Aimpoint reflex optic and Knight's Armament RAS railed handguard and vertical forward grip - 5.56x45mm]] | ||
| − | |||
| − | |||
| − | |||
| − | |||
| − | |||
| − | |||
| − | |||
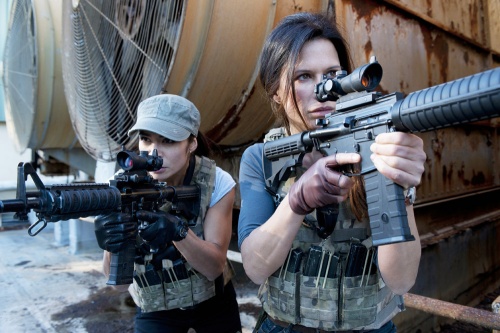
[[File:Strike-back-two-new-clips-from-friday-night-s-episode.jpg|thumb|none|500px| Still of Richmond and Dalton with their M4s]] | [[File:Strike-back-two-new-clips-from-friday-night-s-episode.jpg|thumb|none|500px| Still of Richmond and Dalton with their M4s]] | ||
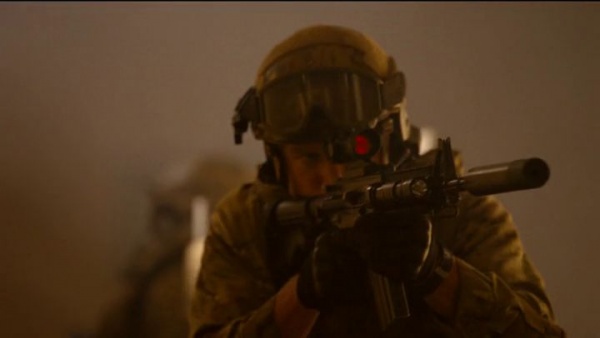
| + | [[File:SBS3-M4-1.jpg|thumb|none|600px|Stonebridge advances with a suppressed M4A1 in episode 3.]] | ||
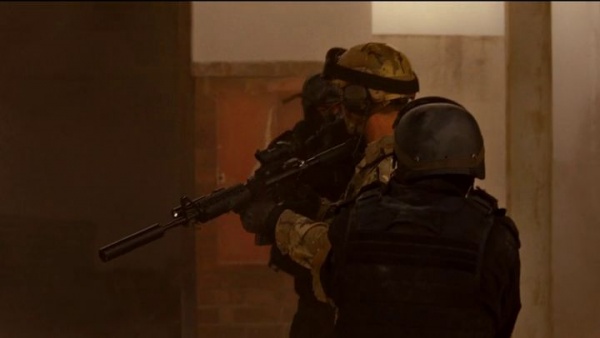
| + | [[File:SBS3-M4-2.jpg|thumb|none|600px|Scott is surrounded by Nigerien special forces.]] | ||
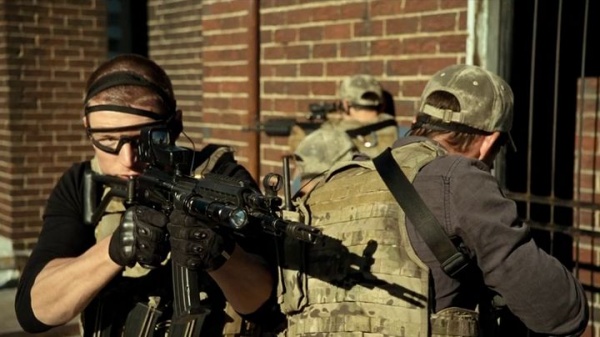
| + | [[File:SBS3-M4-3.jpg|thumb|none|600px|Stonebridge and Scott hold M4A1 carbines.]] | ||
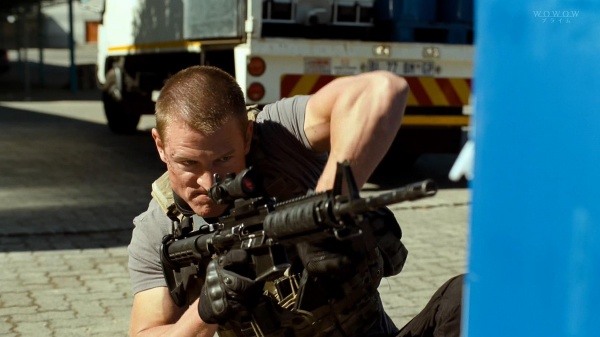
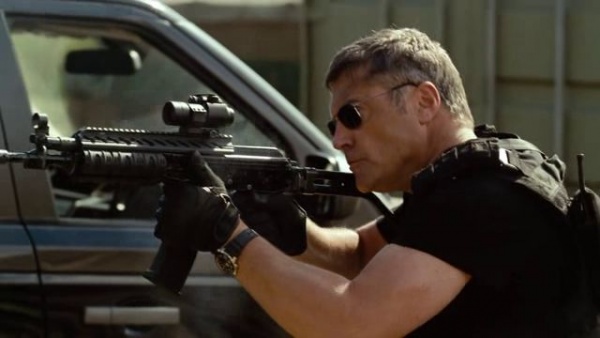
| + | [[File:SBS3-M4-4.jpg|thumb|none|600px|Stonebridge fires his M4A1, which has a Magpul P-mag.]] | ||
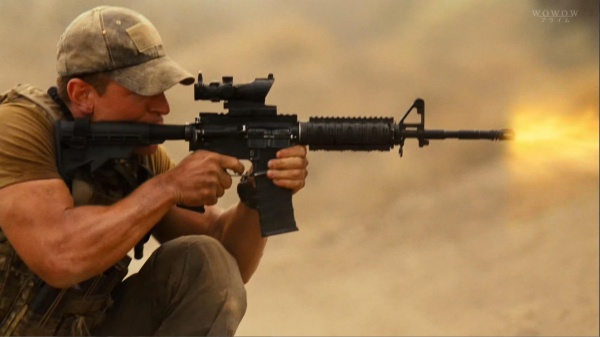
| + | [[File:SBS3-M4-5.jpg|thumb|none|600px|Maj. Dalton fires her M4A1 in episode 6.]] | ||
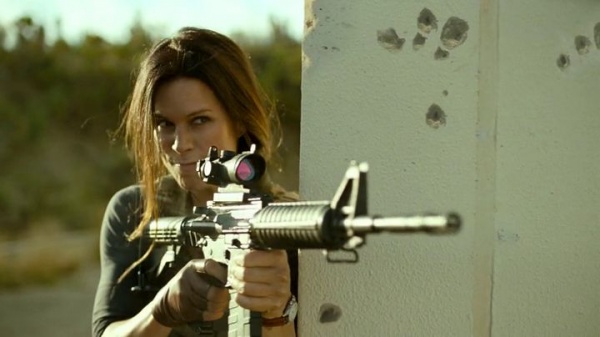
| + | [[Image:Strike.Back.S03E06.jpg|thumb|none|600px|Stonebridge reloads his M4A1 in episode 6.]] | ||
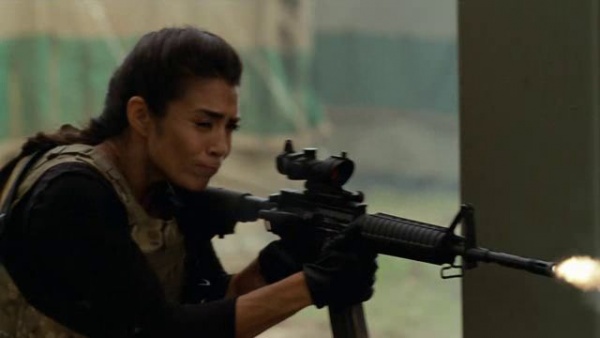
| + | [[File:SBS3-M4-6.jpg|thumb|none|600px|Sgt. Richmond fires her M4A1 in episode 8.]] | ||
==AKMS== | ==AKMS== | ||
| Line 232: | Line 239: | ||
[[File:AKMS.jpg|thumb|none|400px|AKMS - 7.62x39mm.]] | [[File:AKMS.jpg|thumb|none|400px|AKMS - 7.62x39mm.]] | ||
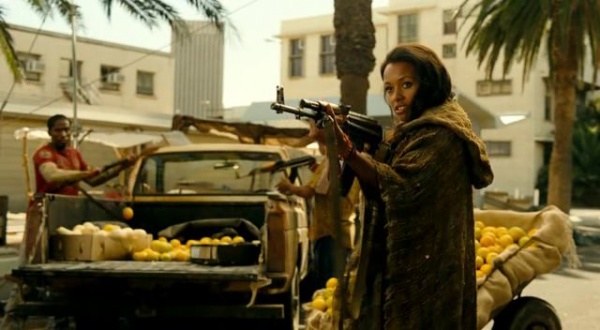
| − | [[File:SBS3-AKMS-1.jpg|thumb|none| | + | [[File:SBS3-AKMS-1.jpg|thumb|none|600px|Asmara (Melanie Liburd) opens fire with an AKMS in episode 1.]] |
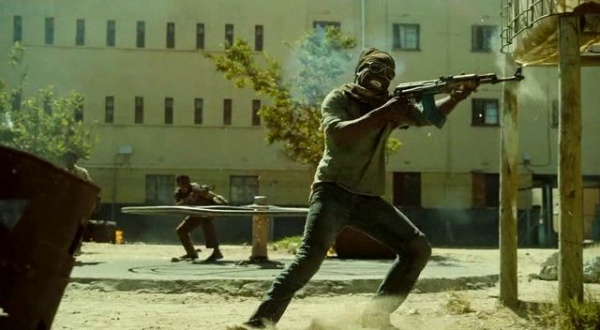
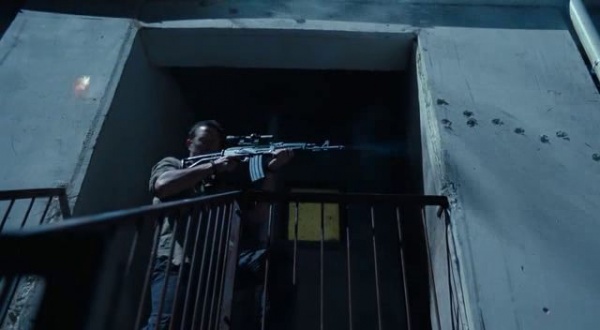
| − | [[File:SBS3-AKMS-5.jpg|thumb|none| | + | [[File:SBS3-AKMS-5.jpg|thumb|none|600px|A Somali militiaman fires his AKMS.]] |
| − | [[File:SBS3-AKMS-2.jpg|thumb|none| | + | [[File:SBS3-AKMS-2.jpg|thumb|none|600px|Dalton wields an AKMS taken from an executed African Union soldier in episode 2.]] |
| − | [[File:SBS3-AKMS-3.jpg|thumb|none| | + | [[File:SBS3-AKMS-3.jpg|thumb|none|600px|Patrick Burton holds an AKMS after gunning down a militiaman.]] |
| − | [[File:SBS3-AKMS-4.jpg|thumb|none| | + | [[File:SBS3-AKMS-4.jpg|thumb|none|600px|A Tuareg bodyguard fires his AKMS at Algerian militants.]] |
==Zastava M70AB2== | ==Zastava M70AB2== | ||
| Line 242: | Line 249: | ||
[[Image:Zastava M70AB2.jpg |thumb|none|400px|Zastava M70AB2 folding stock rifle - 7.62x39mm (non-standard pistol grip).]] | [[Image:Zastava M70AB2.jpg |thumb|none|400px|Zastava M70AB2 folding stock rifle - 7.62x39mm (non-standard pistol grip).]] | ||
| − | [[File:SBS3-M70AB2-1.jpg|thumb|none| | + | [[File:SBS3-M70AB2-1.jpg|thumb|none|600px|A Somali fires a M70AB2.]] |
| − | [[File:SBS3-M70AB2-2.jpg|thumb|none| | + | [[File:SBS3-M70AB2-2.jpg|thumb|none|600px|Stonebridge holds a M70AB2.]] |
| − | [[File:SBS3-M70AB2-3.jpg|thumb|none| | + | [[File:SBS3-M70AB2-3.jpg|thumb|none|600px|Stonebridge aims his M70AB2.]] |
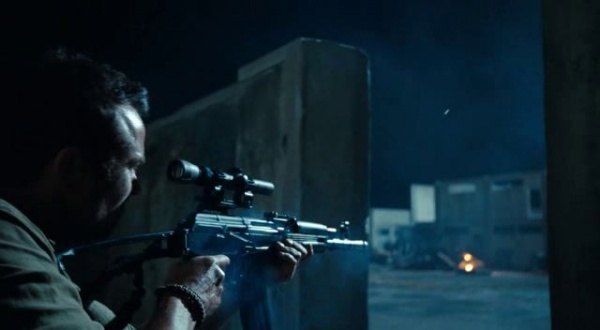
| − | [[File:SBS3-M70AB2-4.jpg|thumb|none| | + | [[File:SBS3-M70AB2-4.jpg|thumb|none|600px|An Algerian militant fires a M70AB2 in episode 3.]] |
==Norinco Type 56== | ==Norinco Type 56== | ||
| Line 251: | Line 258: | ||
[[Image:ChineseType56.jpg|thumb|none|400px|Norinco Type 56 - 7.62x39mm]] | [[Image:ChineseType56.jpg|thumb|none|400px|Norinco Type 56 - 7.62x39mm]] | ||
| − | [[File:SBS3-T56-1.jpg|thumb|none| | + | [[File:SBS3-T56-1.jpg|thumb|none|600px|A Somali fires a Norinco Type 56.]] |
| − | [[File:SBS3-T56-2.jpg|thumb|none| | + | [[File:SBS3-T56-2.jpg|thumb|none|600px|One of El Soldat's men fires a Norinco Type 56.]] |
| − | [[File:SBS3-T56S-1.jpg|thumb|none| | + | [[File:SBS3-T56S-1.jpg|thumb|none|600px|Motorcycle-borne gunmen fire a Type 56.]] |
===Norinco Type 56-1=== | ===Norinco Type 56-1=== | ||
| Line 259: | Line 266: | ||
[[Image:Type56S.jpg|thumb|none|400px|Norinco Type 56-1 (under-folding stock variant) - 7.62x39mm]] | [[Image:Type56S.jpg|thumb|none|400px|Norinco Type 56-1 (under-folding stock variant) - 7.62x39mm]] | ||
| − | [[File:SBS3-T561-1.jpg|thumb|none| | + | [[File:SBS3-T561-1.jpg|thumb|none|600px|A Somali militiaman fires a Type 56-1.]] |
| − | [[File:SBS3-T56S-2.jpg|thumb|none| | + | [[File:SBS3-T56S-2.jpg|thumb|none|600px|Markunda opens fire with a Type 56-1.]] |
| − | [[File:SBS3-T56S-3.jpg|thumb|none| | + | [[File:SBS3-T56S-3.jpg|thumb|none|600px|]] |
| − | [[File:SBS3-T56S-4.jpg|thumb|none| | + | [[File:SBS3-T56S-4.jpg|thumb|none|600px|Markunda tells her men to pull back.]] |
==Vektor R5== | ==Vektor R5== | ||
| Line 268: | Line 275: | ||
[[Image:VektorR5.jpg|thumb|none|400px|Vektor R5 - 5.56x45mm]] | [[Image:VektorR5.jpg|thumb|none|400px|Vektor R5 - 5.56x45mm]] | ||
| − | [[File:SBS3-R5-2.jpg|thumb|none| | + | [[File:24602-square.jpg|thumb|none|500px|Still of Stonebridge with his R5]] |
| − | [[File:SBS3-R5-1.jpg|thumb|none| | + | [[File:SBS3-R5-2.jpg|thumb|none|600px|Mercenaries set up an ambush in episode 5.]] |
| − | [[File:SBS3-R5-3.jpg|thumb|none| | + | [[File:SBS3-R5-1.jpg|thumb|none|600px|A mercenary fires a Vektor R5.]] |
| − | [[File:SBS3-R5-4.jpg|thumb|none| | + | [[File:SBS3-R5-3.jpg|thumb|none|600px|Craig Hanson totes a Vektor R5 with a UTG quad rail system and an Aimpoint sight.]] |
| − | [[File:SBS3-R5-5.jpg|thumb|none| | + | [[File:SBS3-R5-4.jpg|thumb|none|600px|Karl Matlock (Vincent Regan) fires his Vektor R5 during episode 8.]] |
| − | [[File:SBS3-R5-6.jpg|thumb|none| | + | [[File:SBS3-R5-5.jpg|thumb|none|600px|Scott holds a R5 with a CAA railed handguard and ACOG sight in episode 10.]] |
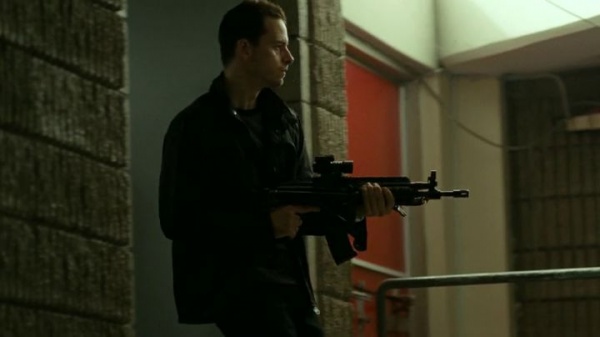
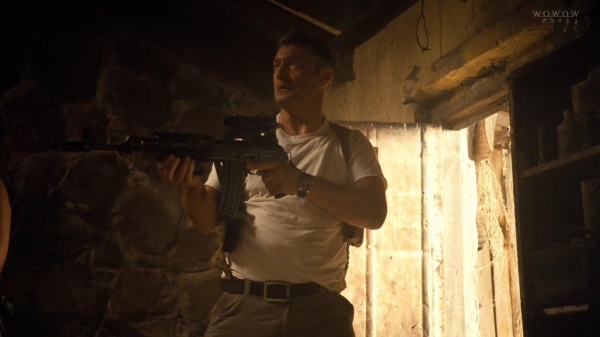
| − | + | [[File:SBS3-R5-6.jpg|thumb|none|600px|Stonebridge holds a R5 as Section 20 units prepare to storm the Nigerian hideout.]] | |
===Vektor R5 (Modified to resemble Modern AK-Series Rifle)=== | ===Vektor R5 (Modified to resemble Modern AK-Series Rifle)=== | ||
| Line 281: | Line 288: | ||
[[Image:VektorR5.jpg|thumb|none|400px|Vektor R5 - 5.56x45mm]] | [[Image:VektorR5.jpg|thumb|none|400px|Vektor R5 - 5.56x45mm]] | ||
[[Image:Aks-74m.jpg|thumb|none|400px|AKS-74 with synthetic furniture - 5.45x39mm]] | [[Image:Aks-74m.jpg|thumb|none|400px|AKS-74 with synthetic furniture - 5.45x39mm]] | ||
| − | [[File:SBS3-R5AK-1.jpg|thumb|none| | + | [[File:SBS3-R5AK-1.jpg|thumb|none|600px|Scott fires at Matlock's mercenaries during a battle at a scrapyard.]] |
| − | [[File:SBS3-R5AK-2.jpg|thumb|none| | + | [[File:SBS3-R5AK-2.jpg|thumb|none|600px|The R5 is used to hold off waves of attacking Somali militiamen.]] |
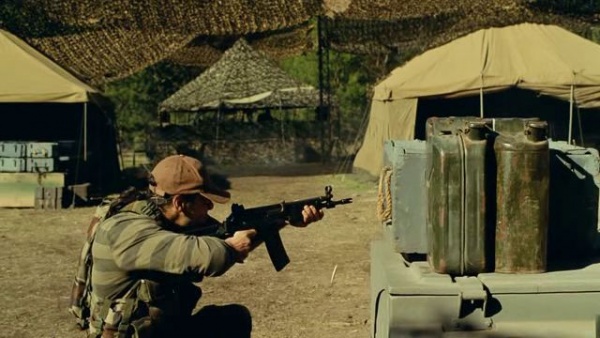
| − | [[File:SBS3-R5AK-3.jpg|thumb|none| | + | [[File:SBS3-R5AK-3.jpg|thumb|none|600px|El Soldat orders his men to attack.]] |
==Vektor R4== | ==Vektor R4== | ||
| Line 289: | Line 296: | ||
[[Image:VektorR4.jpg|thumb|none|400px|Vektor R4 assault rifle of the South African forces with 50-round magazine - 5.56x45mm]] | [[Image:VektorR4.jpg|thumb|none|400px|Vektor R4 assault rifle of the South African forces with 50-round magazine - 5.56x45mm]] | ||
| − | [[File:SBS3-R4-1.jpg|thumb|none| | + | [[File:SBS3-R4-1.jpg|thumb|none|600px|A mercenary fires his R4.]] |
| − | [[File:SBS3-R4-2.jpg|thumb|none| | + | [[File:SBS3-R4-2.jpg|thumb|none|600px|The mercenary returns fire after being surprised by Stonebridge. This weapon is fitted with a carry handle, which is not present on South African made R4s. It also has a receiver which lacks the lightening cuts above the magazine, which were omitted on some commercial R4 receivers which were marketed as the "LM4".]] |
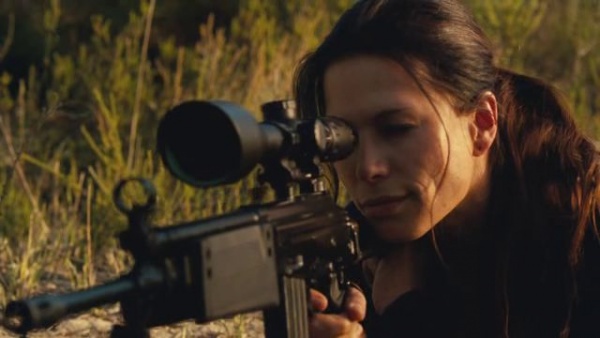
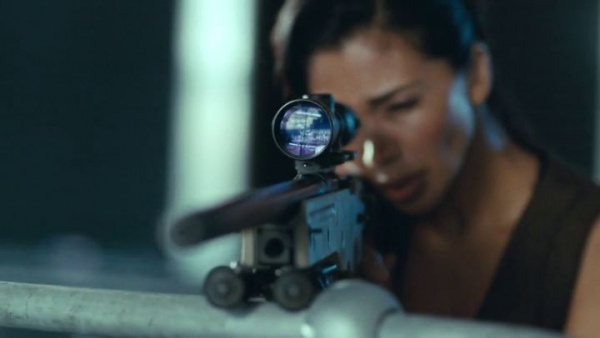
| − | [[File:Picture-of-rhona-mitra-in-strike-back-large-picture.jpg|thumb|none| | + | [[File:Picture-of-rhona-mitra-in-strike-back-large-picture.jpg|thumb|none|600px|Dalton providing sniper cover with the R4. Note the small capacity mag and that her R4 has the lightening cuts and lacks the carry handle as an R4 should.]] |
| − | [[File:SBS3-R4-3.jpg|thumb|none| | + | [[File:SBS3-R4-3.jpg|thumb|none|600px|Dalton looks through the scope of a R4.]] |
==Vektor CR-21== | ==Vektor CR-21== | ||
| Line 298: | Line 305: | ||
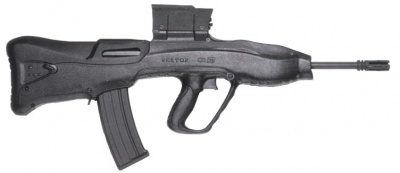
[[Image:Vektor-cr21-1.jpg|thumb|400px|none|Vektor CR-21 bullpup rifle - 5.56x45mm]] | [[Image:Vektor-cr21-1.jpg|thumb|400px|none|Vektor CR-21 bullpup rifle - 5.56x45mm]] | ||
| − | [[File:SBS3-CR21-1.jpg|thumb|none| | + | [[File:SBS3-CR21-1.jpg|thumb|none|600px|A mercenary prepares to ambush Stonebridge and Scott at the stadium.]] |
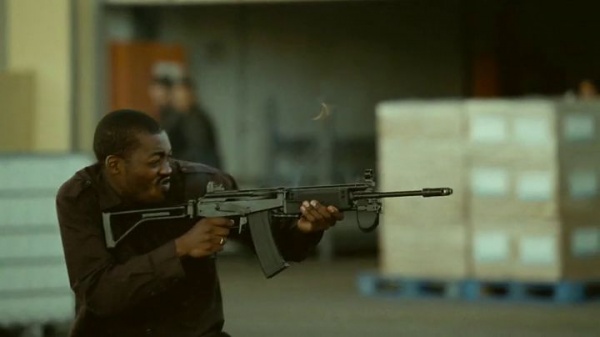
| − | [[File:SBS3-CR21-2.jpg|thumb|none| | + | [[File:SBS3-CR21-2.jpg|thumb|none|600px|A CR21 is fired by a mercenary in episode 6.]] |
==Norinco Type 84S== | ==Norinco Type 84S== | ||
| Line 305: | Line 312: | ||
[[File:NorincoType84SFolder.jpg|thumb|none|400px|Norinco Type 84S - 5.56x45mm.]] | [[File:NorincoType84SFolder.jpg|thumb|none|400px|Norinco Type 84S - 5.56x45mm.]] | ||
| − | [[File:SBS3-T84-1.jpg|thumb|none| | + | [[File:SBS3-T84-1.jpg|thumb|none|600px|Matlock holds a Type 84 in episode 4.]] |
| − | [[File:SBS3-T84-2.jpg|thumb|none| | + | [[File:SBS3-T84-2.jpg|thumb|none|600px|Matlock provides covering fire as mercenaries escape Knox's nuclear facility with several warheads.]] |
==Vz. 52 Rifle== | ==Vz. 52 Rifle== | ||
| Line 312: | Line 319: | ||
[[Image:VZ52Rifle.jpg|thumb|none|400px|The Czech VZ52 rifle, sometimes called the CZ52 or the S.H.E. rifle, is a carbine that was chambered in both 7.62x45mm and 7.62x39mm]] | [[Image:VZ52Rifle.jpg|thumb|none|400px|The Czech VZ52 rifle, sometimes called the CZ52 or the S.H.E. rifle, is a carbine that was chambered in both 7.62x45mm and 7.62x39mm]] | ||
| − | [[File:SBS3-VZ52-1.jpg|thumb|none| | + | [[File:SBS3-VZ52-1.jpg|thumb|none|600px|Tuareg warriors bring Scott to their leader.]] |
==FN FAL== | ==FN FAL== | ||
| Line 318: | Line 325: | ||
[[Image:FN FAL 50 00.jpg|thumb|none|400px| FN FAL 50.00 - 7.62x51mm NATO]] | [[Image:FN FAL 50 00.jpg|thumb|none|400px| FN FAL 50.00 - 7.62x51mm NATO]] | ||
| − | [[File:SBS3-FAL-1.jpg|thumb|none| | + | [[File:SBS3-FAL-1.jpg|thumb|none|600px|A guard with a FN FAL is taken out by Stonebridge.]] |
=Sniper Rifles= | =Sniper Rifles= | ||
| Line 326: | Line 333: | ||
[[Image:Romanian-FPK-PSL.jpg|thumb|none|400px|Romanian FPK/PSL sniper rifle - 7.62x54mm R.]] | [[Image:Romanian-FPK-PSL.jpg|thumb|none|400px|Romanian FPK/PSL sniper rifle - 7.62x54mm R.]] | ||
| − | [[File:SBS3-PSL-1.jpg|thumb|none| | + | [[File:SBS3-PSL-1.jpg|thumb|none|600px|Kohl fires the FPK / PSL.]] |
==Truvelo CMS Sniper Rifle== | ==Truvelo CMS Sniper Rifle== | ||
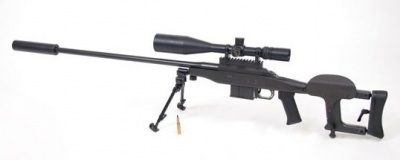
| Line 332: | Line 339: | ||
[[Image:Truvelo308sniper.jpg|thumb|400px|none|Truvelo Armory CMS Sniper Rifle - 7.62x51mm NATO]] | [[Image:Truvelo308sniper.jpg|thumb|400px|none|Truvelo Armory CMS Sniper Rifle - 7.62x51mm NATO]] | ||
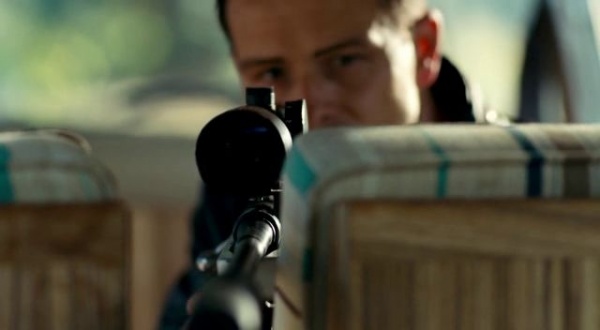
| − | [[File:SBS3-sniper-1.jpg|thumb|none| | + | [[File:SBS3-sniper-1.jpg|thumb|none|600px|Hanson looks up after firing the CMS.]] |
==Unidentified AICS rifle== | ==Unidentified AICS rifle== | ||
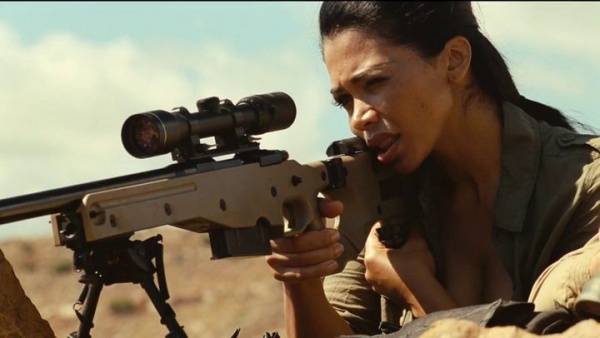
| Line 338: | Line 345: | ||
[[File:AI L115A3.jpg|thumb|none|400px|Genuine Accuracy International L115A3 for comparison - .338 Lapua Magnum]] | [[File:AI L115A3.jpg|thumb|none|400px|Genuine Accuracy International L115A3 for comparison - .338 Lapua Magnum]] | ||
| − | [[File:SBS3-AW-1.jpg|thumb|none| | + | [[File:SBS3-AW-1.jpg|thumb|none|600px|Kohl inspects the rifle. Note the cut-out for the bolt handle which is semi circular. Typically on an AICS this cut-out is square and made from a separate piece of black polymer, suggesting that this stock may actually be from a genuine Accuracy International rifle which has had a different action inserted. ]] |
| − | [[File:SBS3-AW-2.jpg|thumb|none| | + | [[File:SBS3-AW-2.jpg|thumb|none|600px|Kohl looks through the rifle's scope. Visible in this shot is polygonal shape of the rifles action. Also note that the sight rail bridges over the ejection port as opposed to on Accuracy International rifles where the top of the action is closed.]] |
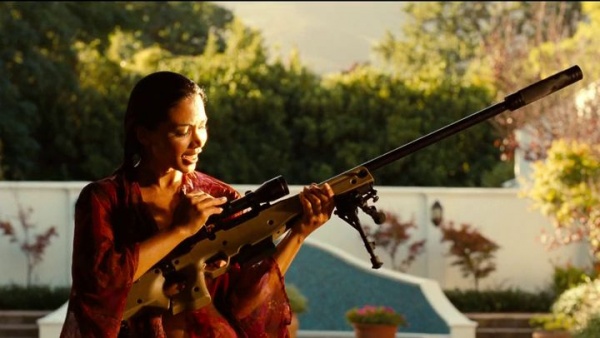
| − | [[File:SBS3-AW-3.jpg|thumb|none| | + | [[File:SBS3-AW-3.jpg|thumb|none|600px|Kohl prepares to fire.]] |
==Modified AR-15 Sniper Rifle== | ==Modified AR-15 Sniper Rifle== | ||
| Line 346: | Line 353: | ||
[[Image:AR10-SB2.jpg|thumb|none|400px|Armalite AR-10SB Target with Magpul PRS stock & PMag, Leupold Mark 4 scope, and Harris bipod - 7.62x51mm NATO. While the weapon in ''Strike Back'' is chambered for 5.56mm, its configuration is similar to this AR-10.]] | [[Image:AR10-SB2.jpg|thumb|none|400px|Armalite AR-10SB Target with Magpul PRS stock & PMag, Leupold Mark 4 scope, and Harris bipod - 7.62x51mm NATO. While the weapon in ''Strike Back'' is chambered for 5.56mm, its configuration is similar to this AR-10.]] | ||
| − | [[File:L_StrikeBkVeng_ep6.jpg|thumb|none| | + | [[File:L_StrikeBkVeng_ep6.jpg|thumb|none|600px| Scott with the AR]] |
| − | [[File:SBS3-sniper-5.jpg|thumb|none| | + | [[File:SBS3-sniper-5.jpg|thumb|none|600px|Alternate angle.]] |
| − | [[File:SBS3-sniper-2.jpg|thumb|none| | + | [[File:SBS3-sniper-2.jpg|thumb|none|600px|Baxter fires the AR-15.]] |
| − | [[File:SBS3-sniper-3.jpg|thumb|none| | + | [[File:SBS3-sniper-3.jpg|thumb|none|600px|The rifle appears to have a Colt lower receiver.]] |
| − | [[File:SBS3-sniper-4.jpg|thumb|none| | + | [[File:SBS3-sniper-4.jpg|thumb|none|600px|Scott fires the AR at the mercenaries as they evacuate.]] |
=Machine Guns= | =Machine Guns= | ||
| Line 358: | Line 365: | ||
[[File:M1919A4.jpg|none|thumb|400px|Browning M1919A4 - .30-06 Springfield]] | [[File:M1919A4.jpg|none|thumb|400px|Browning M1919A4 - .30-06 Springfield]] | ||
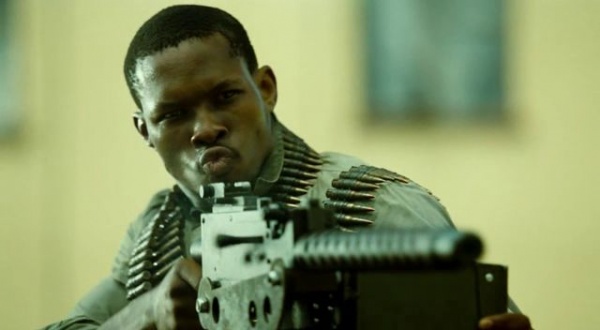
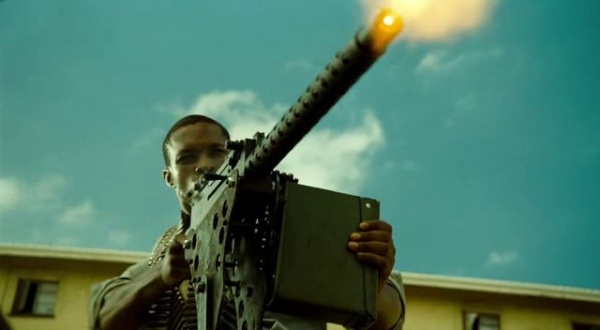
| − | [[File:SBS3-M1919-1.jpg|none|thumb| | + | [[File:SBS3-M1919-1.jpg|none|thumb|600px|The militiaman opens fire with the M1919.]] |
| − | [[File:SBS3-M1919-2.jpg|none|thumb| | + | [[File:SBS3-M1919-2.jpg|none|thumb|600px|The militiaman blasts away.]] |
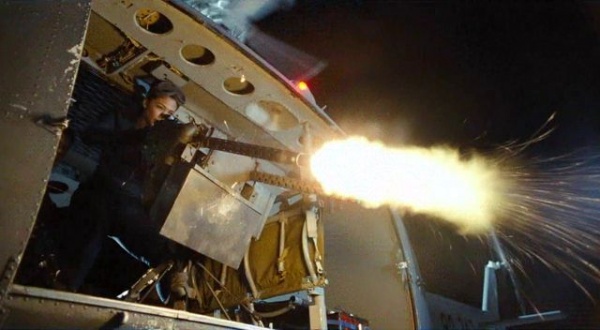
| − | [[File:SBS3-M1919-3.jpg|none|thumb| | + | [[File:SBS3-M1919-3.jpg|none|thumb|600px|Kohl fires dual M1919s.]] |
==RPK== | ==RPK== | ||
| Line 366: | Line 373: | ||
[[Image:RPK lmg.jpg|thumb|none|400px|RPK Light Machine Gun with 40 round magazine - 7.62x39mm]] | [[Image:RPK lmg.jpg|thumb|none|400px|RPK Light Machine Gun with 40 round magazine - 7.62x39mm]] | ||
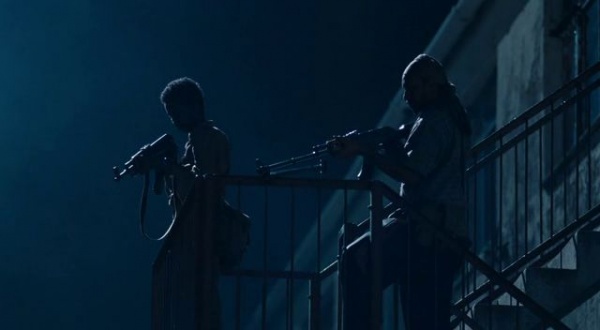
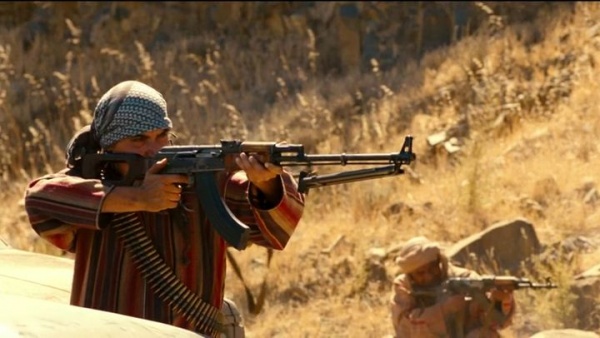
| − | [[File:SBS3-RPK-1.jpg|none|thumb| | + | [[File:SBS3-RPK-1.jpg|none|thumb|600px|A Somali with a RPK.]] |
| − | [[File:SBS3-RPK-2.jpg|none|thumb| | + | [[File:SBS3-RPK-2.jpg|none|thumb|600px|A militant fires a RPK in episode 3. A PK-style stock is attached instead of the standard clubfoot stock.]] |
==RPD== | ==RPD== | ||
| Line 373: | Line 380: | ||
[[Image:RPD-Light-Machine-Gun.jpg|thumb|none|500px|RPD Light Machine Gun - 7.62x39mm]] | [[Image:RPD-Light-Machine-Gun.jpg|thumb|none|500px|RPD Light Machine Gun - 7.62x39mm]] | ||
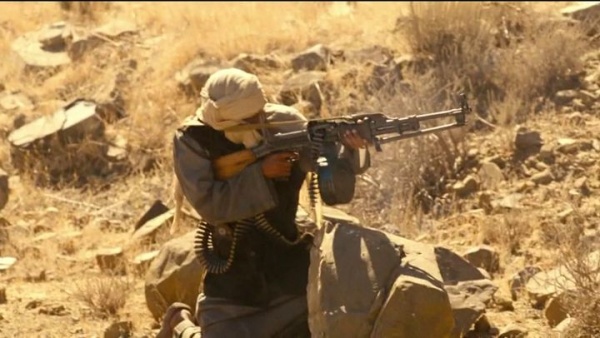
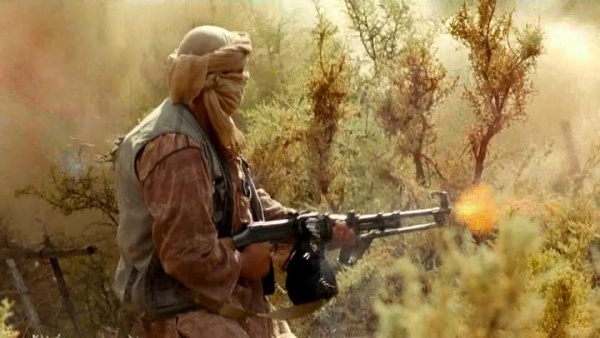
| − | [[File:SBS3-RPD-1.jpg|none|thumb| | + | [[File:SBS3-RPD-1.jpg|none|thumb|600px|A militant fires a RPD.]] |
| − | [[File:SBS3-RPD-2.jpg|none|thumb| | + | [[File:SBS3-RPD-2.jpg|none|thumb|600px|Another militant is shot while firing a RPD.]] |
==Vektor SS-77== | ==Vektor SS-77== | ||
| Line 380: | Line 387: | ||
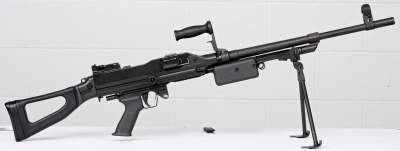
[[Image:Ss77.jpg|thumb|none|400px|Vektor SS-77 - 7.62x51mm General Purpose Machine Gun]] | [[Image:Ss77.jpg|thumb|none|400px|Vektor SS-77 - 7.62x51mm General Purpose Machine Gun]] | ||
| − | [[File:SBS3-SS77-1.jpg|none|thumb| | + | [[File:SBS3-SS77-1.jpg|none|thumb|600px|A SS-77 is seen as Baxter snaps photos of the plant.]] |
=Other= | =Other= | ||
| Line 387: | Line 394: | ||
[[Image:AT-4Launcher.jpg |thumb|none|400px|M136 AT4 Anti-Tank recoilless launcher - 84mm]] | [[Image:AT-4Launcher.jpg |thumb|none|400px|M136 AT4 Anti-Tank recoilless launcher - 84mm]] | ||
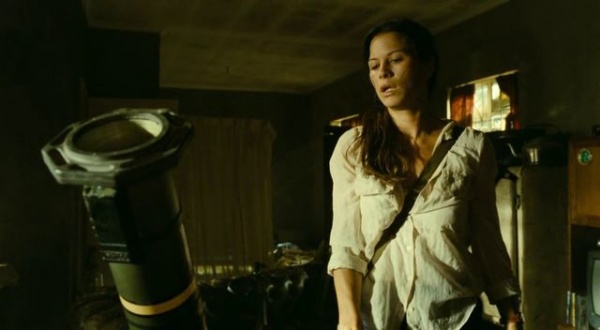
| − | [[File:SBS3-AT4-1.jpg |thumb|none| | + | [[File:SBS3-AT4-1.jpg|thumb|none|600px|Dalton notices a M136 AT4 in a Somali arsenal.]] |
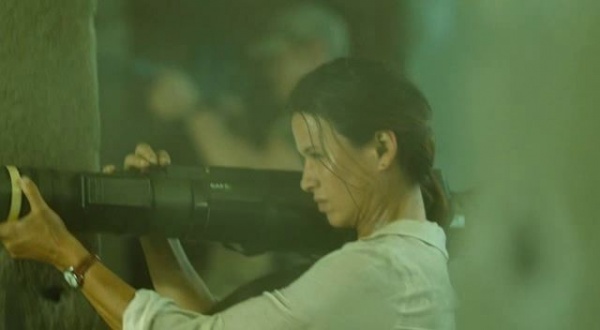
| − | [[File:SBS3-AT4-2.jpg|thumb|none| | + | [[File:SBS3-AT4-2.jpg|thumb|none|600px|Dalton fires the M136 AT4.]] |
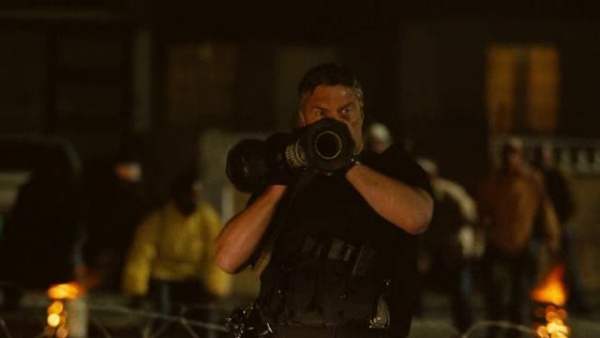
| − | [[File:SBS3-AT4-3.jpg|thumb|none| | + | [[File:SBS3-AT4-3.jpg|thumb|none|600px|Matlock blasts the police station with a M136 AT4.]] |
==RPG-7== | ==RPG-7== | ||
| Line 396: | Line 403: | ||
[[Image:Rpg-7-1-.jpg |thumb|none|400px|RPG-7 - 40mm]] | [[Image:Rpg-7-1-.jpg |thumb|none|400px|RPG-7 - 40mm]] | ||
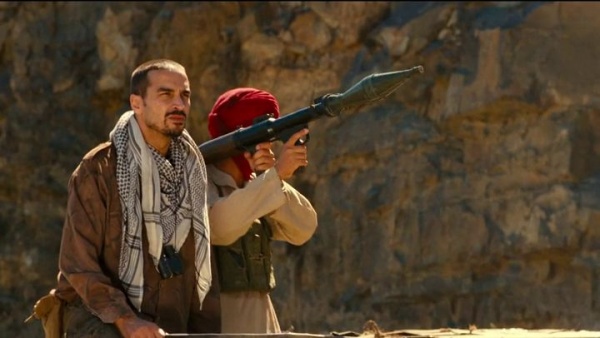
| − | [[File:SBS3-RPG-1.jpg|thumb|none| | + | [[File:SBS3-RPG-1.jpg|thumb|none|600px|El Soldat watches as one of his men fires a RPG-7.]] |
== Milkor "Stopper" 37/38mm Gas Grenade Launcher== | == Milkor "Stopper" 37/38mm Gas Grenade Launcher== | ||
| Line 402: | Line 409: | ||
Sgt. Tekere fires tear gas rounds from a [[Milkor Stopper]] gas grenade launcher to hold off angry protesters in episode 8. | Sgt. Tekere fires tear gas rounds from a [[Milkor Stopper]] gas grenade launcher to hold off angry protesters in episode 8. | ||
[[File:Stopper 38mm grenade launcher (South Africa).jpg|thumb|400px|none|Milkor Stopper - 38mm]] | [[File:Stopper 38mm grenade launcher (South Africa).jpg|thumb|400px|none|Milkor Stopper - 38mm]] | ||
| − | [[File:SBS3-stopper-1.jpg|thumb|none| | + | [[File:SBS3-stopper-1.jpg|thumb|none|600px|Moses uses a Stopper launcher to launch a tear gas grenade.]] |
==M1A1 Stun Grenades== | ==M1A1 Stun Grenades== | ||
| Line 408: | Line 415: | ||
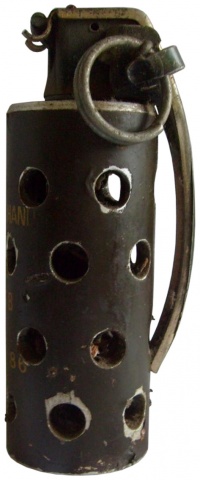
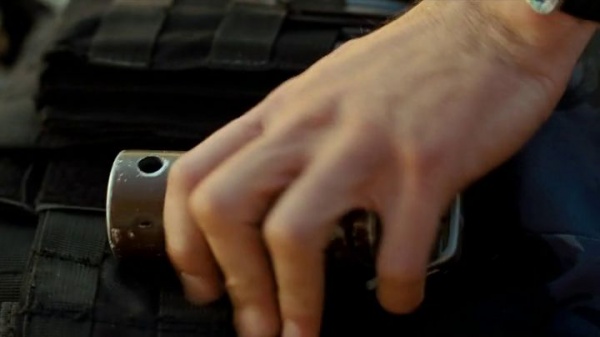
An M1A1 stun grenade is taken from a STF officer by Scott in episode 10 and used to cover the escape of Christy Bryant. These grenades are clearly used and inert, as on an unused live M1A1 the holes in the metal body of the grenade are covered with a thin skin, as opposed to on the grenade featured in the show where these holes have been blown through. | An M1A1 stun grenade is taken from a STF officer by Scott in episode 10 and used to cover the escape of Christy Bryant. These grenades are clearly used and inert, as on an unused live M1A1 the holes in the metal body of the grenade are covered with a thin skin, as opposed to on the grenade featured in the show where these holes have been blown through. | ||
| − | [[File:South African M1A1 stun.jpg|thumb|none|South African M1A1 stun grenade]] | + | [[File:South African M1A1 stun.jpg|thumb|none|200px|South African M1A1 stun grenade]] |
| − | [[File:SBS3-Stun-1.jpg|thumb|none| | + | [[File:SBS3-Stun-1.jpg|thumb|none|600px|Scott snatches a stun grenade from a fallen STF officer.]] |
| − | [[File:SBS3-stun-2.jpg|thumb|none| | + | [[File:SBS3-stun-2.jpg|thumb|none|600px|A stun grenade is attached to Stonebridge's vest.]] |
==Hand Grenades== | ==Hand Grenades== | ||
| Line 416: | Line 423: | ||
Baxter uses a hand grenade to destroy a mercenary ammo dump in episode 8. | Baxter uses a hand grenade to destroy a mercenary ammo dump in episode 8. | ||
| − | [[File:SBS3-grenade.jpg|thumb|none| | + | [[File:SBS3-grenade.jpg|thumb|none|600px|Baxter discovers a case of hand grenades.]] |
=Also See= | =Also See= | ||
Revision as of 11:43, 14 February 2014
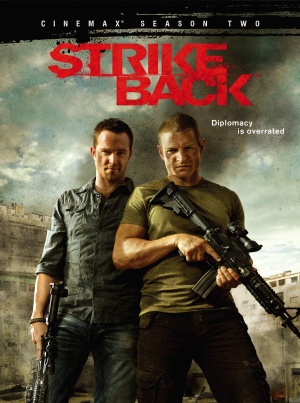
Strike Back - Season 3 (also known as Strike Back: Vengeance or Strike Back: Cinemax Season 2) once again stars Philip Winchester as Sergeant Michael Stonebridge and Sullivan Stapleton as Sergeant Damien Scott, members of a top secret British intelligence unit known as Section 20. Season 3 introduces Rhona Mitra as Section 20's new commanding officer, and Charles Dance as villain Conrad Knox, a wealthy philanthropist who conspires to reshape the political landscape of Africa by acquiring nuclear weapons.
The following weapons are featured in Season 3 of the series Strike Back:
![]() WARNING! THIS PAGE CONTAINS SPOILERS!
WARNING! THIS PAGE CONTAINS SPOILERS!
Handguns
Beretta 92FS
The Beretta 92FS is used by many of the antagonists throughout the series, including Conrad Knox (Charles Dance), his lieutenant Karl Matlock (Vincent Regan) and various mercenaries and criminals. South African Police Service (SAPS) officers in episodes 7-10 also use the Beretta 92FS.
Beretta 92SB
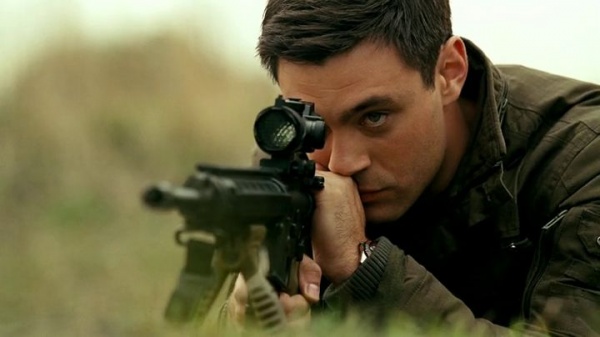
A Beretta 92SB is used by Craig Hanson (Shane Taylor) when he infiltrates Knox's estate in episode 6. A 92SB is also used by the leader of a gang of mercenaries who take Section 20 prisoner in episode 7, and is later used by the teams Communications Officer, Sergeant Liam Baxter (Liam Garrigan).
Beretta 92
In episode 10, Craig Hanson seizes a Beretta 92 from a SAPS officer and uses it to escape police custody.
Glock 17
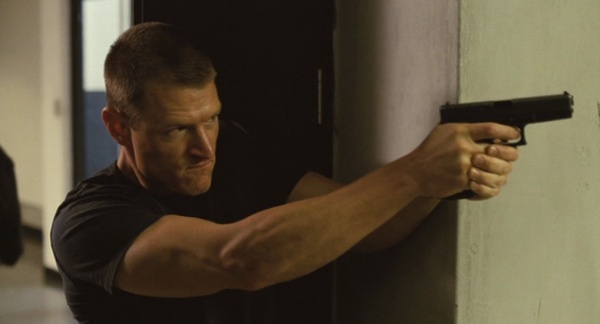
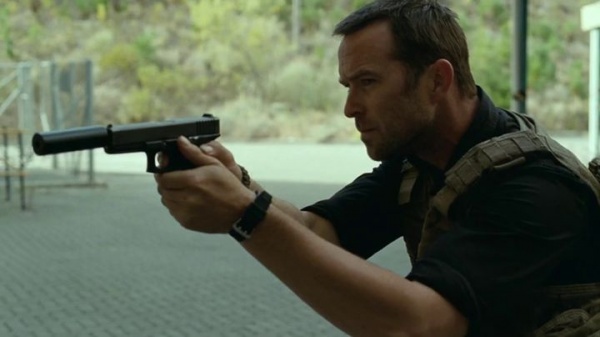
The Glock 17 is the standard pistol for all Section 20 personnel in Season 3, and is used by Sergeant Michael Stonebridge (Philip Winchester), Sergeant Damien Scott (Sullivan Stapleton), Captain (later Major) Rachel Dalton (Rhona Mitra), Sergeant Liam Baxter (Liam Garrigan) and Sergeant Julia Richmond (Michelle Lukes). Major Oliver Sinclair (Rhashan Stone) also briefly uses a Glock 17 to kill a Zimbabwean Central Intelligence Organisation (CIO) agent trying to kidnap Lillian Lutulu in episode 7. Matlock's partner Jessica Kohl (Natalie Becker) also wields a Glock 17.

Desert Eagle Mark VII
Somali warlord Waabri (Anthony Oseyemi) uses a Desert Eagle Mark VII in the season premiere.
Colt M1911A1
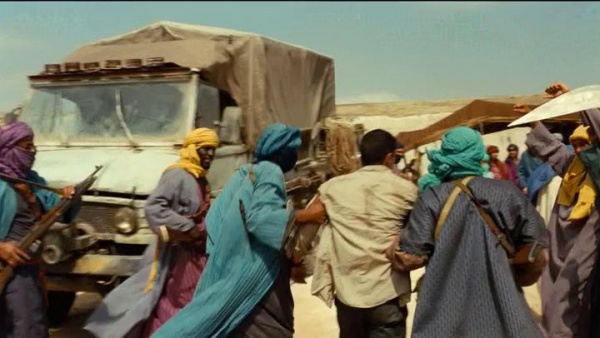
In episode 3, Scott takes a M1911A1 pistol off Markunda when apprehending a courier named Othmani (Saïd Taghmaoui) at a Tuareg camp in Niger as his Glock had been confiscated. He returns it and subsequently Markunda (Laëtitia Eïdo) uses her M1911A1 in episode 4 while battling militants in the Hoggar Mountains of Algeria who are attempting to recapture Othmani.
Star Model BS/Model Super
Islamist militant leader El Soldat (Farid Elouardi) uses a Star Model Super while attempting to free his captured brother Othmani in episode 4. A Nigerian gangster also waves one around in episode 10.
Vektor CP1
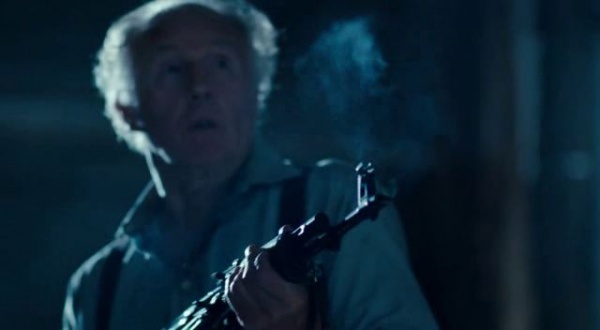
In episode 5, Mossad agent Rebecca Levi (Lyne Renée) wields a Vektor CP1 while attempting to hunt down a nuclear scientist named Peter Evans (Paul Freeman).
Vektor SP1
A Vektor SP1 is used by one of the Israeli assassins who is trying to kill Evans in episode 5. In episode 7, Zimbabwean Central Intelligence Organisation (CIO) agents carry the SP1 when trying to apprehend Lillian Lutulu in Bukohma Township. Craig Hanson also uses a SP1 on several occasions, including when he encounters Stonebridge in episodes 6 and 10. Dual two-tone Vektor SP1s with compensators are used by a Nigerian warlord while fleeing the Johannesburg apartment of Christian Lucas (Nyasha Hatendi) in episode 9.
Browning Hi-Power
In episode 7, an assassin uses a Browning Hi-Power to wound Zimbabwean activist Walter Lutulu (Eamonn Walker).
Smith & Wesson Model 10 HB
One of Walter Lutulu's supporters points a Smith & Wesson Model 10 revolver at Scott in Episode 7.
CZ-75B
Corrupt CIA Officer Christy Bryant (Stephanie Vogt) draws a two-tone CZ-75B when she is confronted by Scott in episode 10.
Submachine Guns
Armscor BXP
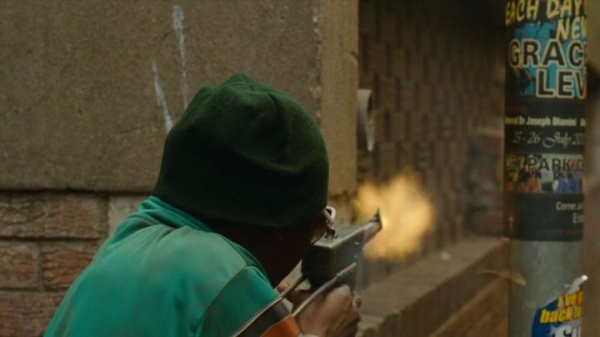
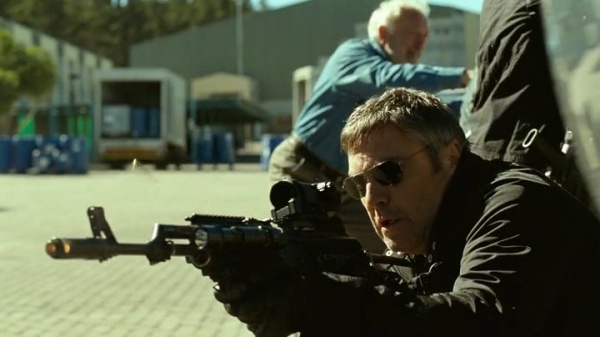
Scott uses an Armscor BXP while defending a British diplomatic convoy from an attack by Somali militants in episode 1. He also uses a BXP with a reflex sight while infiltrating into Mogadishu to search for Dalton and Patrick Burton (Tim Pigott-Smith) after they were kidnapped in the attack. Later in the same episode, one of Matlock's mercenaries uses a BXP with an EOTech sight. A Mossad assassin in episode 5 also fires a BXP, and a Nigerian militant in episode 10 uses a BXP to cover his fleeing boss.
Heckler & Koch MP5A3
Heckler & Koch MP5A3s are used by Nigerien special forces troops when they apprehend Scott in Episode 3. Johannesburg Special Task Force (STF) officers are also armed with MP5A3s in episodes 9 and 10.
Heckler & Koch MP5K-PDW
Rebecca Levi fires a Heckler & Koch MP5K-PDW when a Mossad strike team attacks Section 20's safe house in episode 5.
MAT-49
Nigerian militants in episode 10 are armed with MAT-49 submachine guns.
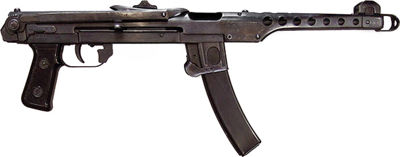
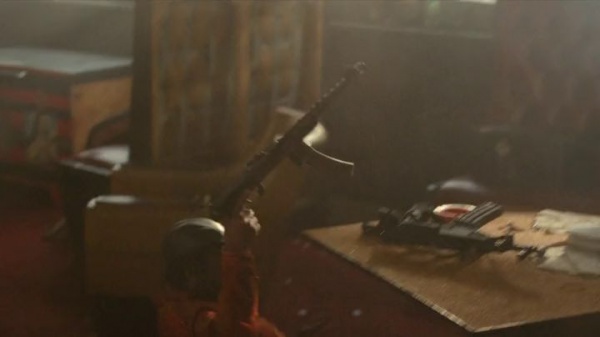
PPS-43
A few Nigerian militants also wield the PPS-43 in episode 10.
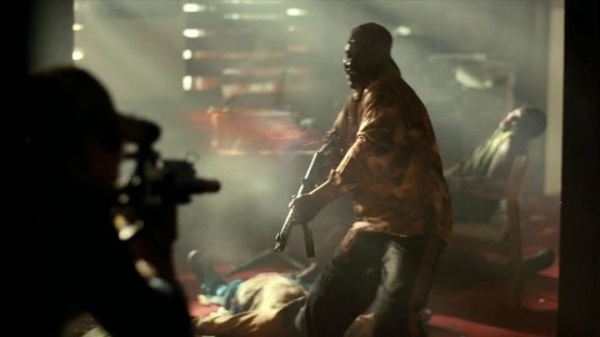
Walther MPK
The leader of the Nigerians fires a Walther MPK at Section 20 commandos when they raid his hideout in Episode 10.
Shotguns
Unknown compact pump-action shotgun
A female attacker uses a compact pump action shotgun during the convoy ambush in episode 1. The shotgun appears to be the same one used during the the first series.
12 Gauge Double-Barreled Shotgun
Scott uses a 12 Gauge Double Barreled Shotgun after running out of ammunition for his other weapons in Episode 4.
Mossberg 500
SAPS Sergeant Moses Tekere (Mpho Malatsi) points a Mossberg 500 (or possibly, the similar looking South African Mussler 12-gauge) at Stonebridge when he breaks into a police station in Episode 8 to hide the killer of activist Walter Lutulu (Eamonn Walker).
Taser X12
Stonebridge gets ahold of what appears to be a Mossberg 500 modified to resemble the Taser X12 less-lethal shotgun in Episode 8, using it to fire XREP rounds to prevent angry protesters from breaking into the building.
Armsel Striker
A Nigerian fires an Armsel Striker during the Section 20 raid in episode 10.
Rifles
Heckler & Koch HK33 (Customized)
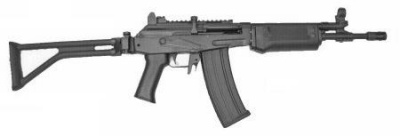
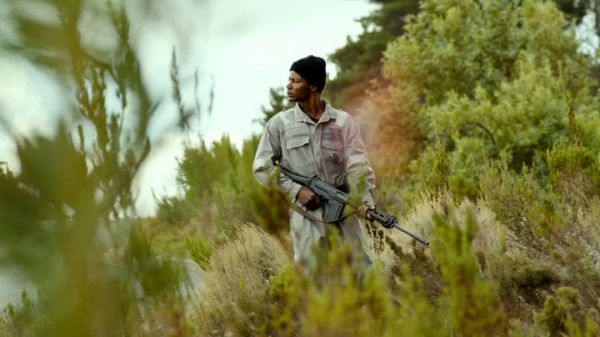
SAS trainees who are being instructed by Stonebridge in Episode 1, including Craig Hanson's brother Jake, are armed with Heckler & Koch HK33 rifles. The rifles have been extensively modified by series armorer Hire Arms, with a chopped down barrel similar in length to the HK33KA3, vented South African G3 handguards and a different trigger group than a factory HK33. The rifles are also adapted to use Vektor R4 polymer magazines rather than the standard metal magazines.
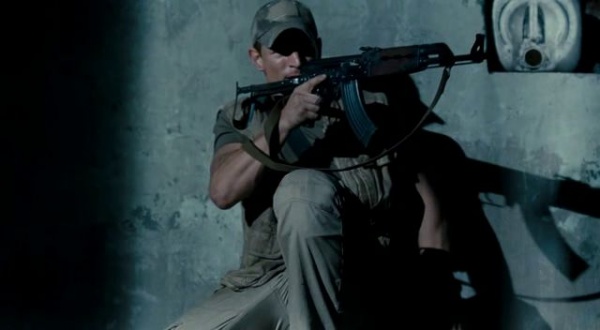
Heckler & Koch G3A4 (Customized)
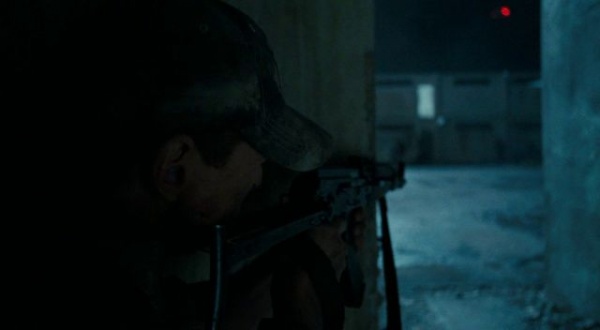
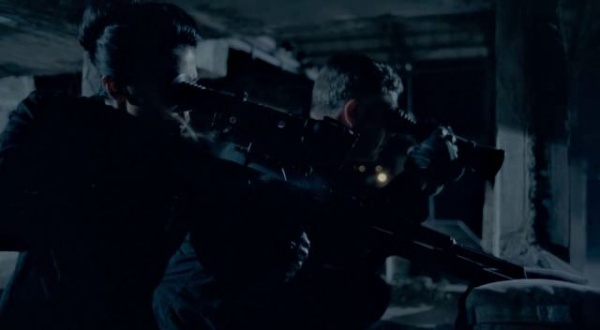
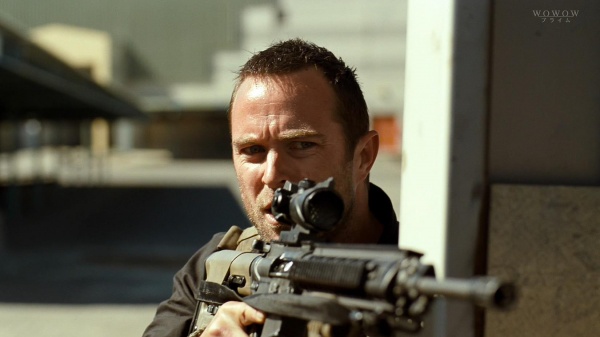
Stonebridge and Scott use Heckler & Koch G3A4 rifles during their mission in Mogadishu. As with the HK33s, the G3A4s have been heavily modified with shortened South African-style vented handguards and a chopped down barrel that is shorter than a G3KA4 but longer than that of the MC51 carbine. The rifles also have laser aiming devices, Surefire flashlights and scopes.
M4A1 Carbine
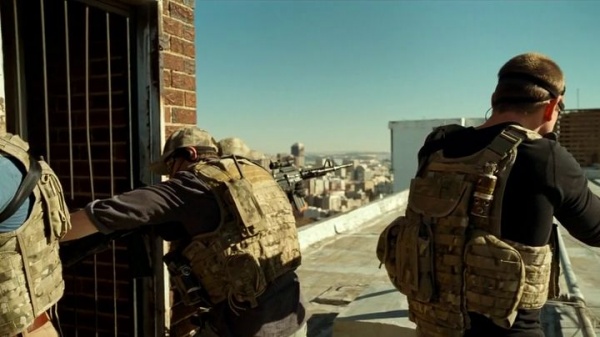
Stonebridge, Scott and other Section 20 commandos use M4A1 carbines in Niger during episodes 3 and 4. Other Section 20 operatives including Sgt. Richmond and Sgt. Liam Baxter (Liam Garrigan) also use M4A1 carbines when they attack Knox's disarmament plant in episode 6 and his mercenary camp in episode 8.
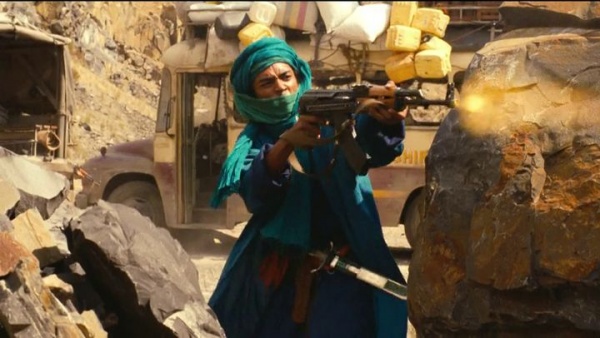
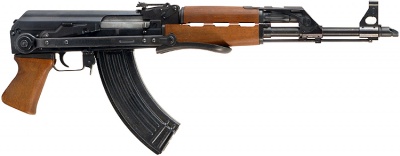
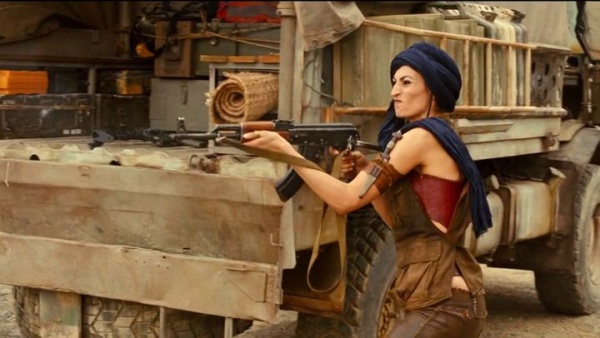
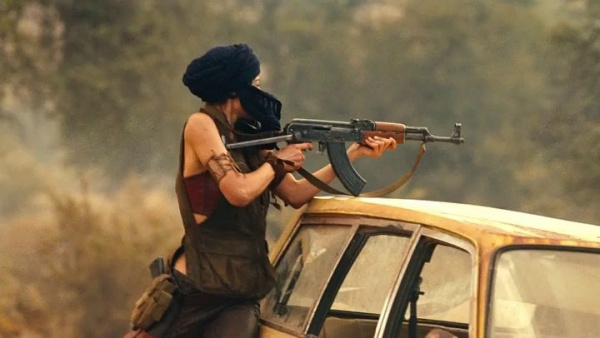
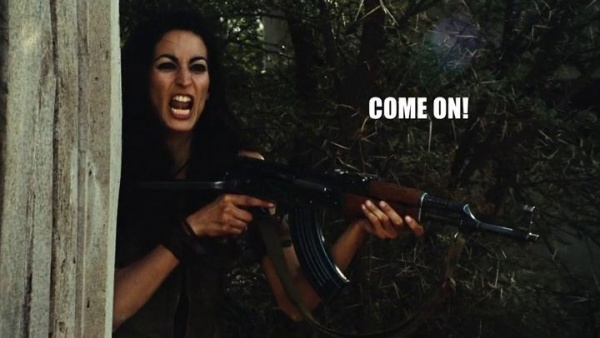
AKMS
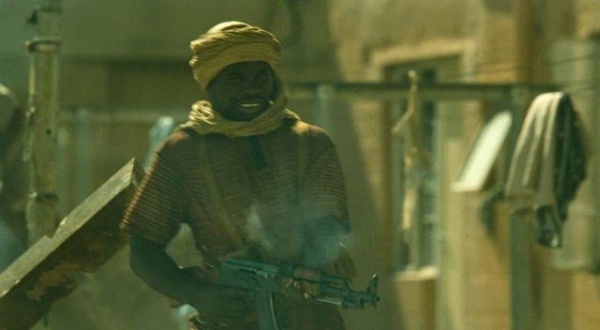
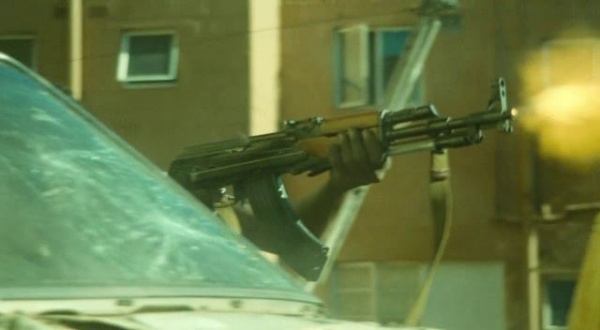
Many of the antagonists in the series are armed with AKMS rifles, including Somali militiamen in episodes 1-2, El Soldat's men in episodes 3-4, and some of Knox's mercenaries in episode 8. Major Dalton and Patrick Burton also use AKMS rifles in episode 2, as do Markunda's Tuareg bodyguards in episodes 3 and 4.
Zastava M70AB2
Zastava M70AB2s are used by Somali militiamen in episodes 1 and 2. Stonebridge takes one from a dead AMISOM soldier in episode 2 while trying to hold off the Somali militia.
Norinco Type 56
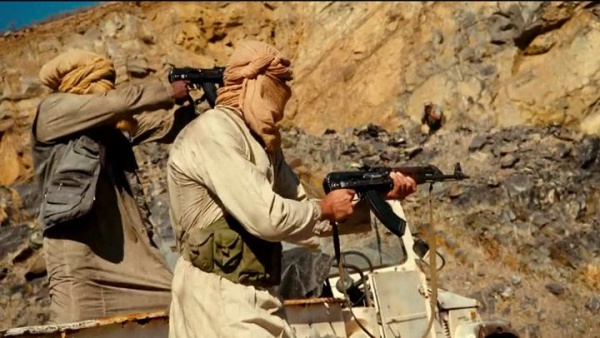
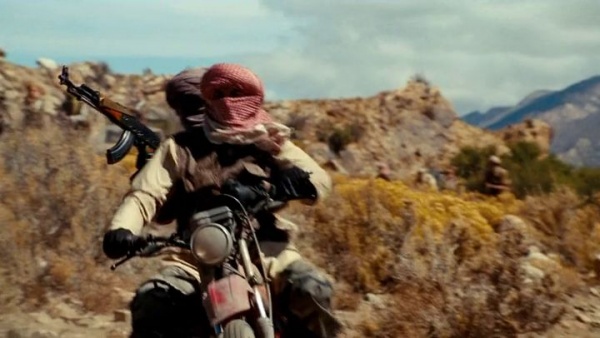
Various enemies wield Norinco Type 56 rifles with attached bayonets throughout the series.
Norinco Type 56-1
Markunda uses a Norinco Type 56-1 while battling El Soldat's militants in the Hoggar Mountains of Algeria.
Vektor R5
The Vektor R5 is the most common assault rifle in the latter half of the season, used by both Stonebridge and Scott, various South African Police Service (SAPS) officers and Special Task Force (STF) operatives, as well as by many of Knox's mercenaries. The rifles are seen in both unmodified form and in a tactical configuration with UTG quad rail mounts and CAA railed handguards, as well as various optical sights, Surefire tactical lights, and three prong flash hiders.
Vektor R5 (Modified to resemble Modern AK-Series Rifle)
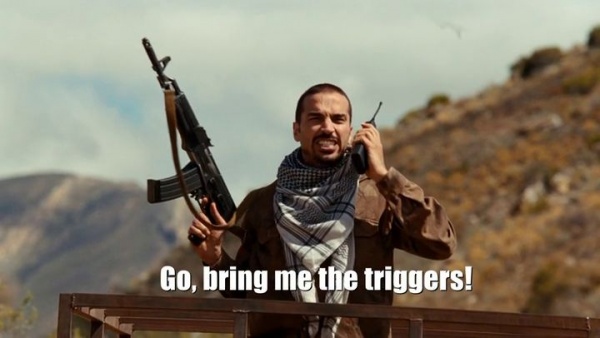
The Vektor R5 rifle, modified to resemble the AKS-74, is used by Scott in episode 1 to disrupt an attempt by Waabri to hand over Libyan nuclear triggers to Matlock. El Soldat brandishes a similar rifle in episode 4 while calling on his men to attack Stonebridge and Scott.
Vektor R4
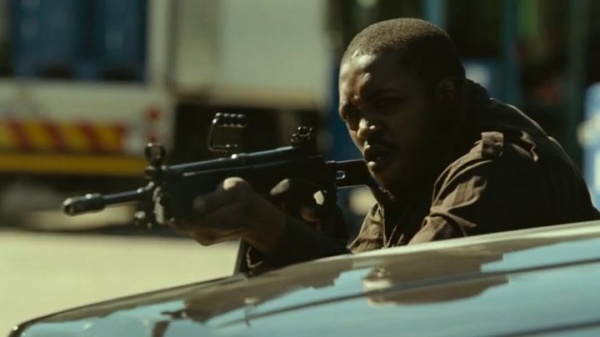
The Vektor R4 is occasionally seen in the hands of Knox's mercenaries. Dalton uses a scoped R4 in episode 8 to provide sniper cover during Section 20's raid of a mercenary camp, with a short 10-round magazine. Some R4s in the series have carry handles and lack lightening cuts, which are not features of the standard R4.
Vektor CR-21
Knox's mercenaries are also seen wielding Vektor CR-21 rifles, most notably during a battle at Greenpont Stadium in episode 5 and when Section 20 attacks Knox's nuclear facility in episode 6. The CR-21s have shortened barrels and Leupold CQ/T scopes.
Norinco Type 84S
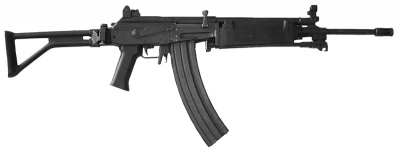
Matlock uses a customized Norncio Type 84S in episodes 2, 4 and 6. The rifle is modified with an AK-74-style muzzle brake, picatinny rails, a scope and a Galil-style folding stock.
Vz. 52 Rifle
A Tuareg warrior is seen with a Czech Vz. 52 Rifle as Stonebridge and Scott enter Markunda's camp.
FN FAL
A guard at Knox's nuclear facility in episode 6 is seen holding a FN FAL.
Sniper Rifles
FPK/PSL Sniper Rifle
Jessica Kohl uses a FPK / PSL Sniper Rifle to shoot a Libyan official in episode 1 as he gives a set of nuclear triggers to Waarbri.
Truvelo CMS Sniper Rifle
Craig Hanson fires what appears to be a Truvelo CMS Sniper Rifle at the end of episode 2.
Unidentified AICS rifle
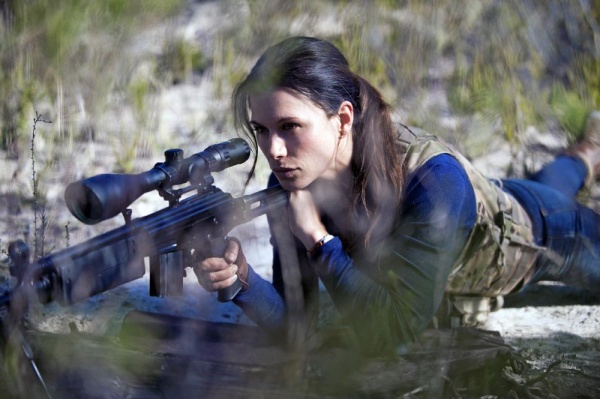
Matlock gives Kohl a custom sniper rifle in an Accuracy International Chassis System (AICS) as a gift in episode 3. She uses the rifle on several occasions, including in Algeria in episode 4 and during the stadium battle in episode 5. The action inside the chassis is not a Remington Model 700 as would regularly be mounted in an AICS, as identified by the polygonal rather than round profile of the action. Based on the length of the magazine, it appears that this rifle is chambered in a magnum caliber such as .338 Lapua Magnum. The rifle is fitted with a suppressor, Harris bipod and has dark earth furniture giving it the appearance of the British Army L115A3 variant of the Accuracy International Arctic Warfare Magnum.
Modified AR-15 Sniper Rifle
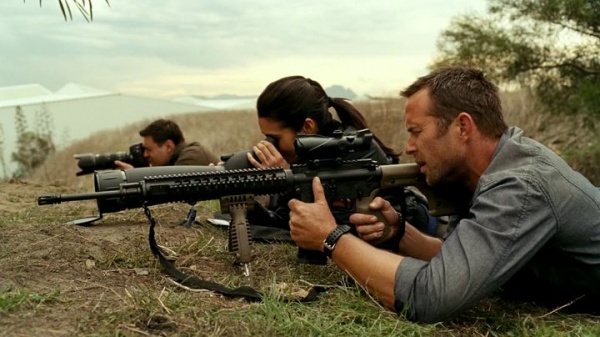
A modified M16 sniper rifle is used by Scott and Sgt. Baxter in episode 6. The rifle is a custom weapon built by armorer Hire Arms on a M16 SP1 upper receiver that has had its carry handle replaced by a picatinny rail. It also features an ACOG scope with killflash filter, a railed handguard, foregrip bipod, Magpul P-Mags and a Magpul PRS stock.
Machine Guns
Browning M1919A4
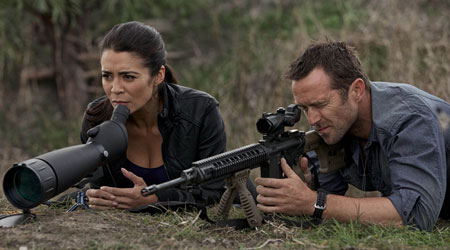
A Somali militiaman fires a truck-mounted M1919A4 machine gun in episode 1. Kohl is later seen firing two M1919s from a Huey helicopter when Matlock attempts to take the nuclear triggers from Waabri.
RPK
Somali militiamen use a RPK light machine gun while covering Waabri when he meets with Matlock. El Soldat's men also use RPKs while attacking Stonebridge and Scott's position in episode 4.
RPD
El Soldat's men are also seen using RPD machine guns in episodes 3 and 4.
Vektor SS-77
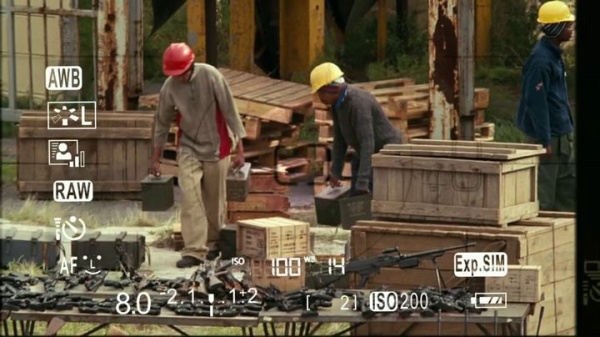
A Vektor SS-77 can be seen among an assortment of weapons at Knox's weapons decommissioning plant in episode 6.
Other
M136 AT4
Dalton uses a M136 AT4 to blast a Somali technical in episode 1. Matlock fires a M136 in episode 8 while attempting to kill an assassin that Stonebridge has detained.
RPG-7
One of El Soldat's men fires a RPG-7 at Stonebridge and Scott as they flee an ambush in episode 4.
Milkor "Stopper" 37/38mm Gas Grenade Launcher
Sgt. Tekere fires tear gas rounds from a Milkor Stopper gas grenade launcher to hold off angry protesters in episode 8.
M1A1 Stun Grenades
An M1A1 stun grenade is taken from a STF officer by Scott in episode 10 and used to cover the escape of Christy Bryant. These grenades are clearly used and inert, as on an unused live M1A1 the holes in the metal body of the grenade are covered with a thin skin, as opposed to on the grenade featured in the show where these holes have been blown through.
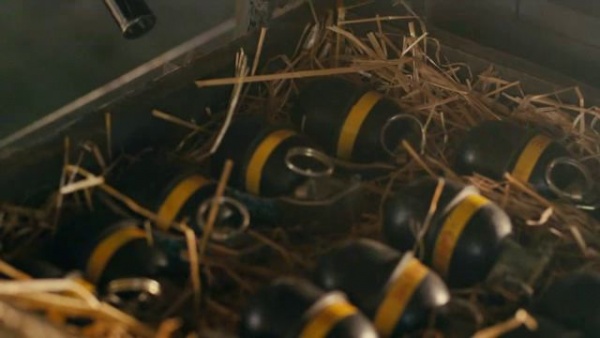
Hand Grenades
Baxter uses a hand grenade to destroy a mercenary ammo dump in episode 8.
