| If you have been locked out of your account you can request a password reset here. |
Difference between revisions of "The Siege of Jadotville"
PyramidHead (talk | contribs) |
|||
| (46 intermediate revisions by 11 users not shown) | |||
| Line 1: | Line 1: | ||
| − | [[Image: | + | {{Infobox Movie|The Siege of Jadotville |
| + | |name=''The Siege of Jadotville'' | ||
| + | |picture=Siege_of_Jadotville.jpg | ||
| + | |caption= | ||
| + | |country=[[Image:USA.jpg|25px]] United States | ||
| + | |director=Richie Smyth | ||
| + | |date=2016 | ||
| + | |language=English | ||
| + | |studio= | ||
| + | |distributor= [[Netflix]] | ||
| + | |character1= Commander Quinlan | ||
| + | |actor1=[[Jamie Dornan]] | ||
| + | |character2=Sgt. Jack Prendergast | ||
| + | |actor2=[[Jason O'Mara]] | ||
| + | |character3=Rene Faulques | ||
| + | |actor3=[[Guillaume Canet]] | ||
| + | |character4=Sgt. Bill Ready | ||
| + | |actor4=[[Sam Keeley]] | ||
| + | }} | ||
| − | '''''The Siege of Jadotville''''' is a 2016 historical war drama covering the true story of ''The Siege at Jadotville'', a battle involving Irish UN Peacekeepers of 'A' Company, 35th Battalion and Katangese rebels in 1961 during the Congo Crisis. The film was released on [[Netflix]] in October of 2016. | + | '''''The Siege of Jadotville''''' is a 2016 historical war drama covering the true story of ''The Siege at Jadotville'', a battle involving Irish UN Peacekeepers of 'A' Company, 35th Battalion and Katangese rebels in 1961 during the Congo Crisis. The film was released on [[Netflix]] in October of 2016. The cast included [[Jamie Dornan]], [[Jason O'Mara]], and [[Mark Strong]]. |
| − | The cast included [[Jamie Dornan]], [[Jason O'Mara]], and [[Mark Strong]]. | ||
| + | {{Film Title|The Siege of Jadotville}} | ||
| − | |||
| − | |||
__TOC__<br clear=all> | __TOC__<br clear=all> | ||
=Pistols= | =Pistols= | ||
==Walther P38== | ==Walther P38== | ||
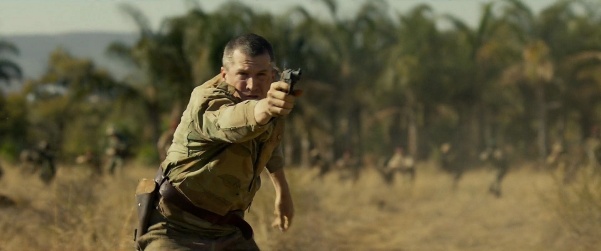
| − | + | Rene Faulques ([[Guillaume Canet]]) carries a [[Walther P38]]. He unholsters it when confronting Commandant Quinlan for the last time. | |
[[Image:P38.jpg|thumb|none|350px|Walther P38 pistol (manufactured at the Mauser Factory) - World War II dated - 9x19mm]] | [[Image:P38.jpg|thumb|none|350px|Walther P38 pistol (manufactured at the Mauser Factory) - World War II dated - 9x19mm]] | ||
| − | [[Image:Jadotville_P38.jpg|thumb|none| | + | [[Image:Jadotville_P38.jpg|thumb|none|601px|Rene Faulques ([[Guillaume Canet]]) firing his P38 after his Jeep is overturned.]] |
| − | [[Image:Jadotville_P38_2.jpg|thumb|none| | + | [[Image:Jadotville_P38_2.jpg|thumb|none|601px|Faulquet unholsters his P38 when confronting Commandant Quinlan for the last time.]] |
| + | |||
| + | ==Browning Hi-Power== | ||
| + | The [[Browning Hi-Power]] is the sidearm carried by Commander Patrick Quinlan ([[Jamie Dornan]]). A mercenary carries the pistol as well. | ||
| + | [[Image:BrowningHiPowerStd.jpg|thumb|none|350px|Browning Hi Power (Belgian Mfg) 1970s - 9x19mm]] | ||
| + | [[Image:SOJ 126.jpg|thumb|none|601px|Closeup of the BHP. The external extractor and spur hammer indicate a post-1973 manufacture and thus anachronistic.]] | ||
| + | [[File:SOJ 141.jpg|thumb|none|601px|A mercenary carries the pistol as well.]] | ||
=Rifles= | =Rifles= | ||
==FN FAL== | ==FN FAL== | ||
Both the Irish Army and the mercenaries/Katangese rebels extensively use [[FN FAL]]s. They are shown to be capable of fully automatic fire. | Both the Irish Army and the mercenaries/Katangese rebels extensively use [[FN FAL]]s. They are shown to be capable of fully automatic fire. | ||
| − | [[Image:FN FAL 50 00.jpg|thumb|none| | + | [[Image:FN FAL 50 00.jpg|thumb|none|450px|FN FAL 50.00 - 7.62x51mm NATO]] |
| − | [[Image:Jadotville_FAL.jpg|thumb|none| | + | [[Image:Jadotville_FAL.jpg|thumb|none|601px|Commander Patrick Quinlan carries the FN FAL on the right.]] |
[[Image:Jadotville_FAL_2.jpg|thumb|none|600px|Rebels charge the Irish compound with FALs.]] | [[Image:Jadotville_FAL_2.jpg|thumb|none|600px|Rebels charge the Irish compound with FALs.]] | ||
| − | [[Image:Jadotville_FAL_3.jpg|thumb|none|600px|]] | + | [[Image:Jadotville_FAL_3.jpg|thumb|none|600px|Quinlan fires an FN FAL.]] |
| − | [[Image:Jadotville_FAL_4.jpg|thumb|none|600px|"Breathe, squeeze, kill! Breathe again!" | + | [[Image:Jadotville_FAL_4.jpg|thumb|none|600px|''"Breathe, squeeze, kill! Breathe again!"'' <br> Sgt. Jack Prendergast ([[Jason O'Mara]]) gives advice to the soldiers with the FN FAL rifles on shooting technique after firing too fast.]] |
| − | == | + | ==Heckler & Koch G3== |
| − | + | At least one mercenary is seen with a [[Heckler & Koch G3]]. The exact variant cannot be determined, but it has a "slimeline" foregrip. | |
| − | [[ | + | [[File:CETME G3.JPG|thumb|none|450px|Early Heckler & Koch G3 rifle with wooden furniture, later muzzle device, and drum rear sight - 7.62x51mm NATO]] |
| − | [[Image: | + | [[Image:Jadotville_Mauser1.jpg|thumb|none|600px|The mercenary to the right is armed with a G3. Note the diopter sight.]] |
| − | |||
| − | ==Lee Enfield No.4 | + | ==Lee-Enfield No. 4 Mk I== |
| − | + | Several members of 'A' Company carry [[Lee-Enfield No. 4 Mk I]]s instead of FALs. | |
| − | [[Image:Smle4mk1t.jpg|thumb|none| | + | [[Image:LeeEnfield4Rifle.jpg|thumb|none|450px|Lee-Enfield No. 4 Mk I - .303 British]] |
| − | [[Image:Jadotville_LE_No4_T.jpg|thumb|none|600px|The | + | [[Image:Jadotville_LE_No4.jpg|thumb|none|600px|'A' Company members carrying No. 4 Mk Is as they first arrive in Jadotville.]] |
| − | [[Image: | + | [[Image:Jadotville_LE_No4_2.jpg|thumb|none|600px|Irish soldiers fire their No. 4 rifles from an entrenched position.]] |
| + | |||
| + | ==Lee-Enfield No. 4 Mk I (T)== | ||
| + | Sgt. Bill Ready ([[Sam Keeley]]), the company sniper, carries a scoped [[Lee-Enfield No. 4 Mk I (T)]]. | ||
| + | [[Image:Smle4mk1t.jpg|thumb|none|450px|Lee-Enfield No. 4 Mk I (T) - .303 British]] | ||
| + | [[Image:Jadotville_LE_No4_T.jpg|thumb|none|601px|Bill Ready ([[Sam Keeley]]), the company sniper aims his Enfield.]] | ||
| + | [[Image:Jadotville_FAL.jpg|thumb|none|601px|Ready on the left.]] | ||
| + | |||
| + | ==Mauser Rifles== | ||
| + | Various Mauser rifles are used by the rebels. | ||
| + | [[Image:Jadotville_Mauser1.jpg|thumb|none|600px|An African fights with a full-length Mauser rifle, that could be a Spanish or Turkish model.]] | ||
| + | [[Image:Jadotville_Mauser2.jpg|thumb|none|600px|The unhooded front sight of the mercenary's rifle. Shortly after, the under-barrel mounted sling swivel is visible.]] | ||
| + | [[Image:Jadotville_Mauser3.jpg|thumb|none|600px|Left side view of the receiver.]] | ||
| + | [[Image:Jadotville_Mauser4.jpg|thumb|none|600px|The Kar98k-style rear sight can be seen.]] | ||
=Submachine Guns= | =Submachine Guns= | ||
==Carl Gustav M/45== | ==Carl Gustav M/45== | ||
| − | Several 'A' Company NCOs use [[Carl Gustav M/45]]s. | + | Several 'A' Company NCOs use [[Carl Gustav M/45]]s, namely Sgt. Jack Prendergast ([[Jason O'Mara]]). |
| − | [[Image:Kp m45b.jpg|thumb|none| | + | [[Image:Kp m45b.jpg|thumb|none|400px|Swedish K / Carl Gustav M/45 - 9x19mm]] |
| − | [[Image:Jadotville_CG_M45.jpg|thumb|none|600px|]] | + | [[Image:Jadotville_CG_M45.jpg|thumb|none|600px|The Carl Gustav is wielded.]] |
| − | [[Image:Jadotville_FAL_4.jpg|thumb|none|600px|]] | + | [[Image:Jadotville_FAL_4.jpg|thumb|none|600px|Sgt. Jack Prendergast ([[Jason O'Mara]]) opens fire with the [[Carl Gustav M/45]].]] |
| − | [[Image:Jadotville_CG_M45_2.jpg|thumb|none|600px|Note the No. 9 bayonet affixed.]] | + | [[Image:Jadotville_CG_M45_2.jpg|thumb|none|600px|Sgt. Jack Prendergast ([[Jason O'Mara]]) on the right with his M/45. Note the No. 9 bayonet affixed.]] |
==MAT-49== | ==MAT-49== | ||
| − | Several mercenaries, including | + | Several mercenaries, including Faulques, use [[MAT-49]]s. |
| − | [[Image:MAT-49.jpg|thumb|none| | + | [[Image:MAT-49.jpg|thumb|none|400px|MAT-49 Submachine Gun - 9x19mm]] |
| − | [[Image:Jadotville_MAT-49.jpg|thumb|none|600px|]] | + | [[Image:Jadotville_MAT-49.jpg|thumb|none|601px|Faulques uses the [[MAT-49]].]] |
| + | |||
| + | == Franchi LF-57 == | ||
| + | [[Franchi LF-57]] SMGs are also used by mercenaries. | ||
| + | [[Image:Franchi_lf57-2.jpg|thumb|none|400px|Franchi LF-57 - 9x19mm]] | ||
| + | [[File:Siege of Jadotville-LF57-1.jpg|thumb|none|600px|An African in green beret holds LF-57 in center.]] | ||
| + | |||
| + | == Vigneron M2 == | ||
| + | [[Vigneron M2]] SMGs are also seen. | ||
| + | [[File:Belgian Vigneron M2 SMG.jpg|thumb|none|400px|Vigernon M2 - 9x19mm]] | ||
| + | [[File:Siege of Jadotville-Vigneron-1.jpg|thumb|none|600px|A Vigneron M2 is seen when Irish soldiers scavenge weapons during a lull in the battle.]] | ||
=Machine Guns= | =Machine Guns= | ||
==Bren MkI== | ==Bren MkI== | ||
| − | 'A' Company employs several [[Bren gun]]s. | + | 'A' Company employs several [[Bren gun]]s. Sgt. Ready, the company sniper, switches to a Bren to make a long distance shot, for unknown reasons, possibly because it is a more stable platform than his No. 4 (T). |
[[Image:Bren gun.JPG|thumb|none|350px|Bren MK1 Light Machine Gun - .303 British]] | [[Image:Bren gun.JPG|thumb|none|350px|Bren MK1 Light Machine Gun - .303 British]] | ||
| − | [[Image:Jadotville_LE_No4_2.jpg|thumb|none|600px|]] | + | [[Image:Jadotville_LE_No4_2.jpg|thumb|none|600px|The Bren is seen fired at the right.]] |
[[Image:Jadotville_Bren.jpg|thumb|none|600px|The Bren after its operator receives a superficial wound to his cheek.]] | [[Image:Jadotville_Bren.jpg|thumb|none|600px|The Bren after its operator receives a superficial wound to his cheek.]] | ||
[[Image:Jadotville_Bren_2.jpg|thumb|none|600px|The sniper preparing to fire the Bren in single shot.]] | [[Image:Jadotville_Bren_2.jpg|thumb|none|600px|The sniper preparing to fire the Bren in single shot.]] | ||
| − | [[Image:Jadotville_Bren_3.jpg|thumb|none| | + | [[Image:Jadotville_Bren_3.jpg|thumb|none|601px|A .303 round, presumably match-grade, being chambered by hand.]] |
| − | [[Image:Jadotville_Bren_5.jpg|thumb|none| | + | [[Image:Jadotville_Bren_5.jpg|thumb|none|601px|Ready looks down the sight.]] |
| − | [[Image:Jadotville_Bren_6.jpg|thumb|none| | + | [[Image:Jadotville_Bren_6.jpg|thumb|none|601px||Ready prepares to fire.]] |
[[Image:Jadotville_Bren_4.jpg|thumb|none|600px|The bolt closing when fired.]] | [[Image:Jadotville_Bren_4.jpg|thumb|none|600px|The bolt closing when fired.]] | ||
| − | == | + | ==Browning M2HB== |
| − | + | Katangese mercenaries use a [[Browning M2HB]] mounted on a vehicle. | |
| − | [[Image: | + | [[Image:BrowningM2.jpg|thumb|none|450px|Browning M2HB on vehicle mount - .50 BMG]] |
| − | [[ | + | [[Image:Jadotville_M2.jpg|thumb|none|601px|Katangese mercenaries use a [[Browning M2HB]] mounted on a vehicle.]] |
| − | [[Image: | + | [[Image:Jadotville_M2_2.jpg|thumb|none|601px|Firing the M2.]] |
| + | [[File:SOJ 148.jpg|thumb|none|601px|Note the heat shield's horizontal slots instead of the usual circular perforations.]] | ||
| + | [[Image:Jadotville_M23.jpg|thumb|none|601px|Faulques calling a retreat while manning the Browning.]] | ||
==Browning M1919A4== | ==Browning M1919A4== | ||
The mercenaries use several [[Browning M1919A4]]s mounted on vehicles and on tripods. | The mercenaries use several [[Browning M1919A4]]s mounted on vehicles and on tripods. | ||
[[File:M1919A4 pintle.jpg|thumb|none|350px|Browning M1919A4 on an M31C pedestal mount - .30-06 Springfield]] | [[File:M1919A4 pintle.jpg|thumb|none|350px|Browning M1919A4 on an M31C pedestal mount - .30-06 Springfield]] | ||
| − | [[Image:Jadotville_M1919.jpg|thumb|none|600px|]] | + | [[Image:Jadotville_M1919.jpg|thumb|none|600px|Faulques mans and fires a mounted M1919A4.]] |
| − | [[Image:Jadotville_M1919_2.jpg|thumb|none|600px|]] | + | [[Image:Jadotville_M1919_2.jpg|thumb|none|600px|A camouflaged Katangnese machine gunner with his M1919A4 is shot by Ready.]] |
| + | [[Image:SOJ 107.jpg|thumb|none|600px|A mercenary fires a M191A4 from the hip.]] | ||
| + | |||
| + | ==DShK Heavy Machine Gun== | ||
| + | The mercenaries use a [[DShK heavy machine gun|DShK Heavy Machine Gun]]. This appears to be the only Soviet-made firearm used by the fiercely anti-communist Katangese. | ||
| + | [[Image:DSHK.jpg|thumb|none|400px|DShK - 12.7x108mm]] | ||
| + | [[Image:SOJ 110.jpg|thumb|none|600px|Faulques fires a mounted DShk from a jeep.]] | ||
==FN MAG 58== | ==FN MAG 58== | ||
| − | A mercenary uses [[FN MAG 58]] fired from the hip. Another is mounted on a vehicle. | + | A mercenary uses an [[FN MAG 58]] fired from the hip. Another is mounted on a vehicle. |
| − | [[Image:FNMAG.jpg|thumb|none| | + | [[Image:FNMAG.jpg|thumb|none|450px|FN MAG 58 - 7.62x51mm NATO]] |
| − | [[Image:Jadotville_FN_MAG.jpg|thumb|none| | + | [[Image:Jadotville_FN_MAG.jpg|thumb|none|601px|A mercenary uses the FN MAG 58 fired from the hip.]] |
| − | [[Image:Jadotville_FN_MAG_2.jpg|thumb|none|600px|]] | + | [[Image:Jadotville_FN_MAG_2.jpg|thumb|none|600px|A Katangnese rebel mans a FN MAG from a vehicle. Note the mounted shield.]] |
| − | == | + | ==Vickers Gun== |
| − | + | 'A' Company uses a [[Vickers Gun]] mounted on a Land Rover, then on its own with and without a tripod. Commander Patrick Quinlan uses it to shoot down a Fouga Magister. | |
| − | [[Image: | + | [[Image:Vickers gun.JPG|thumb|none|300px|Vickers gun with ribbed water jacket - .303 British]] |
| − | [[Image: | + | [[Image:Jadotville_Vickers.jpg|thumb|none|600px|Prendergast fires a mounted Vickers during the first assault.]] |
| − | + | [[Image:Jadotville_Vickers_2.jpg|thumb|none|600px|The Vickers being removed from its tripod before the position is hit with mortar.]] | |
| − | [[Image: | ||
=Other= | =Other= | ||
| Line 91: | Line 142: | ||
An NCO picks up a [[Mk 2 hand grenade]] when his M/45 runs dry. | An NCO picks up a [[Mk 2 hand grenade]] when his M/45 runs dry. | ||
[[Image:MK2 grenade DoD.jpg|thumb|none|200px|Mk 2 "Pineapple" World War II-made High-Explosive Fragmentation hand grenade (sometimes written Mk II)]] | [[Image:MK2 grenade DoD.jpg|thumb|none|200px|Mk 2 "Pineapple" World War II-made High-Explosive Fragmentation hand grenade (sometimes written Mk II)]] | ||
| − | [[Image:Jadotville_Mk_II_grenade.jpg|thumb|none|600px|]] | + | [[Image:Jadotville_Mk_II_grenade.jpg|thumb|none|600px|An Irish NCO with his Mk 2 grenade at the ready.]] |
==M2 Mortar== | ==M2 Mortar== | ||
A Company's support platoon uses a 60mm [[M2 Mortar]] in counter-battery fire. | A Company's support platoon uses a 60mm [[M2 Mortar]] in counter-battery fire. | ||
[[Image:M2Mortar60mm.jpg|thumb|none|350px|M2 Mortar - 60mm]] | [[Image:M2Mortar60mm.jpg|thumb|none|350px|M2 Mortar - 60mm]] | ||
| − | [[Image:Jadotville_60mm_Mortar.jpg|thumb|none|600px|]] | + | [[Image:Jadotville_60mm_Mortar.jpg|thumb|none|600px|Irish mortarmen cover the M2 motar's breech after firing.]] |
| − | [[Image:Jadotville_60mm_Mortar_2.jpg|thumb|none|600px|]] | + | [[Image:Jadotville_60mm_Mortar_2.jpg|thumb|none|600px|Irish mortarmen prepare to load a 60mm mortar round.]] |
==Ordnance ML 3 inch Mortar== | ==Ordnance ML 3 inch Mortar== | ||
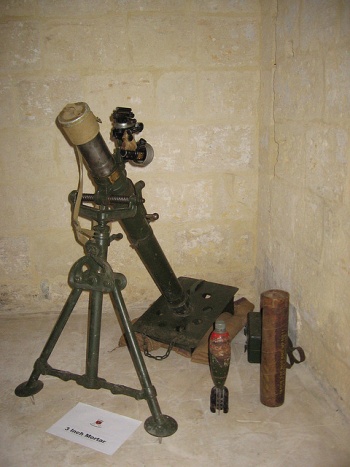
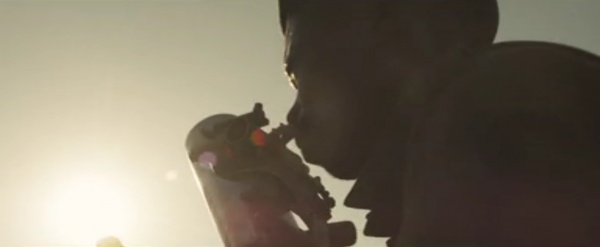
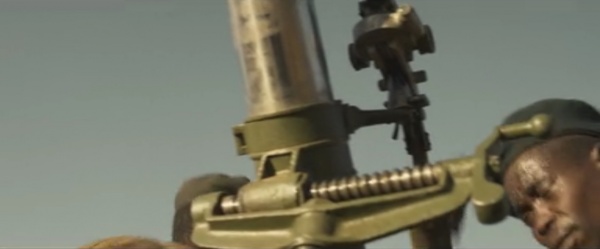
The mercenaries use an [[Ordnance ML 3 inch Mortar]] to shell the compound. | The mercenaries use an [[Ordnance ML 3 inch Mortar]] to shell the compound. | ||
[[File:3inch.jpg|thumb|none|350px|Ordnance ML 3 inch Mortar Mk II - 3.20 in]] | [[File:3inch.jpg|thumb|none|350px|Ordnance ML 3 inch Mortar Mk II - 3.20 in]] | ||
| − | [[Image:Jadotville_81mm_Mortar.jpg|thumb|none|600px|]] | + | [[Image:Jadotville_81mm_Mortar.jpg|thumb|none|600px|A Kantangnese rebel sights his ML mortar to his target.]] |
| − | [[Image:Jadotville_81mm_Mortar_2.jpg|thumb|none|600px|]] | + | [[Image:Jadotville_81mm_Mortar_2.jpg|thumb|none|600px|The mortar fires.]] |
[[Category:Movie]] | [[Category:Movie]] | ||
[[Category:War]] | [[Category:War]] | ||
[[Category:Netflix]] | [[Category:Netflix]] | ||
Revision as of 18:55, 6 October 2022
| ||||||||||||||||||||||||||
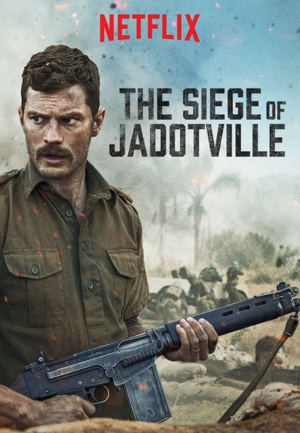
The Siege of Jadotville is a 2016 historical war drama covering the true story of The Siege at Jadotville, a battle involving Irish UN Peacekeepers of 'A' Company, 35th Battalion and Katangese rebels in 1961 during the Congo Crisis. The film was released on Netflix in October of 2016. The cast included Jamie Dornan, Jason O'Mara, and Mark Strong.
The following weapons were used in the film The Siege of Jadotville:
Pistols
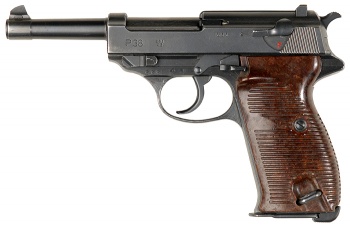
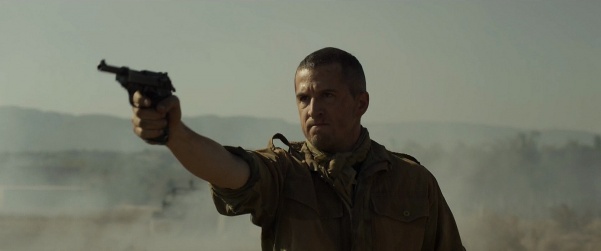
Walther P38
Rene Faulques (Guillaume Canet) carries a Walther P38. He unholsters it when confronting Commandant Quinlan for the last time.
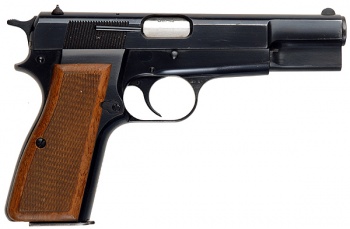
Browning Hi-Power
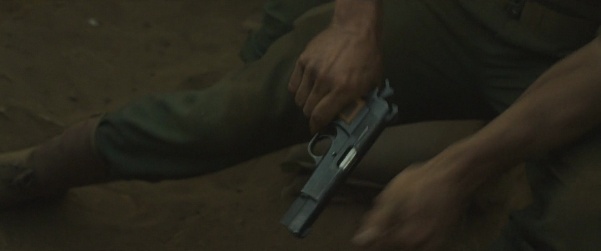
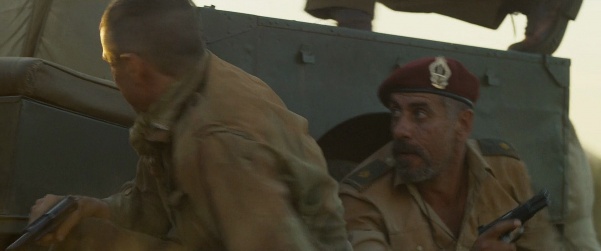
The Browning Hi-Power is the sidearm carried by Commander Patrick Quinlan (Jamie Dornan). A mercenary carries the pistol as well.
Rifles
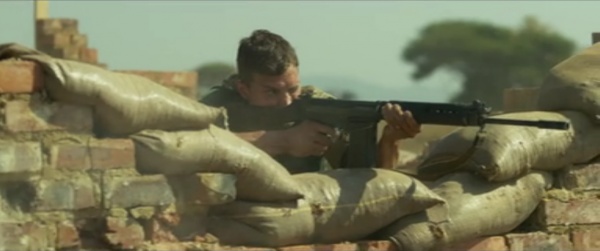
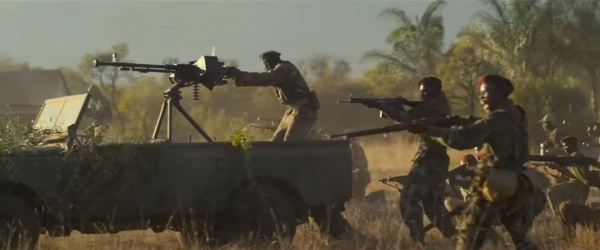
FN FAL
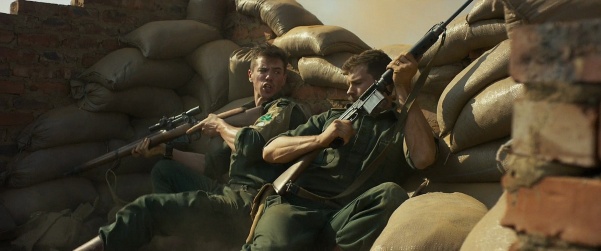
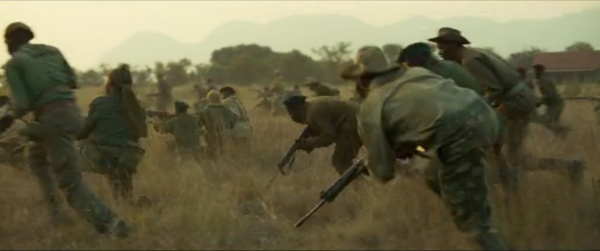
Both the Irish Army and the mercenaries/Katangese rebels extensively use FN FALs. They are shown to be capable of fully automatic fire.
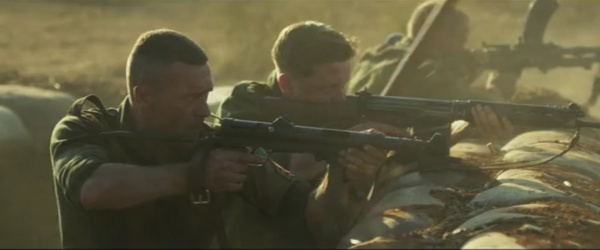
Sgt. Jack Prendergast (Jason O'Mara) gives advice to the soldiers with the FN FAL rifles on shooting technique after firing too fast.
Heckler & Koch G3
At least one mercenary is seen with a Heckler & Koch G3. The exact variant cannot be determined, but it has a "slimeline" foregrip.
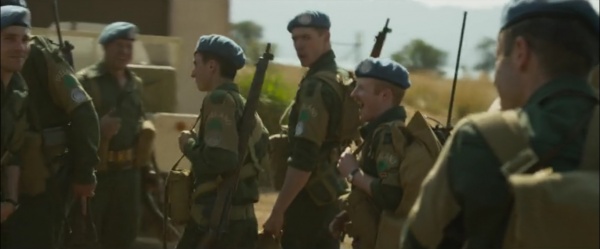
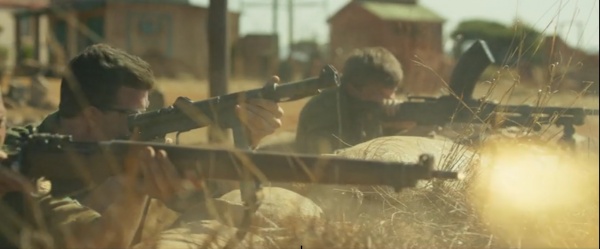
Lee-Enfield No. 4 Mk I
Several members of 'A' Company carry Lee-Enfield No. 4 Mk Is instead of FALs.
Lee-Enfield No. 4 Mk I (T)
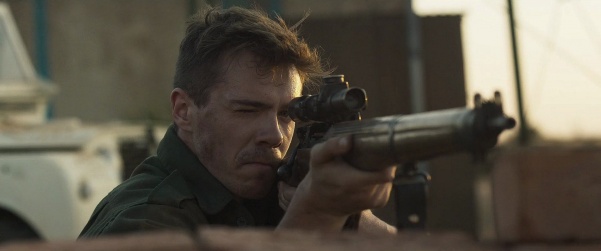
Sgt. Bill Ready (Sam Keeley), the company sniper, carries a scoped Lee-Enfield No. 4 Mk I (T).
Mauser Rifles
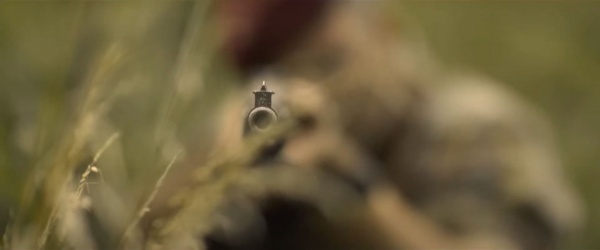
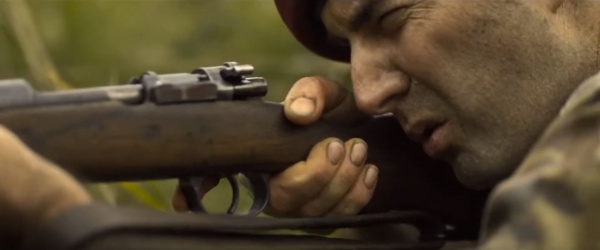
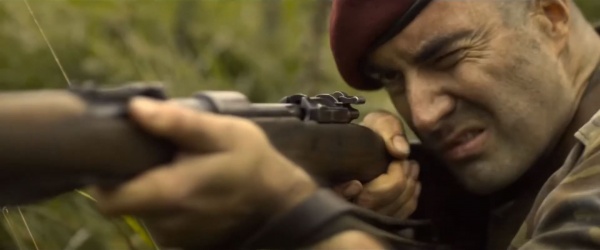
Various Mauser rifles are used by the rebels.
Submachine Guns
Carl Gustav M/45
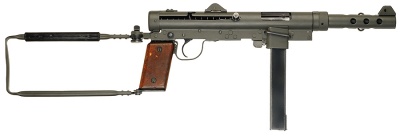
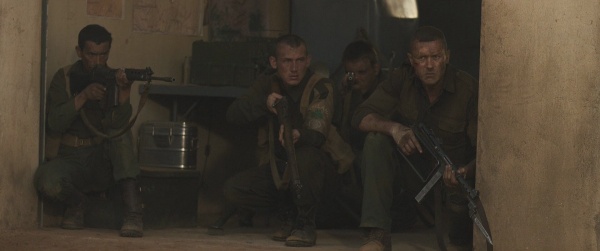
Several 'A' Company NCOs use Carl Gustav M/45s, namely Sgt. Jack Prendergast (Jason O'Mara).
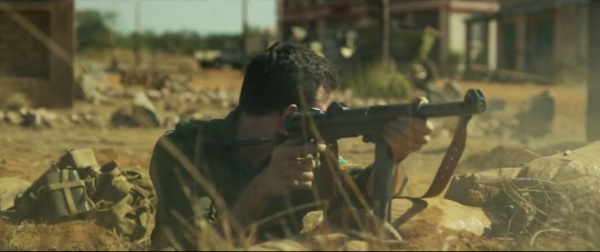
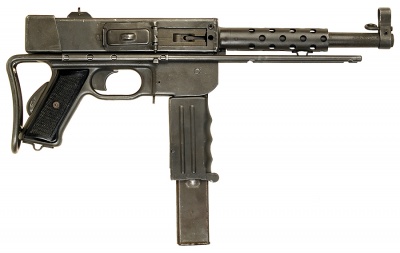
MAT-49
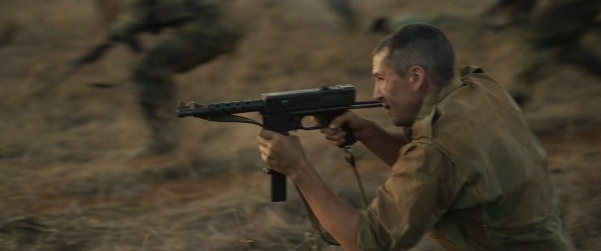
Several mercenaries, including Faulques, use MAT-49s.
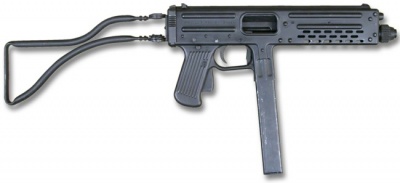
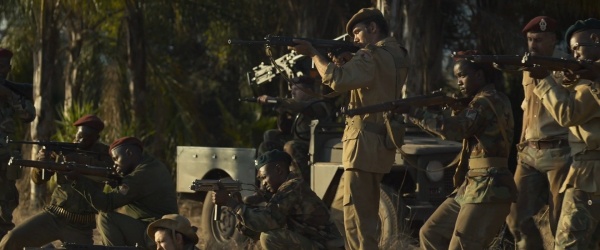
Franchi LF-57
Franchi LF-57 SMGs are also used by mercenaries.
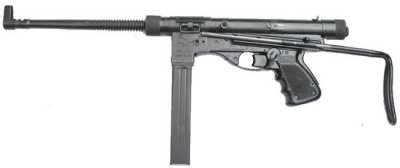
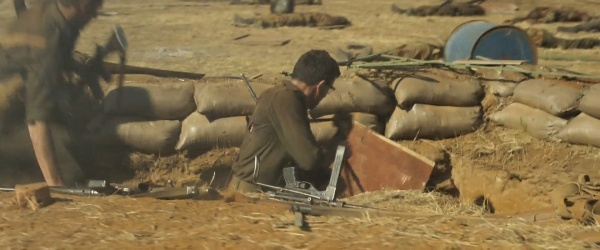
Vigneron M2
Vigneron M2 SMGs are also seen.
Machine Guns
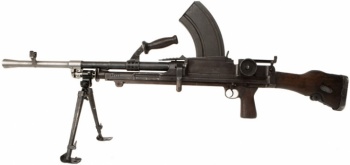
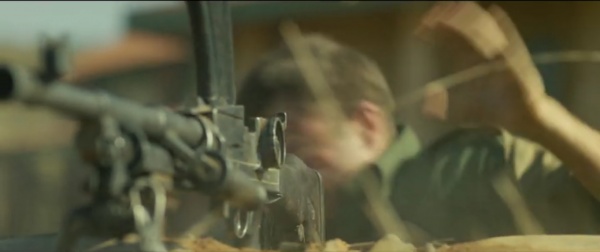
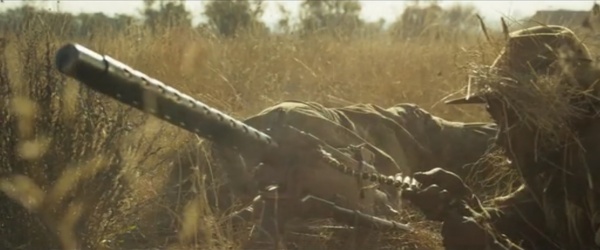
Bren MkI
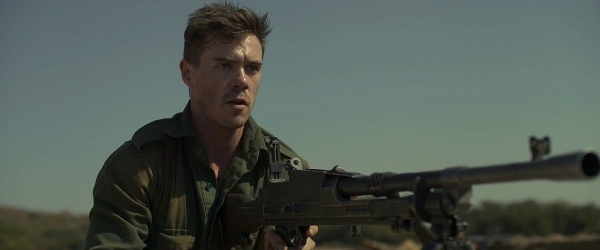
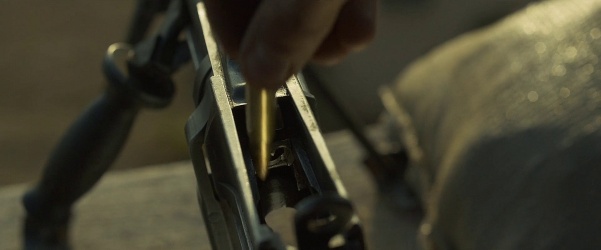
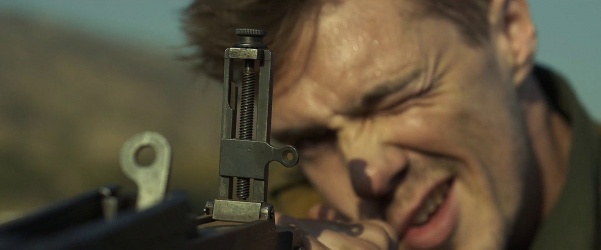
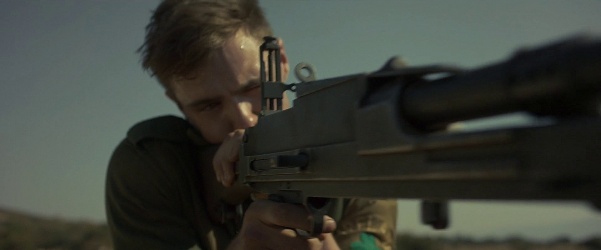
'A' Company employs several Bren guns. Sgt. Ready, the company sniper, switches to a Bren to make a long distance shot, for unknown reasons, possibly because it is a more stable platform than his No. 4 (T).
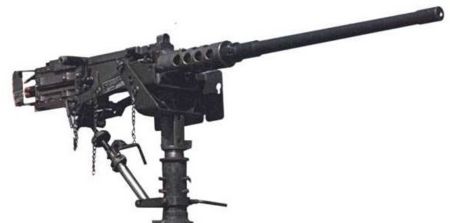
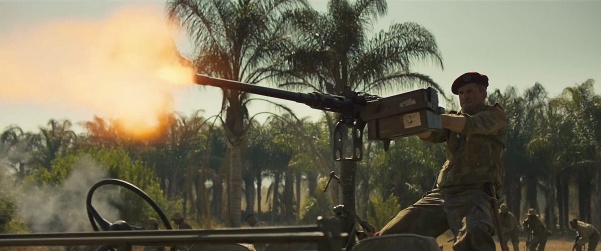
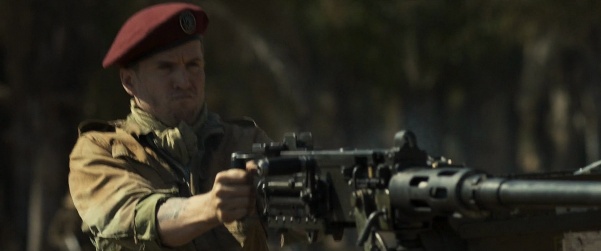
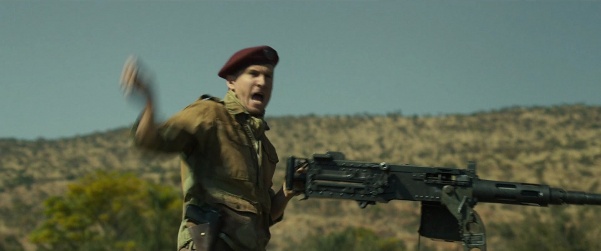
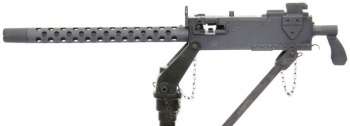
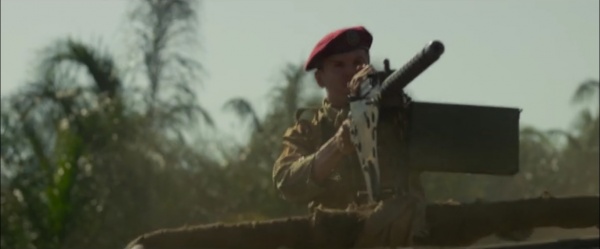
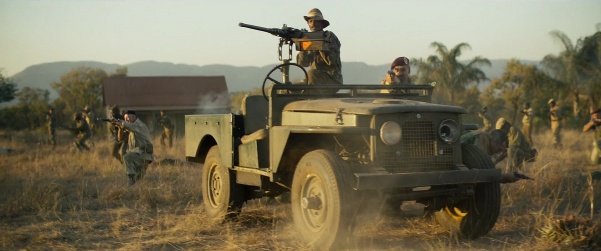
Browning M2HB
Katangese mercenaries use a Browning M2HB mounted on a vehicle.
Browning M1919A4
The mercenaries use several Browning M1919A4s mounted on vehicles and on tripods.
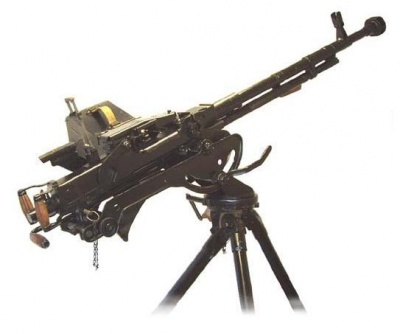
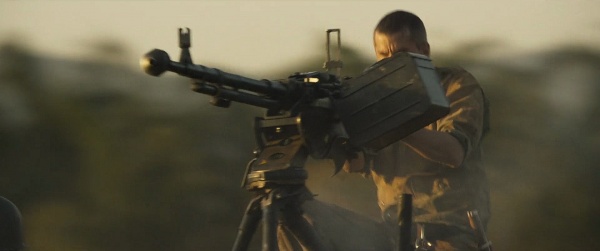
DShK Heavy Machine Gun
The mercenaries use a DShK Heavy Machine Gun. This appears to be the only Soviet-made firearm used by the fiercely anti-communist Katangese.
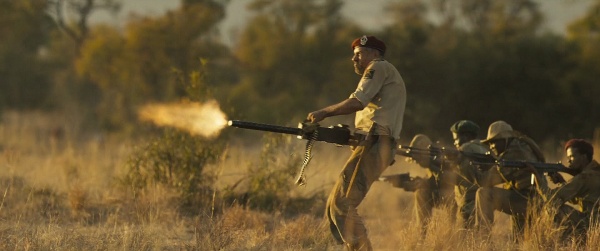
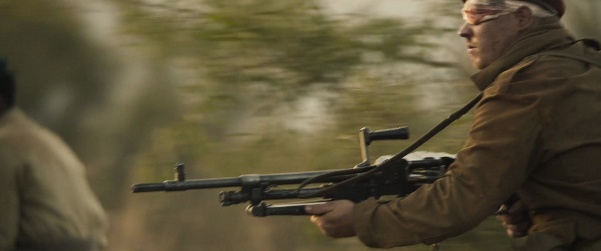
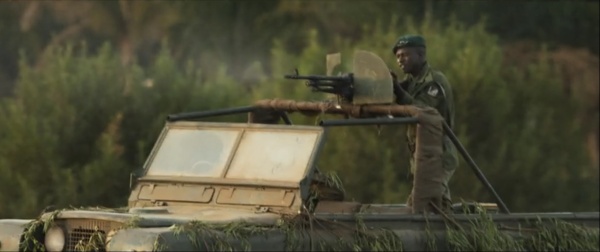
FN MAG 58
A mercenary uses an FN MAG 58 fired from the hip. Another is mounted on a vehicle.
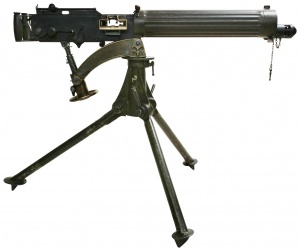
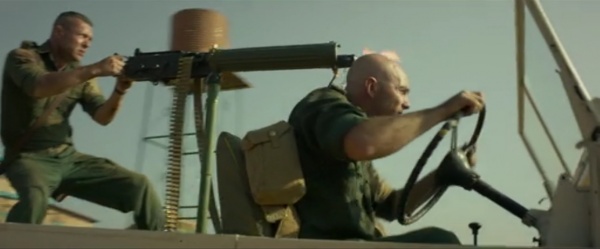
Vickers Gun
'A' Company uses a Vickers Gun mounted on a Land Rover, then on its own with and without a tripod. Commander Patrick Quinlan uses it to shoot down a Fouga Magister.
Other
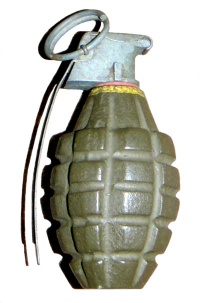
Mk 2 Hand Grenade
An NCO picks up a Mk 2 hand grenade when his M/45 runs dry.
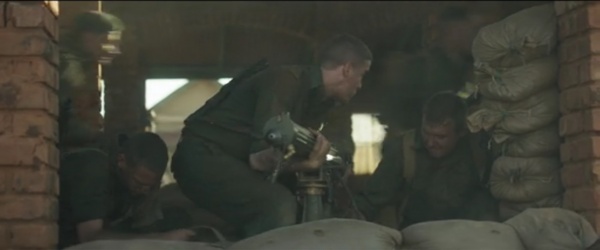
M2 Mortar
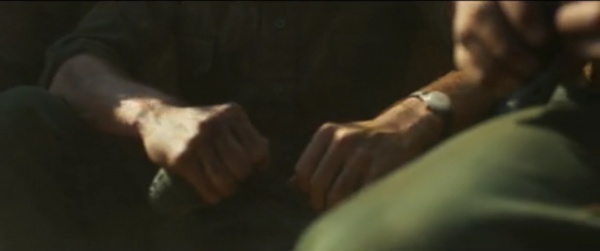
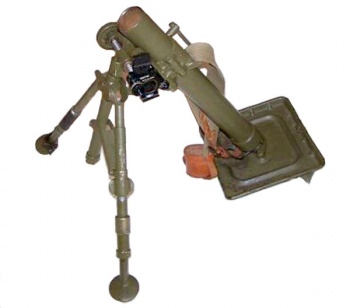
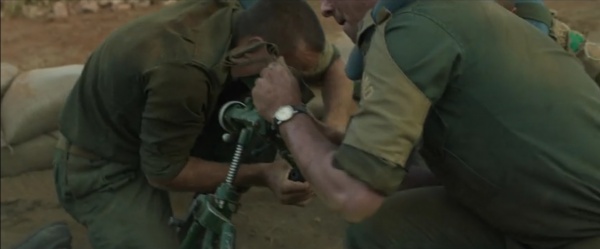
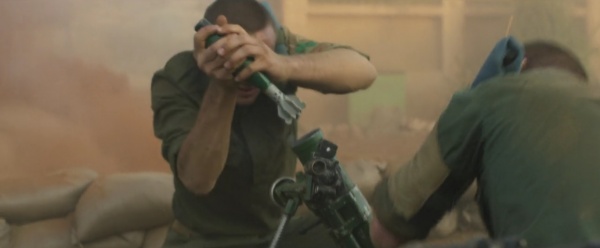
A Company's support platoon uses a 60mm M2 Mortar in counter-battery fire.
Ordnance ML 3 inch Mortar
The mercenaries use an Ordnance ML 3 inch Mortar to shell the compound.
