| If you have been locked out of your account you can request a password reset here. |
Difference between revisions of "Saw III"
| (35 intermediate revisions by 2 users not shown) | |||
| Line 1: | Line 1: | ||
| − | |||
| − | |||
| − | |||
{{Infobox Movie|{{PAGENAME}} | {{Infobox Movie|{{PAGENAME}} | ||
| − | |name = Saw III | + | |name = ''Saw III'' |
|picture = Saw iii.jpg | |picture = Saw iii.jpg | ||
|caption = ''Movie Poster'' | |caption = ''Movie Poster'' | ||
| Line 22: | Line 19: | ||
|character5=Detective Allison Kerry | |character5=Detective Allison Kerry | ||
|actor5=[[Dina Meyer]] | |actor5=[[Dina Meyer]] | ||
| − | |character6=Detective | + | |character6=Detective Eric Matthews |
|actor6=[[Donnie Wahlberg]] | |actor6=[[Donnie Wahlberg]] | ||
|character7= Timothy Young | |character7= Timothy Young | ||
|actor7=[[Mpho Koaho]] | |actor7=[[Mpho Koaho]] | ||
}} | }} | ||
| + | '''''Saw III''''' is a 2006 horror film directed by Darren Lynn Bousman, adapted from a screenplay by [[Leigh Whannell]]. It is the third film in the [[Saw franchise|''Saw'' franchise]]. The film stars [[Tobin Bell]], [[Shawnee Smith]], [[Angus Macfadyen]], Bahar Soomekh, and [[Dina Meyer]] and was released in the United States on October 27, 2006, by Lionsgate. | ||
| + | |||
| + | The story follows Jeff, a man who lost his son in a car accident and wants revenge, who is put through a series of Jigsaw's tests in order to try to get him to let go of his desire for vengeance on the man that killed his son. Meanwhile, a bed-ridden John Kramer has his apprentice Amanda Young kidnap Dr. Lynn Denlon, who is tasked with keeping John alive for one final test before he dies. A sequel, titled ''[[Saw IV]]'', was released in 2007. | ||
| + | |||
| + | {{Film Title|Saw III}} | ||
__TOC__<br clear=all> | __TOC__<br clear=all> | ||
| − | |||
| − | |||
| − | |||
| − | |||
| − | |||
| − | |||
| − | |||
| − | |||
| − | + | {{spoiler}} | |
| − | |||
| − | |||
| − | |||
| − | |||
| + | =Handguns= | ||
==Beretta 92FS== | ==Beretta 92FS== | ||
| − | Jeff Denlon ([[Angus Macfadyen]]) finds a | + | Jeff Denlon ([[Angus Macfadyen]]) finds a one 9x19mm round after the test with Danica Scott (Debra McCabe), the magazine after the test with Halden (Barry Flatman),and [[Beretta 92FS]] after the final test with Timothy ([[Mpho Koaho]]). He loads the pistol and walks down the corridors. Later, in the operating room, he shoots Amanda. In the scene where Jeff slowly walks into the tool room, the gun turns into a non-gun prop, likely for safety and convenience reasons. |
| − | [[Image:BerettaM92FS.jpg|thumb|300px|none|Beretta 92FS - 9x19mm]] | + | [[Image:BerettaM92FS.jpg|thumb|300px|none|Beretta 92FS - 9x19mm Parabellum]] |
| − | [[Image:Saw3 13.jpg|thumb|600px|none|Jeff finds 9x19mm | + | [[Image:Saw3 13.jpg|thumb|600px|none|"One bullet will end it all" <br> Jeff finds a single 9x19mm round after his first test.]] |
| − | [[Image:Saw3 03.jpg|thumb|600px|none| | + | [[Image:Saw3 22.jpg|thumb|600px|none|"One step closer to your revenge" <br> After rescuing the Judge Halden, Jeff finds the next box with a magazine inside.]] |
| − | [[Image:Saw3beretta1.jpg|thumb|600px|none|Jeff | + | [[Image:Saw3 03.jpg|thumb|600px|none|"Last chance" <br> And after final test he finds the gun in another box...]] |
| − | [[Image: | + | [[Image:Saw3beretta1.jpg|thumb|600px|none|... and without hesitation takes the gun ]] |
| − | [[Image:Saw3beretta.jpg|thumb|600px|none|Jeff's | + | [[Image:Saw3beretta2.jpg|thumb|600px|none|Putting everything together, Jeff loads the bullet into the [[Beretta 92FS]].]] |
| − | [[Image:Saw3 08.jpg|thumb|600px|none|Jeff | + | [[Image:Saw3 23 .jpg|thumb|600px|none|Jeff slowly enters the tool room. Note that the end of the barrel is shiny, hinting at a blank fire pistol.]] |
| + | [[Image:Saw3beretta.jpg|thumb|600px|none|Jeff's test heads to a close as he searches the building for his wife with Beretta in hand. This particular example appears to be an airsoft gun due to the size of the barrel.]] | ||
| + | [[Image:Saw3 08.jpg|thumb|600px|none|Jeff points an empty pistol at Jigsaw.]] | ||
| + | |||
| + | ==SIG-Sauer P226== | ||
| + | Detective Allison Kerry ([[Dina Meyer]]) continues to carry and use her service [[SIG-Sauer P226]], as in the [[Saw II|previous film]]. She pulls the P226 from her nightstand when she notices a hidden camera in her closet and then fires a few shots through the closet door before being kidnapped. | ||
| + | [[Image:SigP226.jpg|thumb|none|300px|SIG-Sauer P226 - 9x19mm Parabellum]] | ||
| + | [[Image:Saw3 15.jpg|thumb|none|600px|After the police arrive at the site of Troy's game, Kerry tries to establish the cause of his death. Her service P226 sits in a holster on her belt.]] | ||
| + | [[Image:Saw3 24.jpg|thumb|none|600px|In the evening at home, Kerry grabs a gun from the bedside table, suspecting something wrong.]] | ||
| + | [[Image:Saw3sig.jpg|thumb|none|600px|Kerry ([[Dina Meyer]]) immediately draws out her pistol and shoots several times without hesitation.]] | ||
| + | [[Image:Saw3 05.jpg|thumb|none|600px|Detective shoots her P226 through the closet's doors at a potential attacker.]] | ||
| + | [[Image:Saw3sig3.jpg|thumb|none|600px|Kerry begins to make her way toward her closet cautiously with the pistol in her hands.]] | ||
| + | [[Image:Saw3sig2.jpg|thumb|none|600px|She cautiously approaches the closet to check it.]] | ||
| + | [[Image:Saw3 25.jpg|thumb|none|600px|But the closet turned out to be empty.]] | ||
==Smith & Wesson 5946== | ==Smith & Wesson 5946== | ||
| − | Eric Matthews ([[Donnie Wahlberg]]) | + | At the beginning of the movie, Eric Matthews ([[Donnie Wahlberg]]) reaches for his [[Smith & Wesson 5946]] left by Amanda at the end of the [[Saw II|last movie]] with his boot and checks the magazine, after that he throws it away in a rage. After that, Amanda ([[Shawnee Smith]]) took the gun off-screen and used it as a personal weapon throughout the film. She repeatedly points the gun at Lynn sensually, but almost immediately puts it down. In the final act, she becomes enraged and intends to shoot Lynn, but a small "shootout" begins with Jeff. When Amanda fires it, it sounds as though it is suppressed. |
| − | When Amanda fires it, it sounds as though it is suppressed | + | [[Image:S&W5946.jpg|thumb|300px|none|Smith & Wesson 5946 - 9x19mm Parabellum]] |
| − | [[Image:S&W5946.jpg|thumb|300px|none|Smith & Wesson 5946 - 9x19mm]] | + | [[Image:Saw3 10.jpg|thumb|600px|none|The main storyline begins with the same thing as the second film ended - Eric Matthews ([[Donnie Wahlberg]]) captured by Amanda.]] |
| − | [[Image:Saw3 10.jpg|thumb|600px|none| The main storyline begins with the same thing as the second film ended - Eric captured by Amanda | + | [[Image:Saw3smith3.jpg|thumb|600px|none|Detective finds his Smith & Wesson 5946 has been stripped of its rounds after being locked in the bathroom at the end of ''[[Saw II]]''.]] |
| − | [[Image:Saw3smith3.jpg|thumb|600px|none| Detective | + | [[Image:Saw3 07.jpg|thumb|600px|none|Amanda pulls out a gun to threaten Lynn...]] |
| − | [[Image:Saw3 07.jpg|thumb|600px|none| | + | [[Image:Saw3 06.jpg|thumb|600px|none|...and chambers it.]] |
| − | [[Image:Saw3 02.jpg|thumb|600px|none| Amanda watches the | + | [[Image:Saw3 02.jpg|thumb|600px|none| Amanda watches the Jeff's test with a Eric's gun.]] |
| − | [[Image:Saw3smith2.jpg|thumb|600px|none| Amanda ([[Shawnee Smith]]) begins to get emotional and on edge | + | [[Image:Saw3smith2.jpg|thumb|600px|none| Amanda ([[Shawnee Smith]]) begins to get emotional and on edge while holding Eric Matthews' sidearm.]] |
[[Image:Saw3smith.jpg|thumb|600px|none| Amanda points the S&W at Lynn.]] | [[Image:Saw3smith.jpg|thumb|600px|none| Amanda points the S&W at Lynn.]] | ||
[[Image:Saw3 04.jpg|thumb|600px|none| Amanda with the Smith & Wesson 5946.]] | [[Image:Saw3 04.jpg|thumb|600px|none| Amanda with the Smith & Wesson 5946.]] | ||
| − | + | [[Image:Saw3smith1.jpg|thumb|600px|none| Good close-up of the pistol showing the night sights and chamber.]] | |
| − | [[Image:Saw3smith1.jpg|thumb|600px|none| Good close up of the pistol showing night sights | ||
[[Image:Saw3 16.jpg|thumb|600px|none|Amanda makes difficult decisions and shoots Lynn.]] | [[Image:Saw3 16.jpg|thumb|600px|none|Amanda makes difficult decisions and shoots Lynn.]] | ||
| − | == | + | ==Smith & Wesson Model 10 HB== |
| − | + | In a flashback, Jeff Denlon ([[Angus Macfadyen]]), in a state of anger over the death of his son, points his personal [[Smith & Wesson Model 10]] in the mirror while imagining a confrontation between him and the man who hit his son with a car. | |
| − | [[Image: | + | [[Image:S&WModel10HB.jpg|thumb|350px|none|Smith & Wesson Model 10 HB - .38 Special]] |
| − | [[Image:Saw3 | + | [[Image:Saw3revolver2.jpg|thumb|600px|none|Jeff ([[Angus Macfadyen]]) points his Smith & Wesson Model 10 at a mirror in a state of anger over the death of his son.]] |
| − | [[Image: | + | [[Image:Saw3revolver.jpg|thumb|600px|none|Close-up of the gun.]] |
| − | [[Image: | + | [[Image:Saw3 19.jpg|thumb|600px|none|At some point, he even attempts to commit suicide, but stops.]] |
| − | [[Image: | + | [[Image:Saw3 09.jpg|thumb|600px|none|Jeff's S&W lying in bed, after he hid it from his daughter, Corbett ([[Niamh Wilson]]).]] |
| − | [[Image: | + | |
| + | ==Smith & Wesson Model 686== | ||
| + | In one of the flashbacks, John ([[Tobin Bell]]) and Amanda prepare the bathroom for Adam and Gordon's test, which took place in the [[Saw (2004)|first movie]]. He takes the [[Smith & Wesson Model 686]] from a bag and lies down with it on the floor. | ||
| + | [[Image:S&W SAW1 screen used.jpg|thumb|none|350px|The actual Smith & Wesson Model 686 used in the film.]] | ||
| + | [[Image:Saw3686two.jpg|thumb|none|600px|The revolver is seen in the bag with the rest of the equipment for the test. Notice the S&W logo.]] | ||
| + | [[Image:Saw3smith686.jpg|thumb|none|600px|John prepares to lay down on the floor pretending to be dead with the Smith & Wesson Model 686 as he was in the first [[Saw (2004)|''Saw'']].]] | ||
=Submachine Guns= | =Submachine Guns= | ||
==Heckler & Koch MP5A3== | ==Heckler & Koch MP5A3== | ||
| − | + | Hearing a bomb explosion at Troy's game, one of the neighbors calls the police. Then the arriving SWAT officers including Pete Baker ([[Kelly Jones]]) and Joe ([[Vincent Rother]]) are armed with a [[Heckler & Koch MP5A3]] breaches a welded-shut door in the abandoned school. Unlike other films in the franchise, the appearance of SWAT forces with firearms in this film is very brief. | |
| − | [[Image: | + | [[Image:MP5A3 F stock.jpg|thumb|400px|none|Heckler & Koch MP5A3 with Navy trigger group and MP5F stock - 9x19mm Parabellum]] |
| − | [[Image: | + | [[Image:Saw3 18.jpg|thumb|600px|none|The good shot showing the receiver and the fire selector.]] |
| − | [[Image:Saw3mp52.jpg|thumb|600px|none| SWAT team member | + | [[Image:Saw3mp52.jpg|thumb|600px|none|A SWAT team member Pete Baker ([[Kelly Jones]]) with the railed MP5 stock collapsed in.]] |
| − | |||
| − | |||
| − | |||
| − | [[ | ||
| − | |||
==Heckler & Koch UMP45== | ==Heckler & Koch UMP45== | ||
| Line 94: | Line 97: | ||
[[Image:UMP 45.jpg|thumb|none|400px|Heckler & Koch UMP45 - .45 ACP]] | [[Image:UMP 45.jpg|thumb|none|400px|Heckler & Koch UMP45 - .45 ACP]] | ||
[[Image:Saw3ump.jpg|thumb|none|600px|Rigg ([[Lyriq Bent]]) armed with a [[Heckler & Koch UMP45]] with the stock folded as he and his team sweep a room.]] | [[Image:Saw3ump.jpg|thumb|none|600px|Rigg ([[Lyriq Bent]]) armed with a [[Heckler & Koch UMP45]] with the stock folded as he and his team sweep a room.]] | ||
| − | [[Image:Saw3 18.jpg|thumb|600px|none|Rigg (the one on the left) with | + | [[Image:Saw3 18.jpg|thumb|600px|none|Rigg (the one on the left) with an UMP45.]] |
| + | [[Image:Saw3 28.jpg|thumb|600px|none|When the police have established all the details of a new game, Rigg's gun with a folding stock is best seen.]] | ||
=Shotguns= | =Shotguns= | ||
| − | == | + | ==12 Gauge Double Barreled Shotgun== |
| − | The key to deactivate the "Rack" trap hung from a wire in front of the | + | The key to deactivate the "Rack" trap is hung from a wire in front of the sawed-off barrels of a [[12 Gauge Double Barreled Shotgun]] located in an enlarged glass box. This wire is connected to the shotgun's triggers, so that any attempt to remove the key will result in a shot. Jeff ([[Angus Macfadyen]]) has to take the key to save his son's killer Timothy Young ([[Mpho Koaho]]). Initially, he manages to carefully disconnect the key, but by releasing the wire, he inadvertently set the trap in action and the shot kills the Judge Halden (Barry Flatman) standing in front of it. |
| − | [[ | + | [[Image:StoegerCoachGunWestern.jpg|thumb|none|400px|Stoeger imported Coach Western shotgun, for comparison - 12 gauge]] |
| − | [[Image:Saw3shotgun.jpg|thumb|600px|none|After the announcement of the rules of the last test, Jeff inspects the glass box containing the rigged up booby trap with the shotgun with the key he has to retrieve in front of the muzzle.]] | + | [[Image:Saw3 26.jpg|thumb|600px|none|Halden inspects the glass box first. Note the wire and the key attached to it. ]] |
| + | [[Image:Saw3shotgun.jpg|thumb|600px|none|After the announcement of the rules of the last test, Jeff inspects the glass box containing the rigged-up booby trap with the shotgun with the key he has to retrieve in front of the muzzle.]] | ||
[[Image:Saw3shotgun2.jpg|thumb|600px|none|Jeff tries to gently free the key from the string connected to the shotgun trigger.]] | [[Image:Saw3shotgun2.jpg|thumb|600px|none|Jeff tries to gently free the key from the string connected to the shotgun trigger.]] | ||
| − | [[Image:Saw3shotgun3.jpg|thumb|600px|none| Any little movement of the string connected to it moves the mechanism attached to the shotgun.]] | + | [[Image:Saw3shotgun3.jpg|thumb|600px|none|Any little movement of the string connected to it moves the mechanism attached to the shotgun.]] |
| + | [[Image:Saw3 27.jpg|thumb|600px|none|Close-up of the triggers a second before the shot.]] | ||
=Other= | =Other= | ||
| − | == | + | ==Nail bomb== |
| − | + | A homemade nail bomb is the main incentive for Troy (J. LaRose) to pass the test. There is a timer on it for five minutes, during which time it should have been released from the chains. But since this trap was designed by Amanda and not by John, Troy had no chance of salvation. One of the neighbors heard the explosion and called the police. When they arrive, a SWAT team led by Daniel Rigg finds the remains of the bomb and Troy's body, and Detective Mark Hoffman ([[Costas Mandylor]]) immediately begins to examine the crime scene. | |
| − | [[Image:Saw3 11.jpg|thumb|600px|none| | + | [[Image:Saw3 11.jpg|thumb|600px|none|The bomb itself consists of a large glass jar with nails and a timer connected to it with a detonator.]] |
==Shotgun Collar== | ==Shotgun Collar== | ||
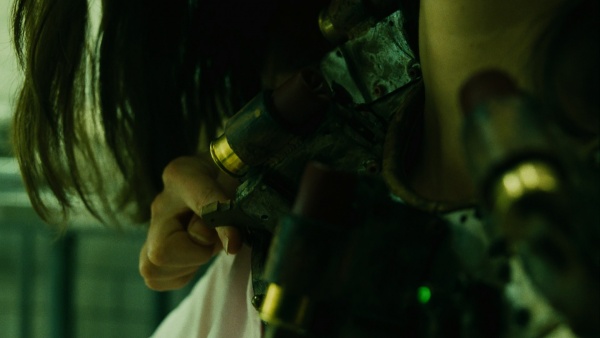
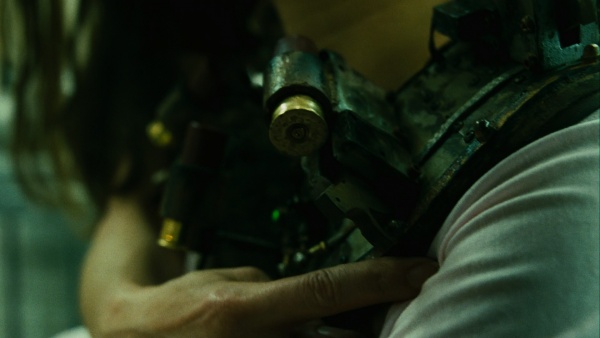
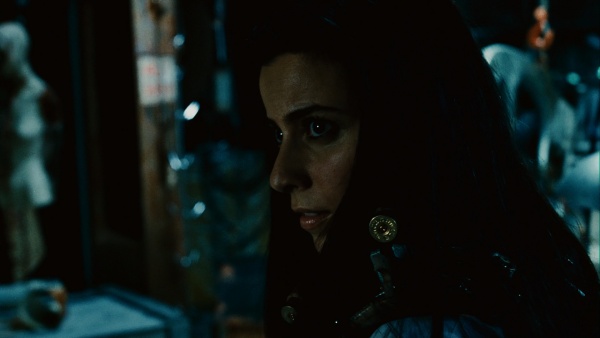
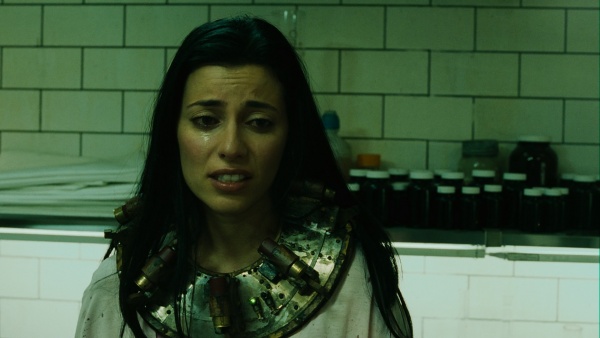
| − | The main challenge for Lynn was the | + | The main challenge for Lynn was the shotgun collar. This device is five shotgun shells placed around the collar, directly aiming at the victim's head. Each of these shells has its own hammer which all had to be activated individually. The collar was attuned to some kind of signal. If this signal got lost, for example if the test subject moved out of range , the collar would be activated, causing it to blow off the victim's head. The wrong actions of Amanda and Jeff led to the collar activating and killing Lynn. |
| − | [[Image:Saw3 01.jpg|thumb|600px|none|General view of shotgun collar.]] | + | [[Image:Saw3 20.jpg|thumb|600px|none|Amanda picks up the device from the table to put the collar on Lynn.]] |
| − | [[Image:Saw3 | + | [[Image:Saw3 01.jpg|thumb|600px|none|General view of shotgun collar. Note that the hammers are not currently cocked and Amanda will do it herself.]] |
| − | [[Image:Saw3 | + | [[Image:Saw3 21.jpg|thumb|600px|none|Amanda alternates cocking the hammer for each cartridge...]] |
| − | [[Image:Saw3 17.jpg|thumb|600px|none|Lynn | + | [[Image:Saw3 12.jpg|thumb|600px|none|...and on the other side.]] |
| + | [[Image:Saw3 17.jpg|thumb|600px|none|Lynn while searching for tools for John's operation. Note the lettering on the brass head.]] | ||
| + | [[Image:Saw3 14.jpg|thumb|600px|none|Lynn with the shotgun collar. Note the green light, which indicates that John is in good condition.]] | ||
{{Saw}} | {{Saw}} | ||
| Line 120: | Line 128: | ||
[[Category:Horror]] | [[Category:Horror]] | ||
[[Category:Crime]] | [[Category:Crime]] | ||
| + | [[Category:Detective]] | ||
Revision as of 14:43, 10 November 2022
| ||||||||||||||||||||||||||||||||||
Saw III is a 2006 horror film directed by Darren Lynn Bousman, adapted from a screenplay by Leigh Whannell. It is the third film in the Saw franchise. The film stars Tobin Bell, Shawnee Smith, Angus Macfadyen, Bahar Soomekh, and Dina Meyer and was released in the United States on October 27, 2006, by Lionsgate.
The story follows Jeff, a man who lost his son in a car accident and wants revenge, who is put through a series of Jigsaw's tests in order to try to get him to let go of his desire for vengeance on the man that killed his son. Meanwhile, a bed-ridden John Kramer has his apprentice Amanda Young kidnap Dr. Lynn Denlon, who is tasked with keeping John alive for one final test before he dies. A sequel, titled Saw IV, was released in 2007.
The following weapons were used in the film Saw III:
![]() WARNING! THIS PAGE CONTAINS SPOILERS!
WARNING! THIS PAGE CONTAINS SPOILERS!
Handguns
Beretta 92FS
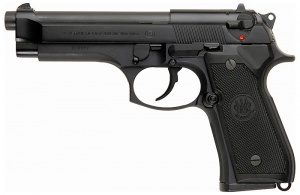
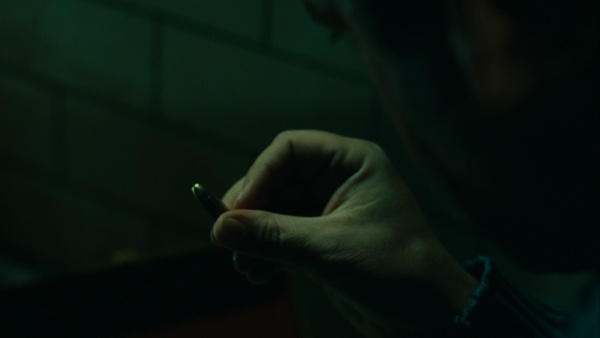
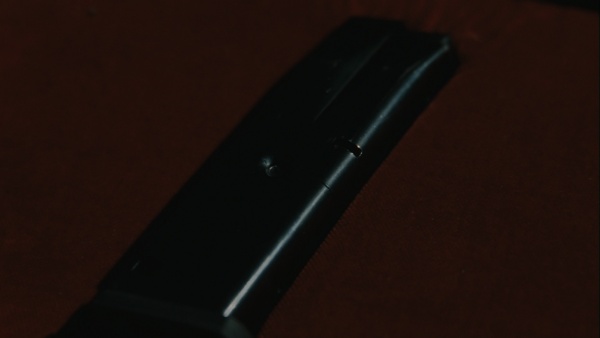
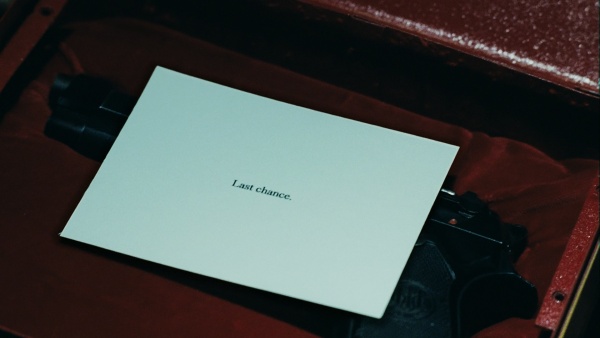
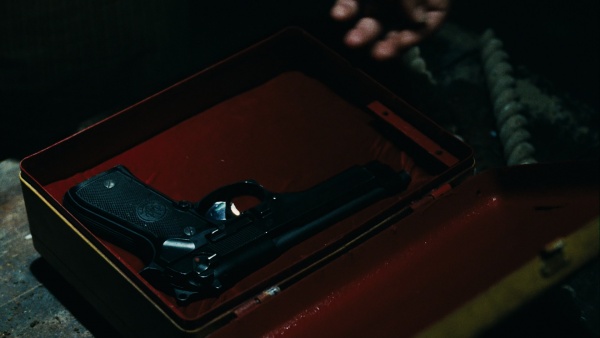
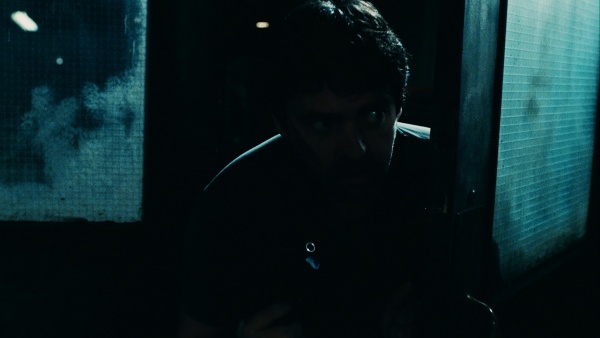
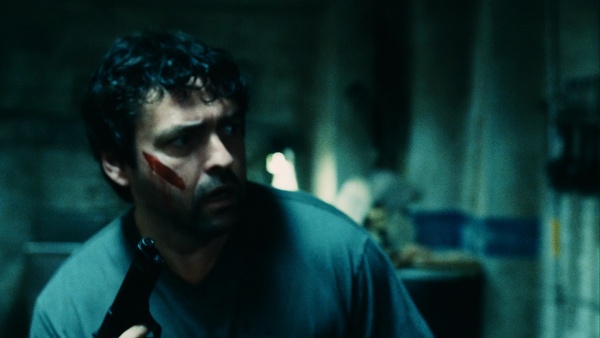
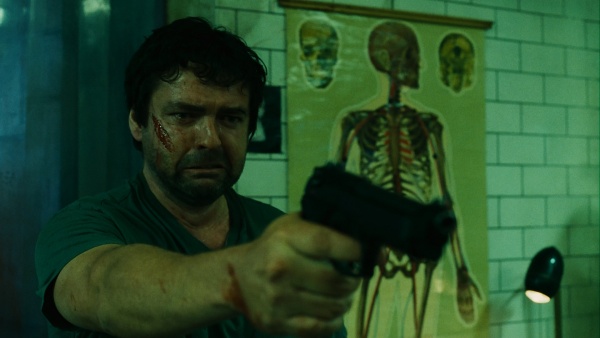
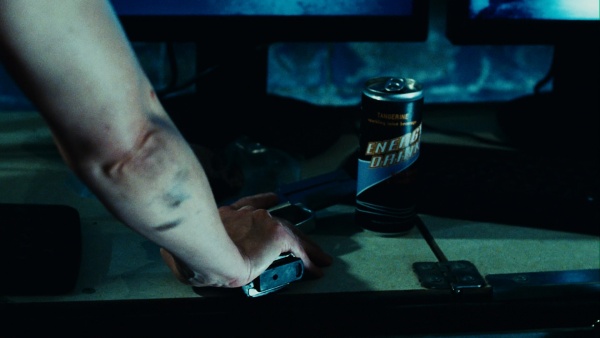
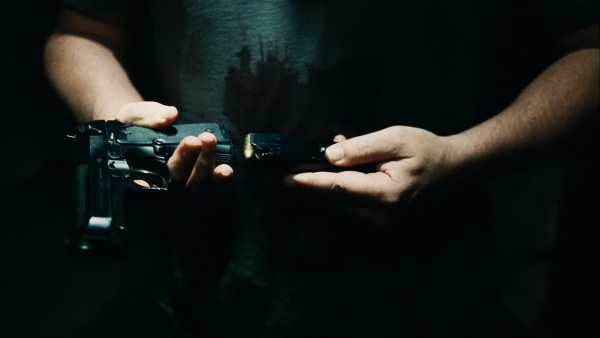
Jeff Denlon (Angus Macfadyen) finds a one 9x19mm round after the test with Danica Scott (Debra McCabe), the magazine after the test with Halden (Barry Flatman),and Beretta 92FS after the final test with Timothy (Mpho Koaho). He loads the pistol and walks down the corridors. Later, in the operating room, he shoots Amanda. In the scene where Jeff slowly walks into the tool room, the gun turns into a non-gun prop, likely for safety and convenience reasons.
SIG-Sauer P226
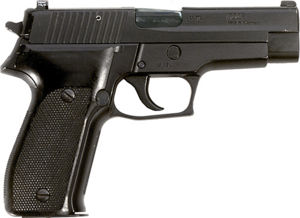
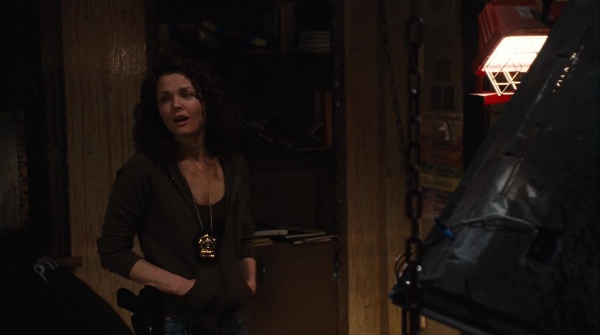
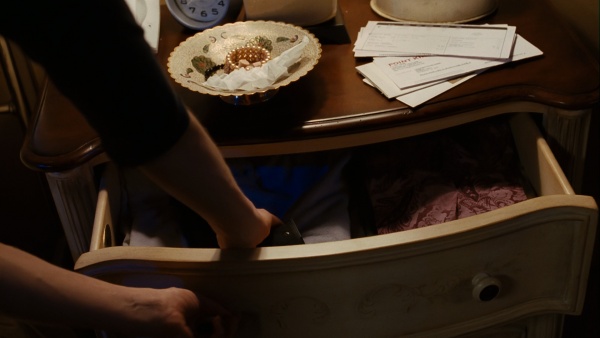
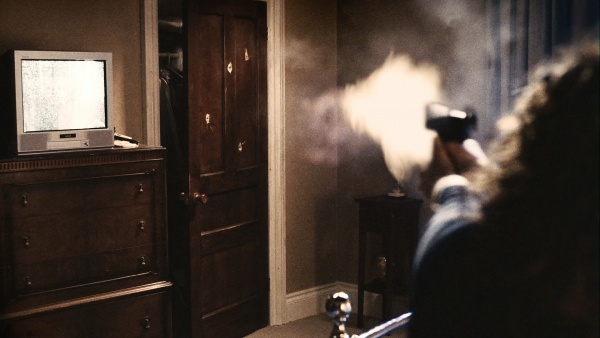
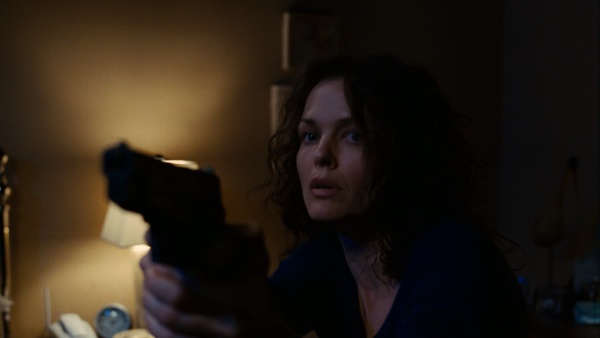
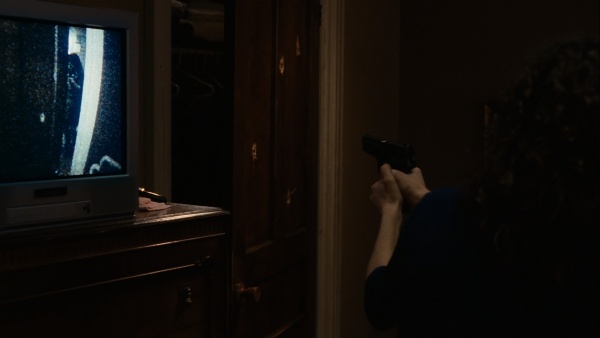
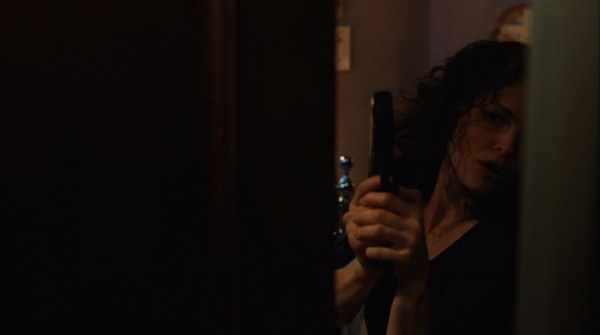
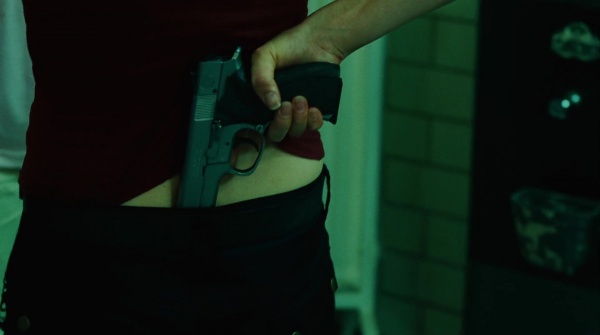
Detective Allison Kerry (Dina Meyer) continues to carry and use her service SIG-Sauer P226, as in the previous film. She pulls the P226 from her nightstand when she notices a hidden camera in her closet and then fires a few shots through the closet door before being kidnapped.

Smith & Wesson 5946
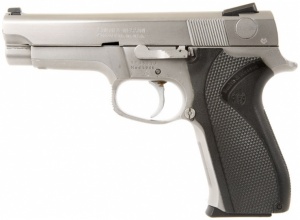
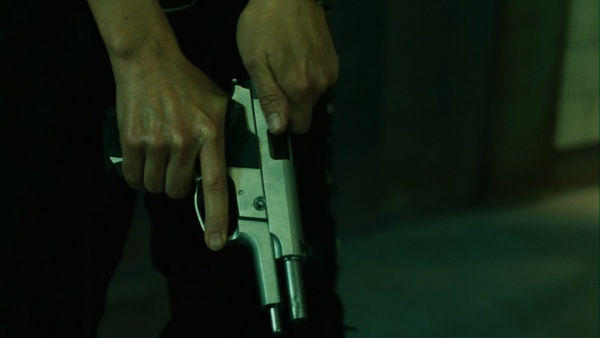
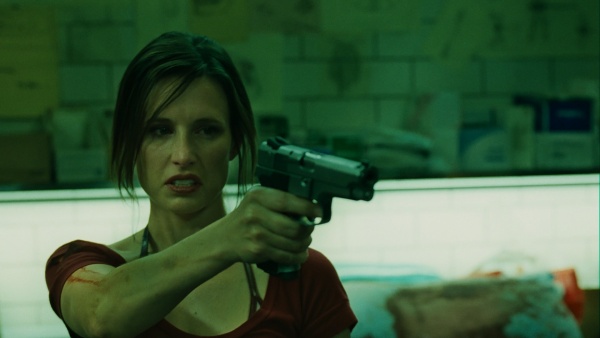
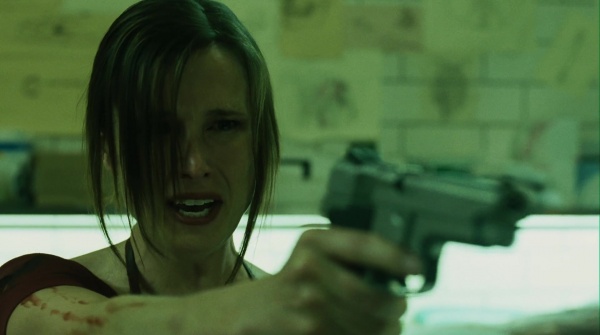
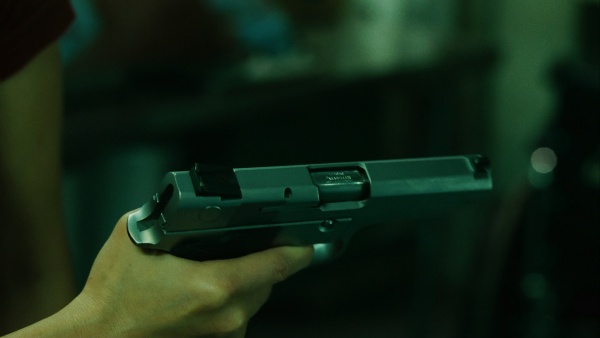
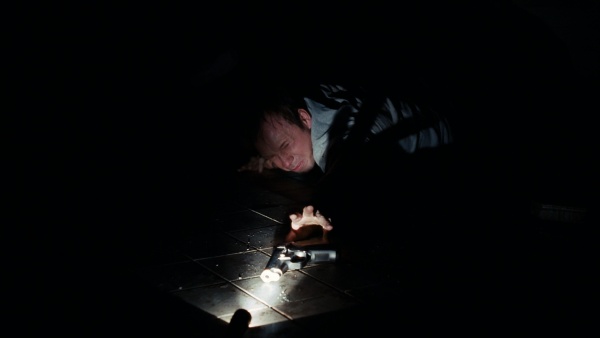
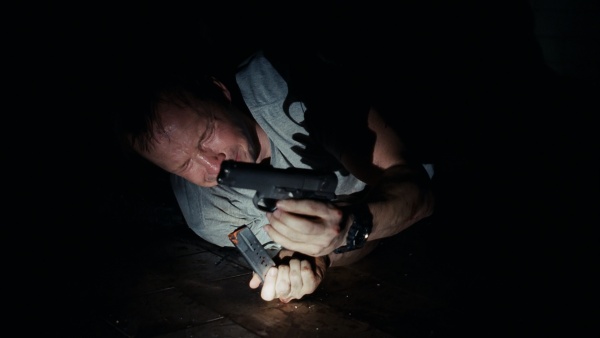
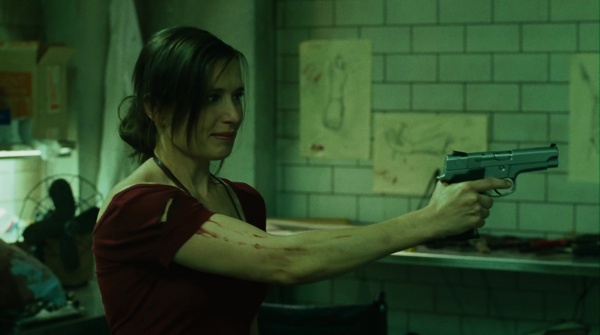
At the beginning of the movie, Eric Matthews (Donnie Wahlberg) reaches for his Smith & Wesson 5946 left by Amanda at the end of the last movie with his boot and checks the magazine, after that he throws it away in a rage. After that, Amanda (Shawnee Smith) took the gun off-screen and used it as a personal weapon throughout the film. She repeatedly points the gun at Lynn sensually, but almost immediately puts it down. In the final act, she becomes enraged and intends to shoot Lynn, but a small "shootout" begins with Jeff. When Amanda fires it, it sounds as though it is suppressed.
Smith & Wesson Model 10 HB
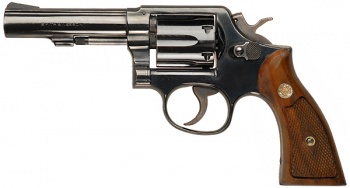
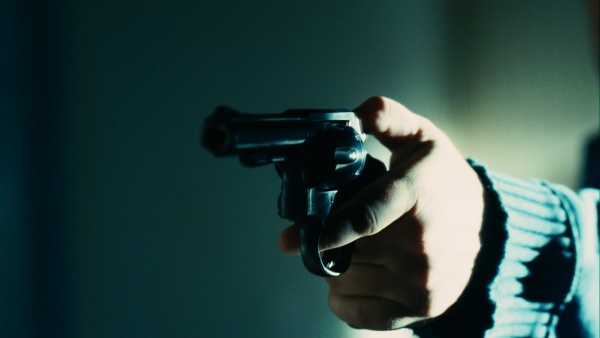
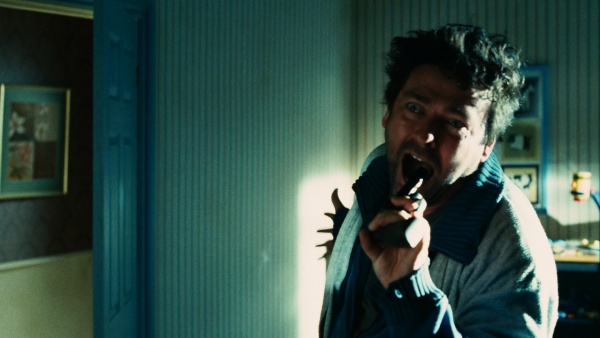
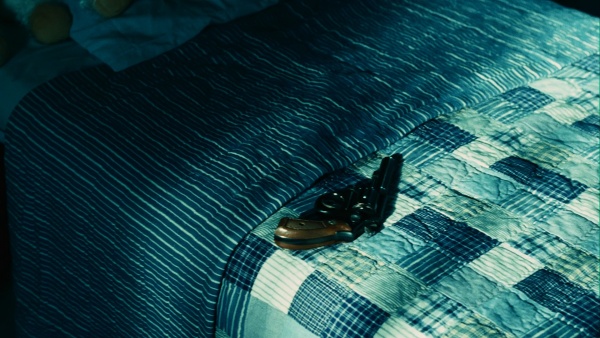
In a flashback, Jeff Denlon (Angus Macfadyen), in a state of anger over the death of his son, points his personal Smith & Wesson Model 10 in the mirror while imagining a confrontation between him and the man who hit his son with a car.

Smith & Wesson Model 686
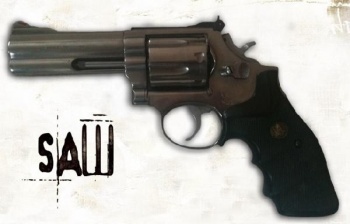
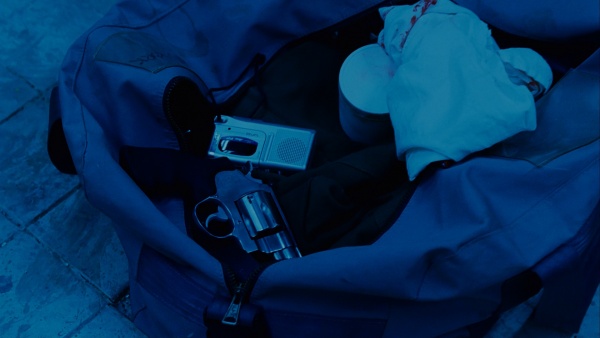
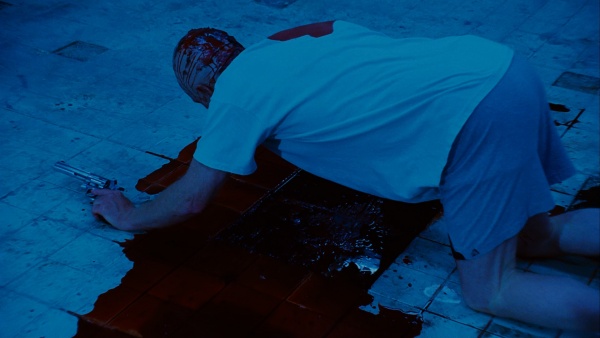
In one of the flashbacks, John (Tobin Bell) and Amanda prepare the bathroom for Adam and Gordon's test, which took place in the first movie. He takes the Smith & Wesson Model 686 from a bag and lies down with it on the floor.
Submachine Guns
Heckler & Koch MP5A3
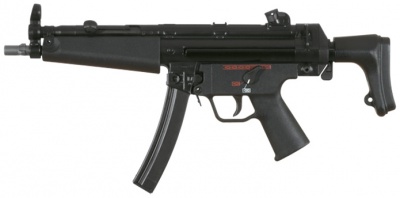
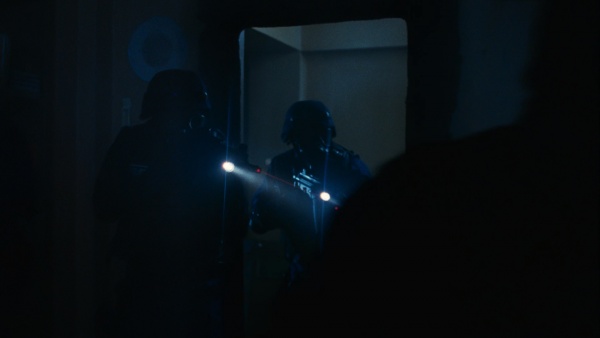
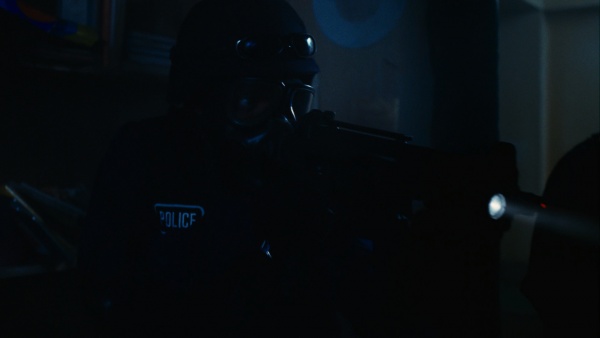
Hearing a bomb explosion at Troy's game, one of the neighbors calls the police. Then the arriving SWAT officers including Pete Baker (Kelly Jones) and Joe (Vincent Rother) are armed with a Heckler & Koch MP5A3 breaches a welded-shut door in the abandoned school. Unlike other films in the franchise, the appearance of SWAT forces with firearms in this film is very brief.
Heckler & Koch UMP45
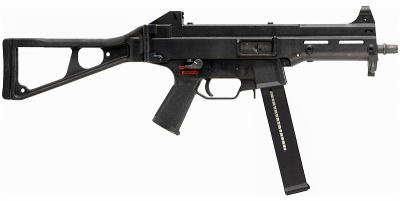
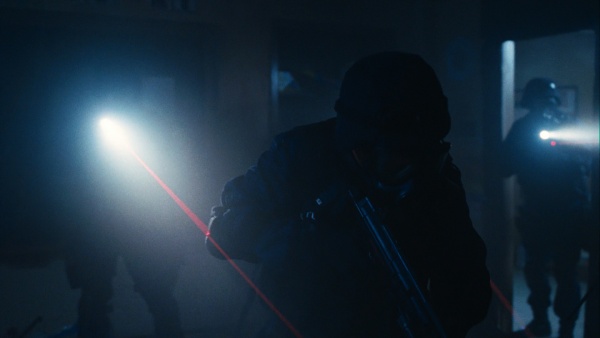
When the SWAT team breaches the room in the school near the opening, SWAT Commander Daniel Rigg (Lyriq Bent) is seen with a Heckler & Koch UMP45 equipped with a flashlight and laser with the stock folded in.
Shotguns
12 Gauge Double Barreled Shotgun
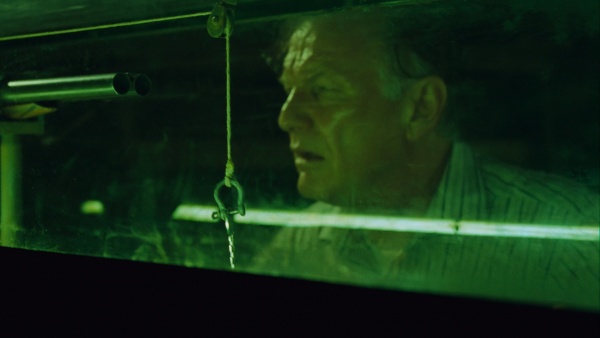
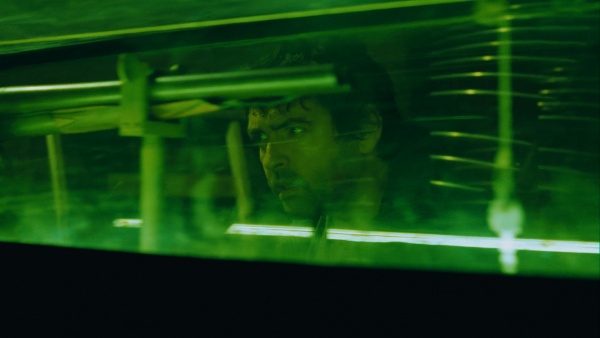
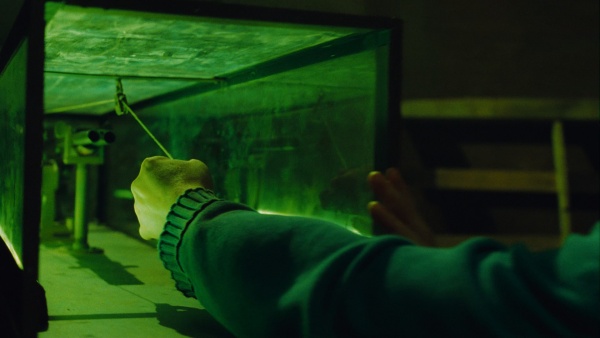
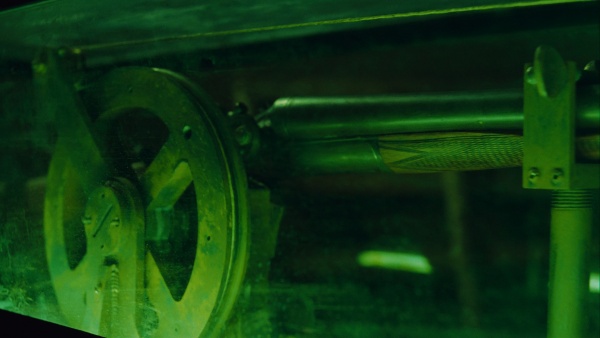
The key to deactivate the "Rack" trap is hung from a wire in front of the sawed-off barrels of a 12 Gauge Double Barreled Shotgun located in an enlarged glass box. This wire is connected to the shotgun's triggers, so that any attempt to remove the key will result in a shot. Jeff (Angus Macfadyen) has to take the key to save his son's killer Timothy Young (Mpho Koaho). Initially, he manages to carefully disconnect the key, but by releasing the wire, he inadvertently set the trap in action and the shot kills the Judge Halden (Barry Flatman) standing in front of it.
Other
Nail bomb
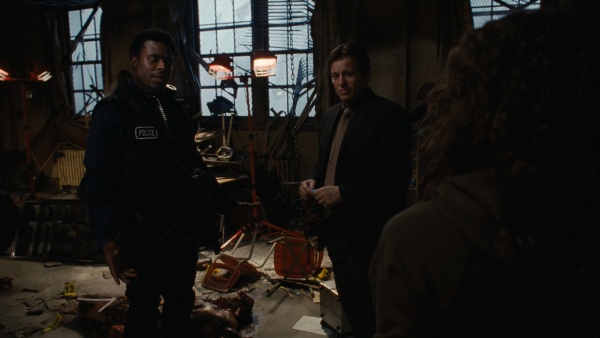
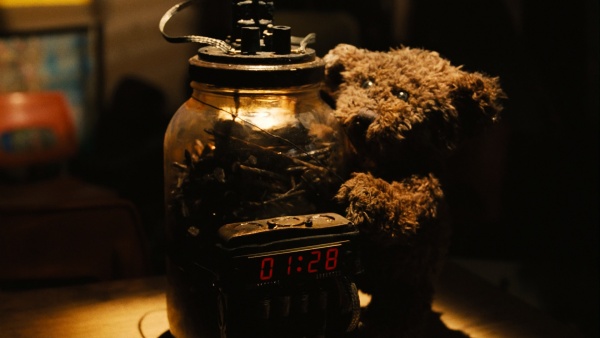
A homemade nail bomb is the main incentive for Troy (J. LaRose) to pass the test. There is a timer on it for five minutes, during which time it should have been released from the chains. But since this trap was designed by Amanda and not by John, Troy had no chance of salvation. One of the neighbors heard the explosion and called the police. When they arrive, a SWAT team led by Daniel Rigg finds the remains of the bomb and Troy's body, and Detective Mark Hoffman (Costas Mandylor) immediately begins to examine the crime scene.
Shotgun Collar
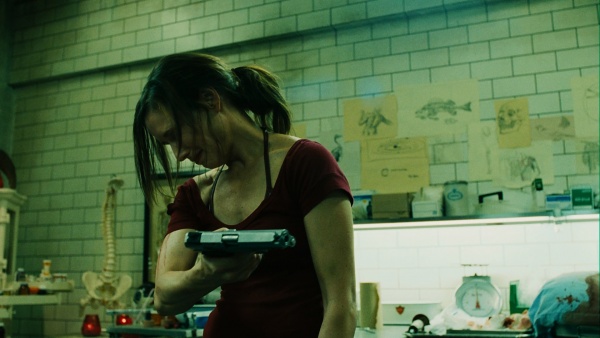
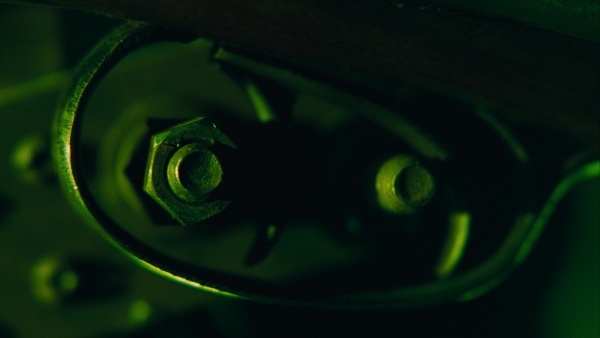
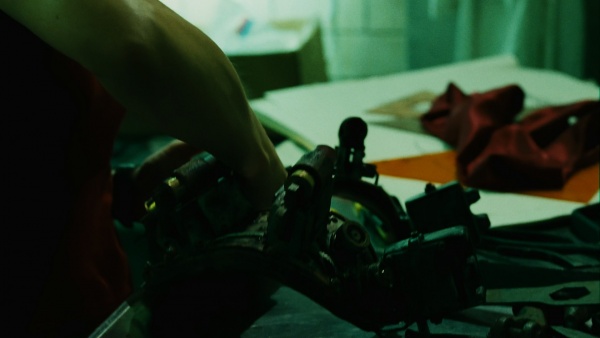
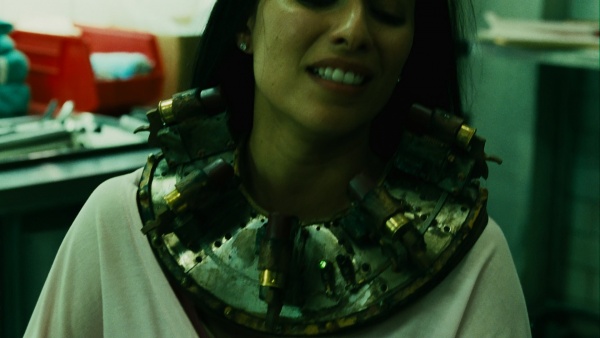
The main challenge for Lynn was the shotgun collar. This device is five shotgun shells placed around the collar, directly aiming at the victim's head. Each of these shells has its own hammer which all had to be activated individually. The collar was attuned to some kind of signal. If this signal got lost, for example if the test subject moved out of range , the collar would be activated, causing it to blow off the victim's head. The wrong actions of Amanda and Jeff led to the collar activating and killing Lynn.

