| If you have been locked out of your account you can request a password reset here. |
IMFDB Screencapping Guide
IMFDB is in the business of identifying firearms in films, television, anime and video games, and we do that via screen captures. Without screencaps, any identifying of firearms is based merely on opinion and shoddy memories, and completely defeats the purpose of collaborative editing. Therefore, screencaps are ABSOLUTELY REQUIRED.
Obtaining Screencaps
Programs
IMFDB recommends two programs:
VLC media player for obtaining screencaps from local media. Fast Stone Image Viewer for obtaining screencaps from streaming media and for editing images. Both are freeware and both are available in portable versions.
Note: For legal reasons, we cannot and will not offer any instructions on obtaining Blu-Ray screencaps, so please do not ask. Please make certain that your screencaps come from legal sources.
VLC media player
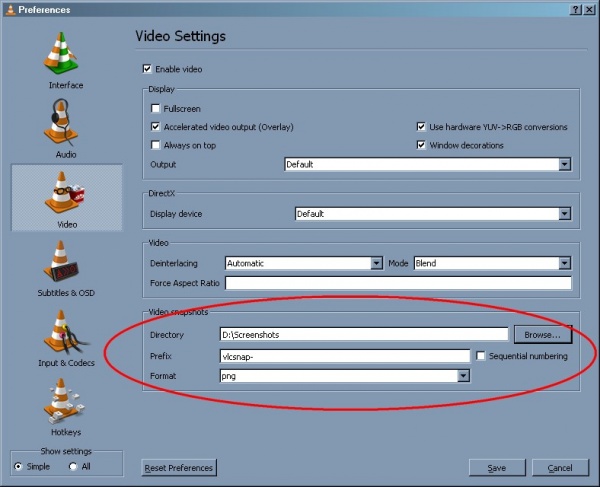
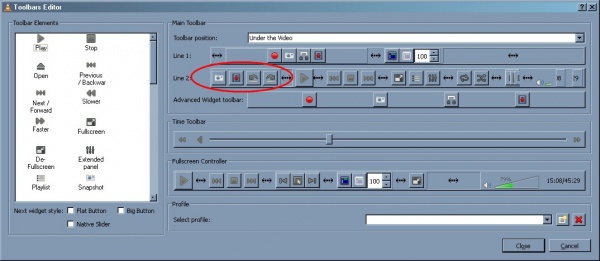
VLC is handy when you have a local copy of the media. There is a snapshot tool (in the video menu) and you have the option of going frame-by-frame. VLC allows you to take snapshots in either JPG or PNG. You are free to pick either, but all PNGs will need to be converted to JPGs in order to be uploaded to IMFDB. (Taking screencaps in PNG are more clear, but require the extra step of converting to JPG.) (See figure 1) You may also customize your interface, which allows you to access the snapshot and frame-by-frame tools more easily. (In the tools menu, see figure 2)
Fast Stone Image Viewer
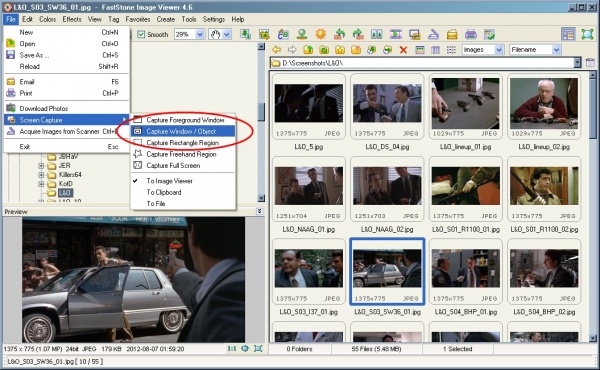
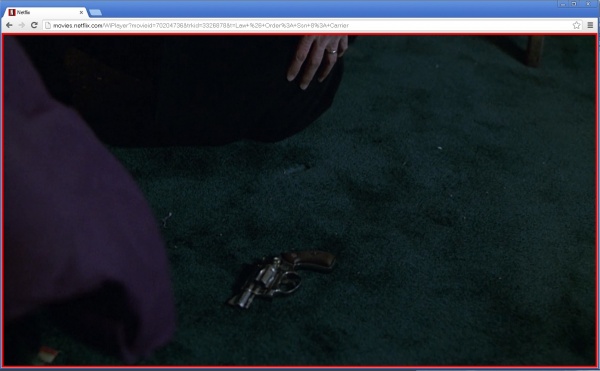
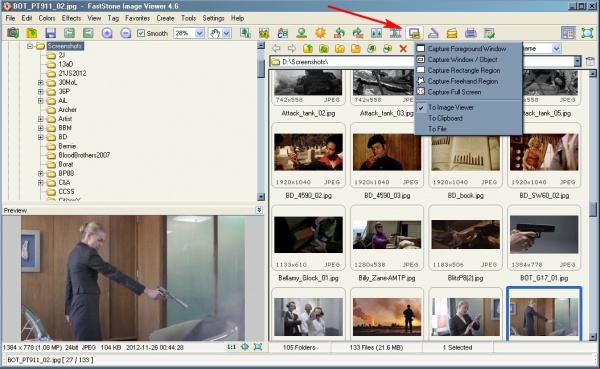
If you wish to take screencaps from streaming media, then Fast Stone Image Viewer will be your best option. Go to File>Screen Capture>Capture Window/Object. (See figure 3) The streaming window and you will see a red frame around what you are about to capture. (See figure 4). You may also use the capture button seen in Figure 5. Since capturing the right window may take some finesse, you may also select the entire screen. Crop (see below) and save.
Editing and Saving Screencaps
Screencaps should be uploaded as is, with some exceptions.
Cropping
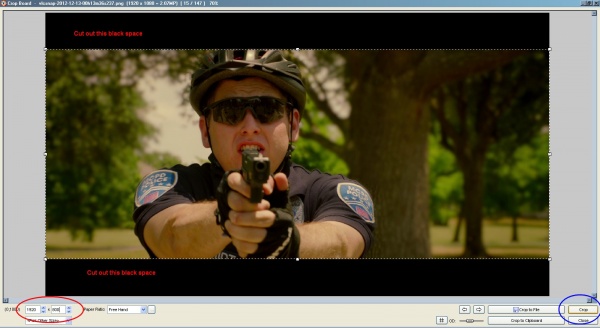
All screencaps are to be cropped of blank space (the black bars). Fast Stone has a cropping tool under Edit>Crop Board. (See figure 6).
Drawing
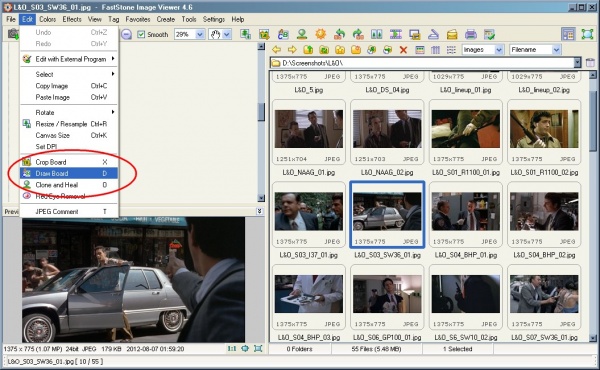
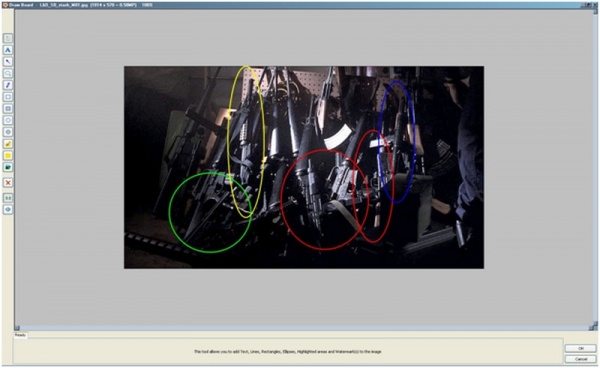
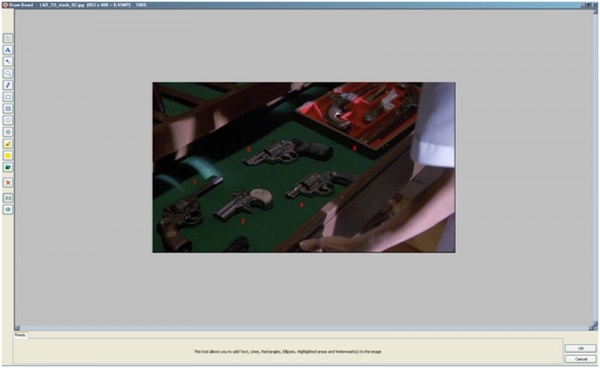
Drawing (see figure 8) is sometimes necessarily if there are multiple firearms in the same screencap that need to be identified, or the image is NSFW. In the former case, arrows, circles (see figure 9), or numbers (see figure 10) can be used to differentiate or emphasize firearms, in the latter case, censor bars may be drawn in.
Resize
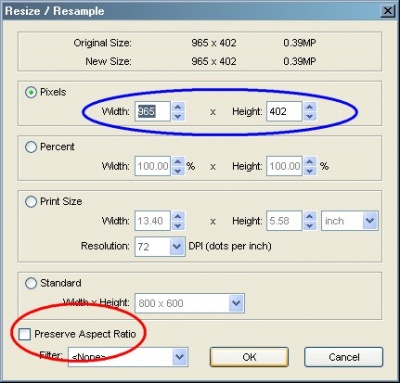
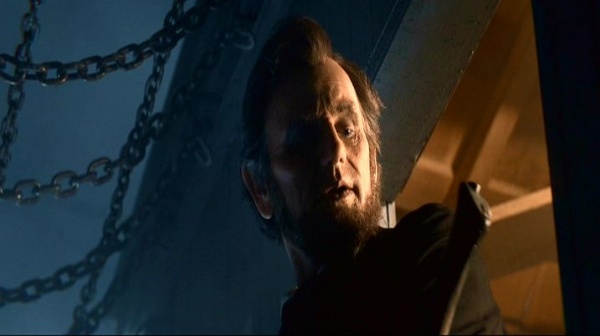
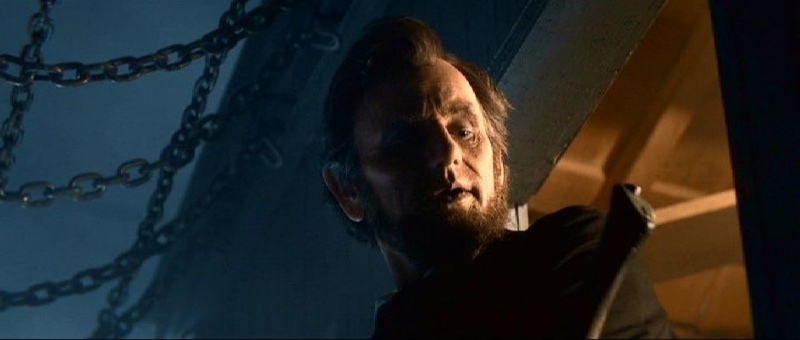
Sometimes a screencap may be in the wrong aspect ratio. Screencaps that are in the wrong aspect ratio may look squeezed/stretched and distorted. It is possible to restore the proper aspect ratio using Fast Stone Image Viewer. First, see what the aspect ratio is supposed to be. This information is usually available in IMDB under Technical Specifications. For example, we see that the aspect ratio for Abraham Lincoln: Vampire Hunter is supposed to be 2.35:1. This means that the width should be 2.35 times the height. The aspect ratio of the original image (figure 12) is 717:402, or 1.78:1 (or 16:9, common in HD television.) Go to Edit>Resize/Resample, uncheck the box Preserve Aspect Ratio box, multiply the height by 2.35 (402 x 2.35) and enter that value as the new width (in this case, 945) (See figure 11). The resulting image looks more natural. (See figure 13)
- Update, November 2015: Recent versions of VLC (2.2.1) do not preserve native aspect ratios when taking screencaps. If using VLC 2.2.1, please take this extra step and resize your images.
- Update, April 2017: The above issue has now been resolved. If you're unsure, please double-check to see that your aspect ratios are correct.
Saving
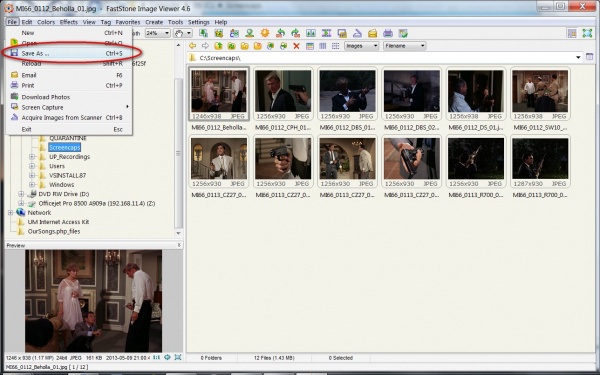
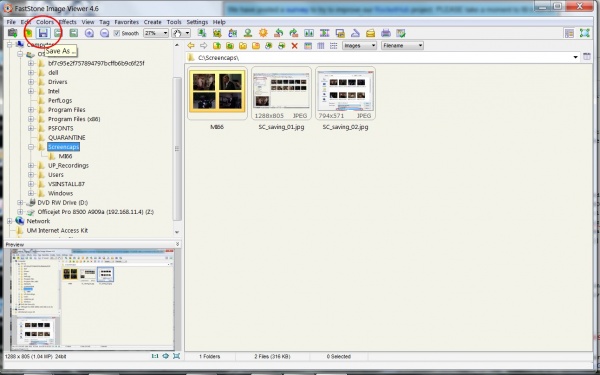
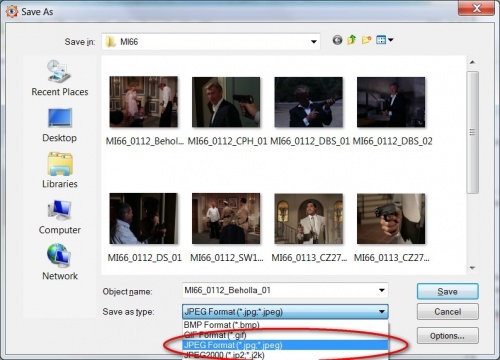
Saving should not be too difficult if you've used a computer at all in the past twenty years. Go to File>Save As (Figure 14) or click on the floppy disk (Figure 15.) All images must be saved as JPG files first, as the site will not accept any other formats. (Figure 16.) Please do not use a generic file name like PPK1.jpg or Revolver.jpg, use a more descriptive file name instead. For example, if the movie is Super 8, and the file an image of a Smith & Wesson Model 10, it can be "Super8_SW10_01.jpg."
Batch functions
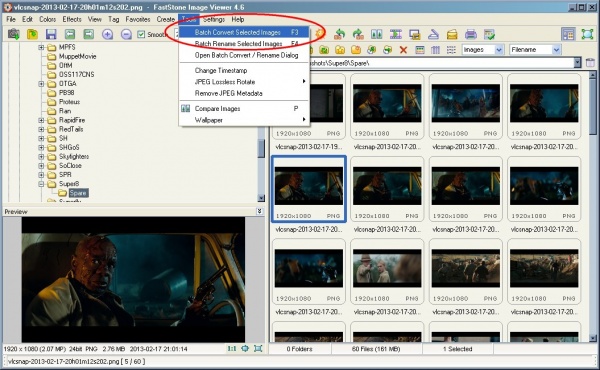
Cropping, resizing and renaming/saving can be done by batch as well. The batch functions are found under Tools (Figure 17.)
Batch crop
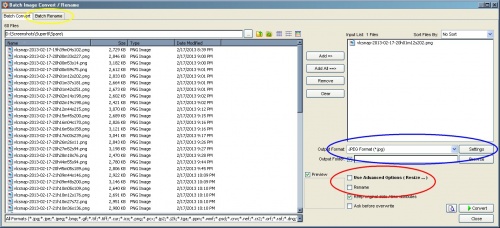
Under the Batch Image Convert/Rename menu, check off the box next to "Use Advanced Options" (Figure 18, red circle) and click on "Advanced Options" when it comes up. Select the "Crop" tab, and then enter the dimensions. (Figure 19.)
Batch resize
While in Advanced Options, select the Resize tab. (figure 20, red.) Enter your desired dimensions (figure 20, blue.) Check or uncheck the "Preserve Aspect Ratio" box if necessary (Figure 20, yellow.)
Batch renaming/saving
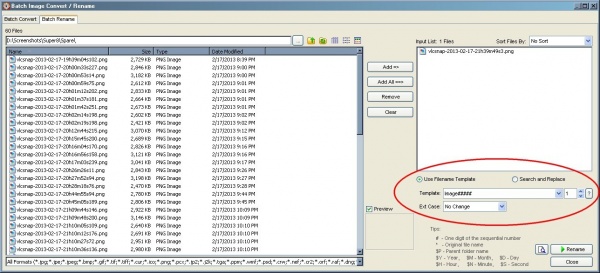
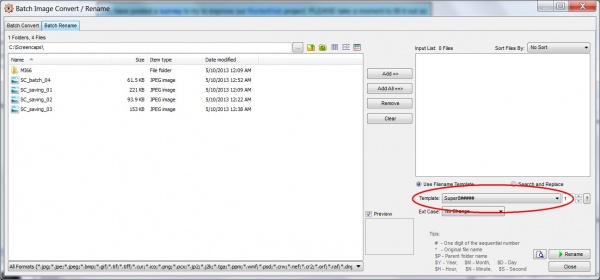
Batch renaming/saving is available under both the Batch Convert (Figure 21) and Batch Rename (Figure 22) tabs. Select a prefix for your images and enter it in to the box (Figures 21 and 22, red.) For example, if my caps are from the film Super 8, I can enter in "Super8" (Figure 23), all of my files will be named "Super8xxxxx.jpg."
