| If you have been locked out of your account you can request a password reset here. |
Difference between revisions of "The Death and Life of Bobby Z"
(The 500 S&W was misidentified as a Colt Python, the Winchester Model 1300 is a Mossberg 500, The bolt-guns are all Winchester Model 70s, and the Unknown Pistol looks to my eyes to be SIG-Sauer P228R.) |
|||
| Line 10: | Line 10: | ||
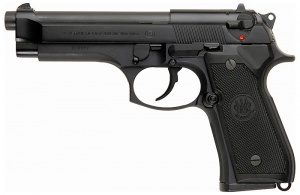
==Beretta 92FS== | ==Beretta 92FS== | ||
| − | Don Huertero ([[Joaquim de Almeida]]) and one of his henchmen use [[Beretta 92FS]] pistols. A biker in the ending and federal agent Tad Gruzsa ([[Laurence Fishburne]]) use | + | Don Huertero ([[Joaquim de Almeida]]) and one of his henchmen use [[Beretta 92FS]] pistols. A biker in the ending and federal agent Tad Gruzsa ([[Laurence Fishburne]]) use Beretta 92FS' as well as Tim "Bobby Z" Kearney ([[Paul Walker]]). |
| − | [[Image:BerettaM92FS.jpg|thumb| | + | [[Image:BerettaM92FS.jpg|thumb|300px|none|Beretta 92FS - 9x19mm]] |
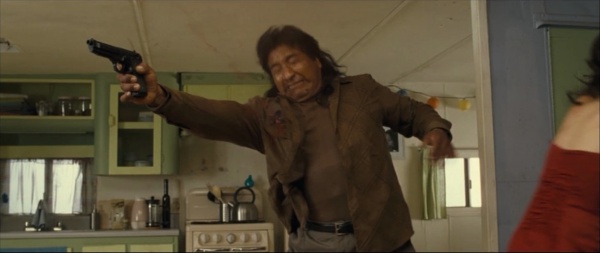
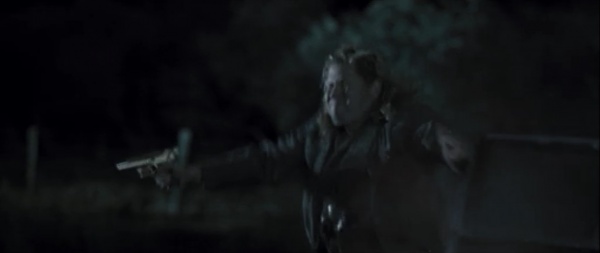
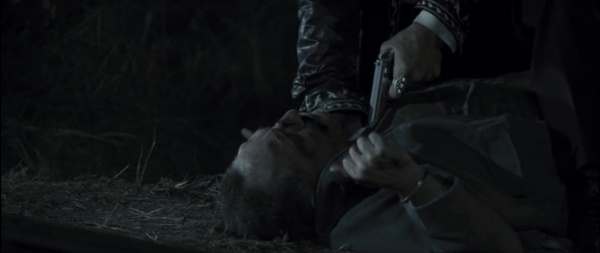
[[File:BobbyZ92FS.jpg|thumb|600px|none|A henchman being shot while holding his Beretta 92FS.]] | [[File:BobbyZ92FS.jpg|thumb|600px|none|A henchman being shot while holding his Beretta 92FS.]] | ||
| − | [[File:BobbyZ92FSAim.jpg|thumb|600px|none|Don Huertero ([[Joaquim de Almeida]]) with | + | [[File:BobbyZ92FSAim.jpg|thumb|600px|none|Don Huertero ([[Joaquim de Almeida]]) with a Beretta 92FS.]] |
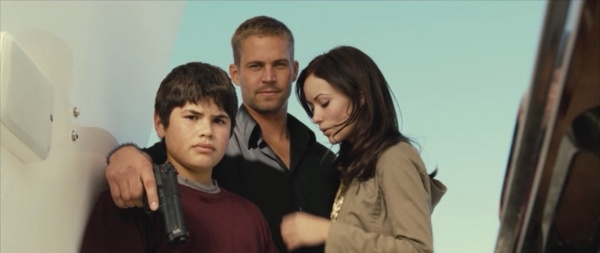
[[File:BobbyZ92FS2.jpg|thumb|600px|none|Tim "Bobby Z" Kearney ([[Paul Walker]]) holds a 92FS in a lovely family photo.]] | [[File:BobbyZ92FS2.jpg|thumb|600px|none|Tim "Bobby Z" Kearney ([[Paul Walker]]) holds a 92FS in a lovely family photo.]] | ||
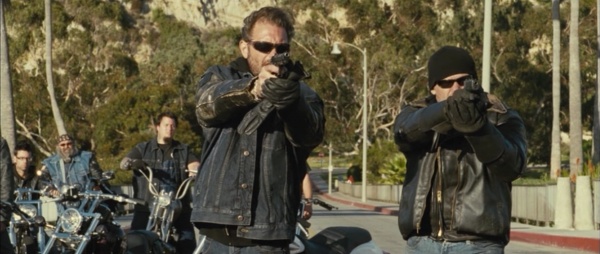
| − | [[File:BobbyZ92FS&Glock17.jpg|thumb|600px|none|The biker on the left with his | + | [[File:BobbyZ92FS&Glock17.jpg|thumb|600px|none|The biker on the left with his 92FS.]] |
| − | [[File:BobbyZ92FS3.jpg|thumb|600px|none|Agent Tad Gruzsa ([[Laurence Fishburne]]) aims his Beretta | + | [[File:BobbyZ92FS3.jpg|thumb|600px|none|Agent Tad Gruzsa ([[Laurence Fishburne]]) aims his Beretta 92FS.]] |
| − | |||
| − | |||
| − | |||
| − | |||
| − | |||
| − | |||
| − | |||
==Glock 17== | ==Glock 17== | ||
| − | One of Don Huertero's men and a biker in the end use | + | One of Don Huertero's men and a biker in the end use a 2nd Generation [[Glock 17]]. |
| − | [[Image:Glock17EarlyModel.jpg|thumb|none| | + | [[Image:Glock17EarlyModel.jpg|thumb|none|300px|Glock 17 (2nd Generation) - 9x19mm]] |
[[File:BobbyZGlock17.jpg|thumb|600px|none|One of Don Huertero's men firing his Glock 17.]] | [[File:BobbyZGlock17.jpg|thumb|600px|none|One of Don Huertero's men firing his Glock 17.]] | ||
| − | [[File:BobbyZGlock17(2).jpg|thumb|600px|none|A biker with | + | [[File:BobbyZGlock17(2).jpg|thumb|600px|none|A biker with a Glock 17.]] |
==Jericho 941== | ==Jericho 941== | ||
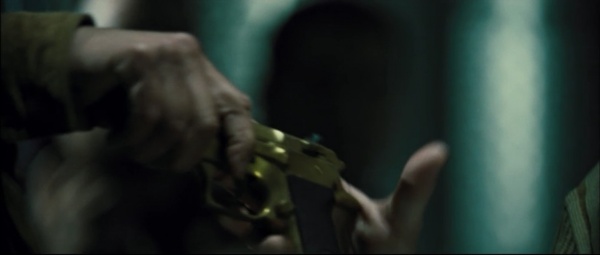
Don Huertero's ([[Joaquim de Almeida]]) men make use of multiple [[Jericho 941]] pistols with both gold and stainless finishes. | Don Huertero's ([[Joaquim de Almeida]]) men make use of multiple [[Jericho 941]] pistols with both gold and stainless finishes. | ||
| − | [[Image:JerichoStainless.jpg|thumb| | + | [[Image:JerichoStainless.jpg|thumb|300px|none|Stainless Jericho 941 R - 9x19mm]] |
[[File:BobbyZDesertEagleMKVIIGold.jpg|thumb|600px|none|One of Huertero's men is handed a gold-plated Jericho.]] | [[File:BobbyZDesertEagleMKVIIGold.jpg|thumb|600px|none|One of Huertero's men is handed a gold-plated Jericho.]] | ||
[[File:BobbyZDesertEagleMKVIIGold2.jpg|thumb|600px|none|The gold Jericho is pointed at Tim Kearney ([[Paul Walker]]).]] | [[File:BobbyZDesertEagleMKVIIGold2.jpg|thumb|600px|none|The gold Jericho is pointed at Tim Kearney ([[Paul Walker]]).]] | ||
| − | [[File:BobbyZDesertEagleMKVIIGoldCloseup.jpg|thumb|600px|none|A closeup on the Jericho | + | [[File:BobbyZDesertEagleMKVIIGoldCloseup.jpg|thumb|600px|none|A closeup on the Jericho.]] |
[[File:BobbyZDesertEagleMarkXIX.jpg|thumb|600px|none|One of Don Huertero's is shot while holding his stainless Jericho.]] | [[File:BobbyZDesertEagleMarkXIX.jpg|thumb|600px|none|One of Don Huertero's is shot while holding his stainless Jericho.]] | ||
[[File:BobbyZDesertEagleMarkXIX2.jpg|thumb|600px|none|Tim is once again held at gunpoint.]] | [[File:BobbyZDesertEagleMarkXIX2.jpg|thumb|600px|none|Tim is once again held at gunpoint.]] | ||
| + | |||
| + | ==SIG-Sauer P228R== | ||
| + | |||
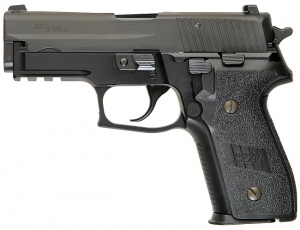
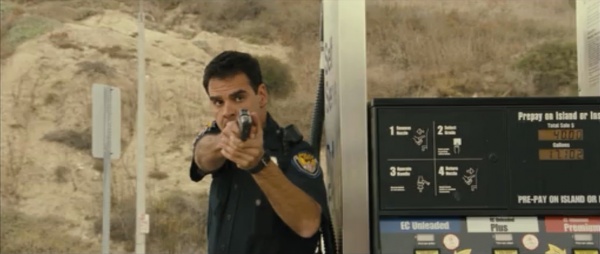
| + | During a flashback to Tim Kearney's second arrest, an officer is seen with what appears to be a [[SIG-Sauer P228R]] pistol. | ||
| + | |||
| + | [[Image:SIG-Sauer P228R.jpg|thumb|none|300px|SIG-Sauer P228R - 9x19mm]] | ||
| + | [[File:BobbyZUnknownPistol.jpg|thumb|600px|none|The police officer with what appears to be a SIG-Sauer P228R]] | ||
==Smith & Wesson Model 500== | ==Smith & Wesson Model 500== | ||
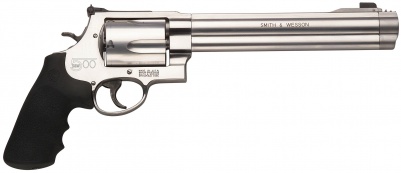
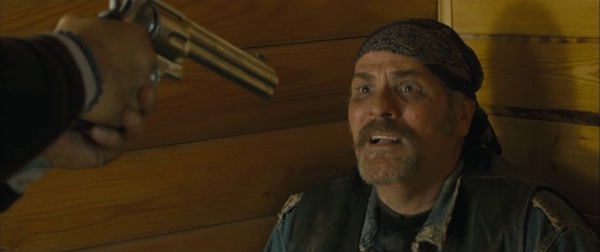
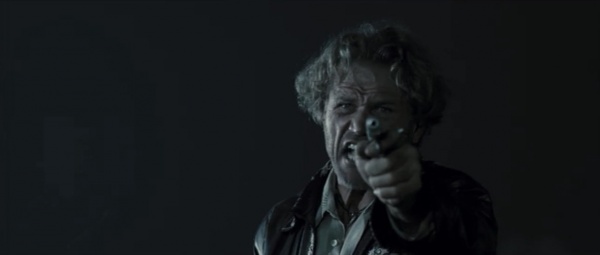
| − | + | With the C4 trap failing to kill Tim Kearney ([[Paul Walker]]) Boom Boom ([[M.C. Gainey]]) tries to finish the job with a [[Smith & Wesson Model 500]]. When Tim Kearney confronts Boom Boom he takes and turns the Smith & Wesson Model 500 on its owner. | |
[[Image:Magnum 50cal 500.jpg|thumb|none|401px|Smith & Wesson Model 500 - .500 S&W Magnum]] | [[Image:Magnum 50cal 500.jpg|thumb|none|401px|Smith & Wesson Model 500 - .500 S&W Magnum]] | ||
| + | [[File:BobbyZColtPython.jpg|thumb|600px|none|Boom Boom ([[M.C. Gainey]]) with his Smith & Wesson Model 500. Note the large bore, overall large proportions, and five shot cylinder.]] | ||
[[File:BobbyZS&WModel500.jpg|thumb|600px|none|Tim Kearney ([[Paul Walker]]) with the Smith & Wesson Model 500 after taking it from Boom Boom.]] | [[File:BobbyZS&WModel500.jpg|thumb|600px|none|Tim Kearney ([[Paul Walker]]) with the Smith & Wesson Model 500 after taking it from Boom Boom.]] | ||
[[File:BobbyZS&WModel500(2).jpg|thumb|600px|none|]] | [[File:BobbyZS&WModel500(2).jpg|thumb|600px|none|]] | ||
| − | |||
| − | |||
| − | |||
| − | |||
| − | |||
| − | |||
==Walther PPK== | ==Walther PPK== | ||
| Line 62: | Line 57: | ||
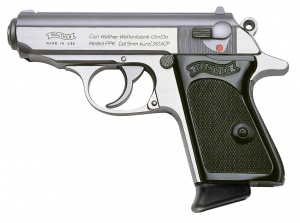
A stainless [[Walther PPK]] is used by Don Huertero ([[Joaquim de Almeida]]) during the hostage exchange. | A stainless [[Walther PPK]] is used by Don Huertero ([[Joaquim de Almeida]]) during the hostage exchange. | ||
| − | [[Image:PPK_stainless.jpg|thumb|none| | + | [[Image:PPK_stainless.jpg|thumb|none|300px|Stainless Walther PPK - .380 ACP]] |
[[File:BobbyZWaltherPPK.jpg|thumb|600px|none|Don Huertero ([[Joaquim de Almeida]]) with the Walther PPK.]] | [[File:BobbyZWaltherPPK.jpg|thumb|600px|none|Don Huertero ([[Joaquim de Almeida]]) with the Walther PPK.]] | ||
[[File:BobbyZWaltherPPKAim.jpg|thumb|600px|none|Don Huertero aims the PPK.]] | [[File:BobbyZWaltherPPKAim.jpg|thumb|600px|none|Don Huertero aims the PPK.]] | ||
| Line 68: | Line 63: | ||
==Wilson Combat Protector== | ==Wilson Combat Protector== | ||
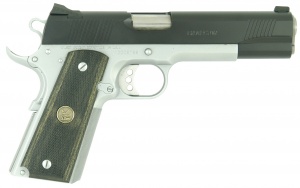
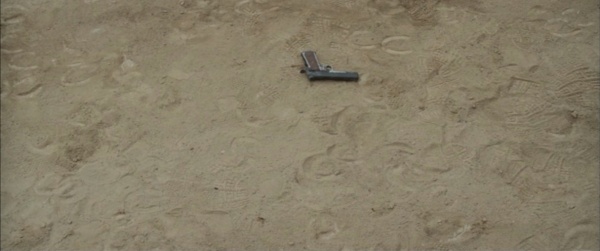
| − | Tim "Bobby Z" Kearney ([[Paul Walker]]) wields a [[ | + | Tim "Bobby Z" Kearney ([[Paul Walker]]) wields a [[M1911 pistol series#Wilson Combat "Protector"|Wilson Combat Protector]]. |
| − | [[Image:WilsonProtector.jpg|thumb| | + | [[Image:WilsonProtector.jpg|thumb|300px|none|Wilson Combat Protector - .45 ACP]] |
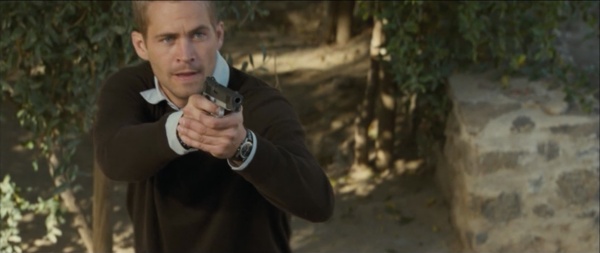
[[File:BobbyZM1911A1.jpg|thumb|600px|none|Tim "Bobby Z" Kearney ([[Paul Walker]]) with a Wilson Combat Protector.]] | [[File:BobbyZM1911A1.jpg|thumb|600px|none|Tim "Bobby Z" Kearney ([[Paul Walker]]) with a Wilson Combat Protector.]] | ||
[[File:BobbyZM1911A1(2).jpg|thumb|600px|none|The Combat Protector on the ground.]] | [[File:BobbyZM1911A1(2).jpg|thumb|600px|none|The Combat Protector on the ground.]] | ||
| Line 83: | Line 78: | ||
[[File:BobbyZPA3.jpg|thumb|600px|none|One of Don Huertero's men with a Franchi PA3.]] | [[File:BobbyZPA3.jpg|thumb|600px|none|One of Don Huertero's men with a Franchi PA3.]] | ||
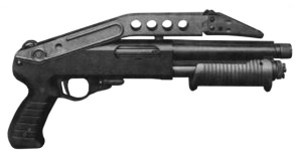
| − | == | + | ==Mossberg 500 Cruiser== |
| − | A few of Don Huertero's men are seen with [[ | + | A few of Don Huertero's men are seen with rubber prop versions of the [[Mossberg 500 Cruiser]] with extended magazine tube and heat shield. |
| − | [[Image: | + | [[Image:Mossberg500cruiser.jpg|thumb|none|500px|Mossberg 500 Cruiser with extended magazine tube and heat shield - 12 gauge]] |
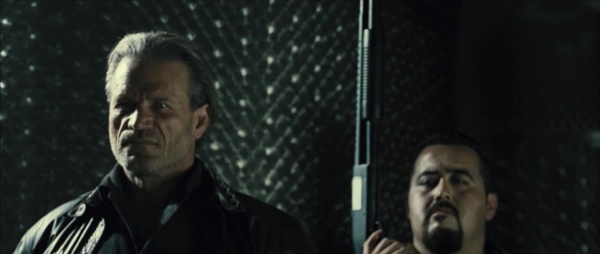
| − | [[File:BobbyZWinchesterModel1300.jpg|thumb|600px|none|One of Don Huertero's men with a | + | [[File:BobbyZWinchesterModel1300.jpg|thumb|600px|none|One of Don Huertero's men with a Mossberg 500 Cruiser. Note the solid ejection port.]] |
| − | [[File:BobbyZWinchesterModel1300(2).jpg|thumb|600px|none|The | + | [[File:BobbyZWinchesterModel1300(2).jpg|thumb|600px|none|The Mossberg 500 Cruiser on the left.]] |
=Submachine Guns= | =Submachine Guns= | ||
| Line 95: | Line 90: | ||
==Heckler & Koch MP5K== | ==Heckler & Koch MP5K== | ||
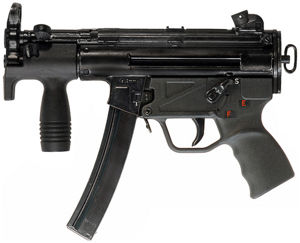
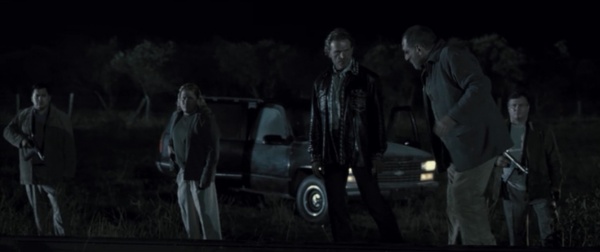
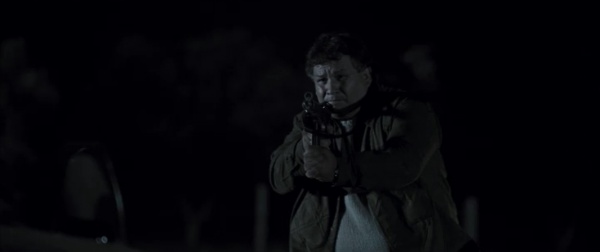
| − | Two bikers | + | Two bikers near the ending carry [[Heckler & Koch MP5K]]s. |
| − | [[Image:MP5K-SEF.jpg|thumb|none| | + | [[Image:MP5K-SEF.jpg|thumb|none|300px|Heckler & Koch MP5K - 9x19mm]] |
[[File:BobbyZ9MP5K.jpg|thumb|600px|none|The bikers with Heckler & Koch MP5Ks.]] | [[File:BobbyZ9MP5K.jpg|thumb|600px|none|The bikers with Heckler & Koch MP5Ks.]] | ||
| − | ==Kimel AP-9 | + | ==Kimel AP-9== |
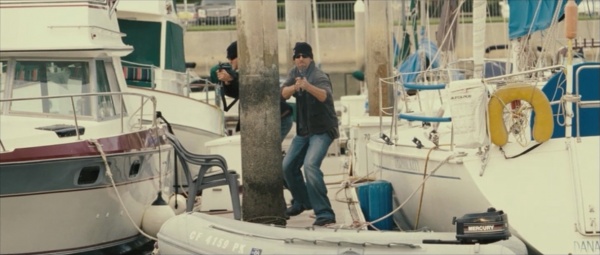
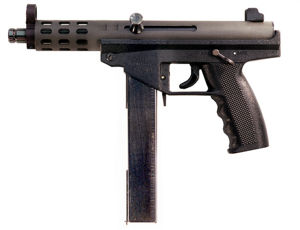
| − | + | Two of Don Huertero's men are seen with [[Kimel AP-9]]s during the hostage exchange. | |
| − | [[Image: | + | [[Image:AP9-Pistol.jpg|thumb|300px|none|Kimel Industries AP-9 Pistol - 9x19mm]] |
| − | [[File:BobbyZKimelAP9.jpg|thumb|600px|none| | + | [[File:BobbyZKimelAP9.jpg|thumb|600px|none|Two of Don Huertero's men with Kimel AP-9s.]] |
| − | [[File:BobbyZKimelAP9Aim.jpg|thumb|600px|none| | + | [[File:BobbyZKimelAP9Aim.jpg|thumb|600px|none|A mook aims his Kimel AP-9.]] |
=Rifles= | =Rifles= | ||
| Line 114: | Line 109: | ||
The [[Colt M4A1]] is used by agent Tad Gruzsa ([[Laurence Fishburne]]), one of Don Huertero's men, and Tim "Bobby Z" Kearney ([[Paul Walker]]). | The [[Colt M4A1]] is used by agent Tad Gruzsa ([[Laurence Fishburne]]), one of Don Huertero's men, and Tim "Bobby Z" Kearney ([[Paul Walker]]). | ||
| − | [[Image:ColtM4A1-2.jpg|thumb|none| | + | [[Image:ColtM4A1-2.jpg|thumb|none|500px|Colt M4A1 with carry handle removed - 5.56x45mm]] |
| − | [[Image:ColtM4.jpg|thumb|none| | + | [[Image:ColtM4.jpg|thumb|none|500px|Colt M4A1 with M68 Aimpoint reflex optic and Knight's Armament RAS railed handguard and vertical forward grip - 5.56x45mm]] |
| − | [[File:BobbyZM4A1.jpg|thumb|600px|none|Federal agent Tad Gruzsa ([[Laurence Fishburne]]) with a | + | [[File:BobbyZM4A1.jpg|thumb|600px|none|Federal agent Tad Gruzsa ([[Laurence Fishburne]]) with a M4A1.]] |
[[File:BobbyZM4A1FP.jpg|thumb|600px|none|A first person view from Tad Gruzsa's M4A1 despite not having an optic attached.]] | [[File:BobbyZM4A1FP.jpg|thumb|600px|none|A first person view from Tad Gruzsa's M4A1 despite not having an optic attached.]] | ||
| − | [[File:BobbyZM4A1Reload.jpg|thumb|600px|none|Agent Tad Gruzsa reloads his | + | [[File:BobbyZM4A1Reload.jpg|thumb|600px|none|Agent Tad Gruzsa reloads his M4A1.]] |
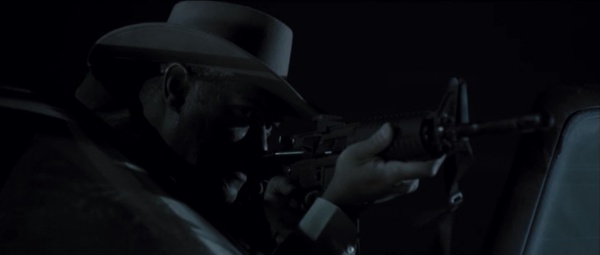
[[File:BobbyZM4A1(2).jpg|thumb|600px|none|One of Don Huertero's goons aims his M4A1.]] | [[File:BobbyZM4A1(2).jpg|thumb|600px|none|One of Don Huertero's goons aims his M4A1.]] | ||
| − | [[File:BobbyZM4A1Closeup.jpg|thumb|600px|none|A closeup on the M4A1. Note that this is one of the few times you will see a stock in the retracted position in film.]] | + | [[File:BobbyZM4A1Closeup.jpg|thumb|600px|none|A closeup on the M4A1. Note that this is one of the few times you will see a stock in the retracted position in the film.]] |
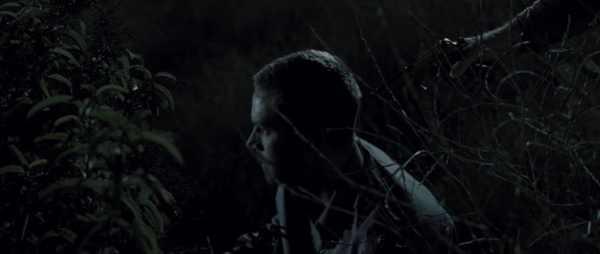
| − | [[File:BobbyZM4A1Aim.jpg|thumb|600px|none|Tim "Bobby Z" Kearney aims | + | [[File:BobbyZM4A1Aim.jpg|thumb|600px|none|Tim "Bobby Z" Kearney braces on a rock as he aims a M4A1.]] |
| − | == | + | ==Winchester Model 70== |
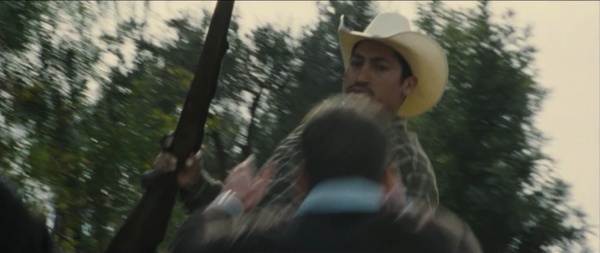
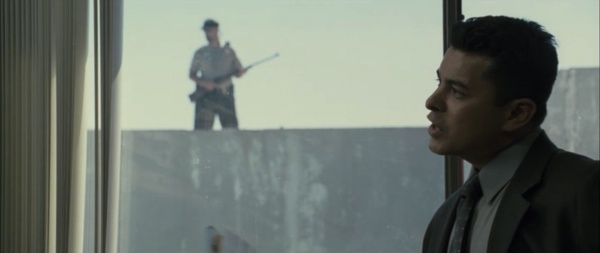
| − | + | Guards at Don Huertero's villa carry post-1964 [[Winchester Model 70]]s. The one carried by a guard on horse back alternates between having a scope and not having one between shots. A prison guard is also seen with a Winchester Model 70. | |
| − | [[Image: | + | [[Image:Win70-2.jpg|thumb|none|500px|Modern update of the classic Winchester Model 70 with open sights - .30-06]] |
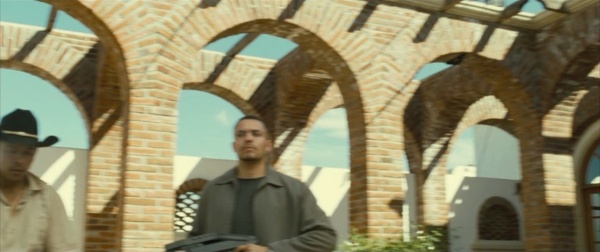
| − | [[File:BobbyZRemingtonModel7.jpg|thumb|none|600px|]] | + | [[File:BobbyZRemingtonModel7.jpg|thumb|none|600px|A guard at Don Huertero's villa patrols with a Winchester Model 70.]] |
| − | + | [[File:BobbyZWinchesterModel70.jpg|thumb|none|600px|A guard with a Winchester Model 70.]] | |
| − | + | [[File:BobbyZWinchesterModel70(2).jpg|thumb|none|600px|A closeup on the Model 70 showing the scope missing.]] | |
| − | + | [[File:BobbyZUnknownRifle.jpg|thumb|none|600px|A prison guard with a Winchester Model 70.]] | |
| − | A | ||
| − | |||
| − | [[File:BobbyZUnknownRifle.jpg|thumb|none|600px|]] | ||
==Winchester Model 1892== | ==Winchester Model 1892== | ||
| Line 140: | Line 132: | ||
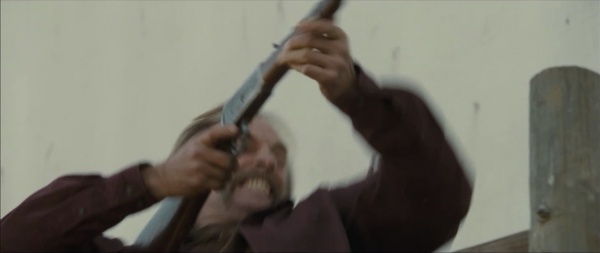
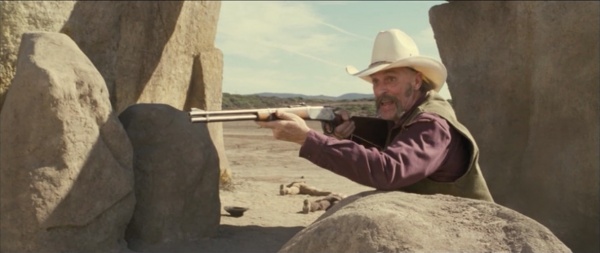
Johnson ([[Keith Carradine]]) carries a [[Winchester Model 1892]]. | Johnson ([[Keith Carradine]]) carries a [[Winchester Model 1892]]. | ||
| − | [[Image:Winchester1892Carbine.jpg|thumb|none| | + | [[Image:Winchester1892Carbine.jpg|thumb|none|500px|Winchester Model 1892 - .38-40]] |
[[File:BobbyZWinchesterModel1892.jpg|thumb|none|600px|Johnson ([[Keith Carradine]]) with a Winchester Model 1892.]] | [[File:BobbyZWinchesterModel1892.jpg|thumb|none|600px|Johnson ([[Keith Carradine]]) with a Winchester Model 1892.]] | ||
[[File:BobbyZWinchesterModel1892(2).jpg|thumb|none|600px|]] | [[File:BobbyZWinchesterModel1892(2).jpg|thumb|none|600px|]] | ||
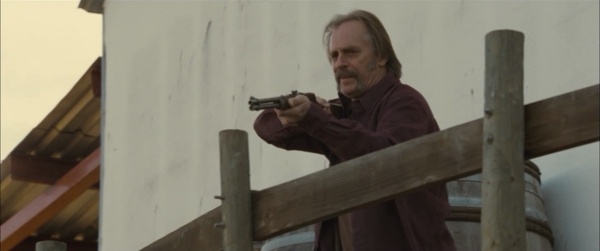
[[File:BobbyZWinchesterModel1892(3).jpg|thumb|none|600px|Johnson aims the Winchester 1892.]] | [[File:BobbyZWinchesterModel1892(3).jpg|thumb|none|600px|Johnson aims the Winchester 1892.]] | ||
| − | |||
| − | |||
| − | |||
| − | |||
| − | |||
| − | |||
| − | |||
| − | |||
=Explosives= | =Explosives= | ||
| Line 158: | Line 142: | ||
Boom Boom ([[M.C. Gainey]]) wires Tim Kearney's cabin with C4 plastic explosive. | Boom Boom ([[M.C. Gainey]]) wires Tim Kearney's cabin with C4 plastic explosive. | ||
[[File:M112.jpg|thumb|none|450px|Block of C4]] | [[File:M112.jpg|thumb|none|450px|Block of C4]] | ||
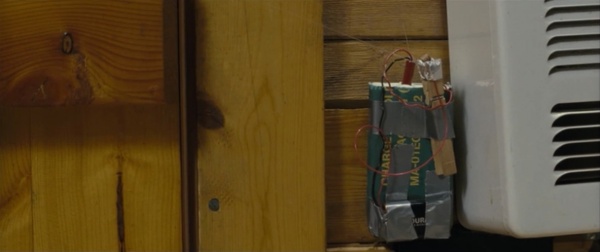
| − | [[File:BobbyZC4.jpg|thumb|none|600px| | + | [[File:BobbyZC4.jpg|thumb|none|600px|Half a block of C4 wired to the door.]] |
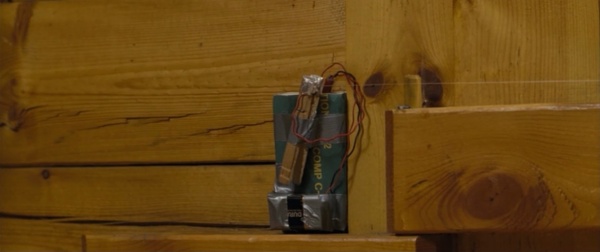
| − | [[File:BobbyZC4(2).jpg|thumb|none|600px|]] | + | [[File:BobbyZC4(2).jpg|thumb|none|600px|The other half of the C4 block on the other side of the door frame.]] |
==M26 Grenade== | ==M26 Grenade== | ||
| Line 165: | Line 149: | ||
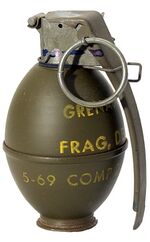
While Tim Kearney and Kit ([[J.R. Villarreal]]) are on the run, one of Don Huertero's men in a microlight drops [[M26 hand grenade|M26 Grenades]] on them. | While Tim Kearney and Kit ([[J.R. Villarreal]]) are on the run, one of Don Huertero's men in a microlight drops [[M26 hand grenade|M26 Grenades]] on them. | ||
| − | [[Image:200px-M-67handgrenade.jpg|thumb|none| | + | [[Image:200px-M-67handgrenade.jpg|thumb|none|150px|M26 High-Explosive Fragmentation hand grenade]] |
[[File:BobbyZM26.jpg|thumb|none|600px|One of Don Huertero's men drops an M26 Grenade.]] | [[File:BobbyZM26.jpg|thumb|none|600px|One of Don Huertero's men drops an M26 Grenade.]] | ||
Revision as of 02:23, 6 May 2016
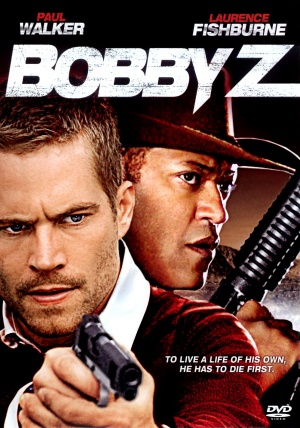
The Death and Life of Bobby Z is a 2007 action film starring Paul Walker as a convict who is offered the chance at redemption by impersonating a notorious marijuana trafficker known as Bobby Z, whom he is told is dead. The film's cast includes Laurence Fishburne and Joaquim de Almeida. The film, which was based on the novel The Life and Death of Bobby Z by Don Winslow (the author of Savages), was also released on video under the title Bobby Z as well as Let's Kill Bobby Z.
The following weapons were used in the film The Death and Life of Bobby Z:
Handguns
Beretta 92FS
Don Huertero (Joaquim de Almeida) and one of his henchmen use Beretta 92FS pistols. A biker in the ending and federal agent Tad Gruzsa (Laurence Fishburne) use Beretta 92FS' as well as Tim "Bobby Z" Kearney (Paul Walker).

Glock 17
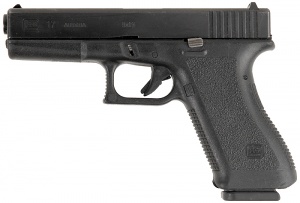
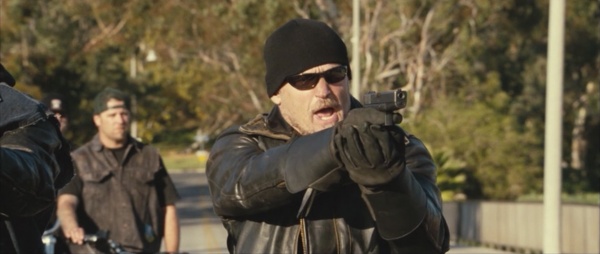
One of Don Huertero's men and a biker in the end use a 2nd Generation Glock 17.
Jericho 941
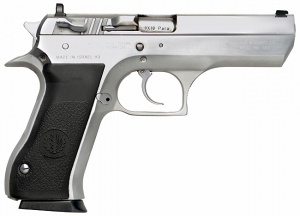
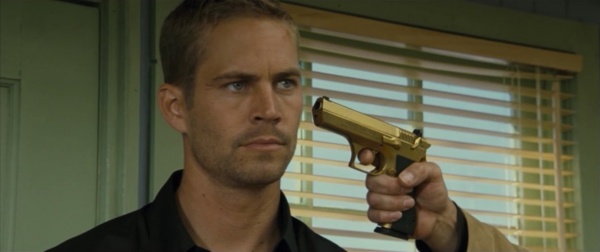
Don Huertero's (Joaquim de Almeida) men make use of multiple Jericho 941 pistols with both gold and stainless finishes.
SIG-Sauer P228R
During a flashback to Tim Kearney's second arrest, an officer is seen with what appears to be a SIG-Sauer P228R pistol.
Smith & Wesson Model 500
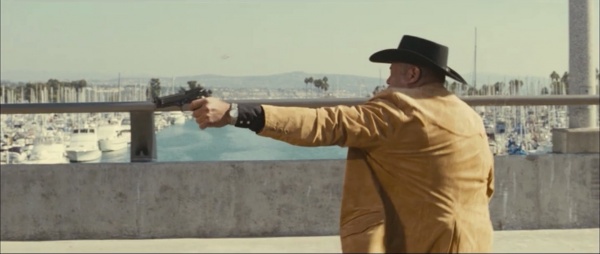
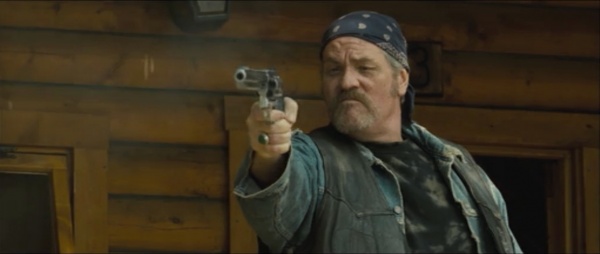
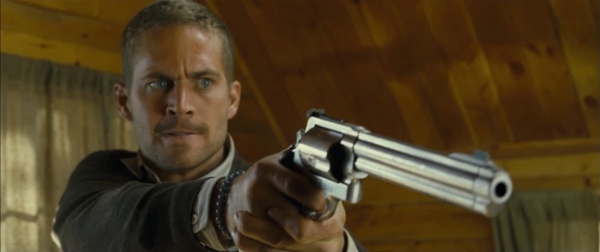
With the C4 trap failing to kill Tim Kearney (Paul Walker) Boom Boom (M.C. Gainey) tries to finish the job with a Smith & Wesson Model 500. When Tim Kearney confronts Boom Boom he takes and turns the Smith & Wesson Model 500 on its owner.
Walther PPK
A stainless Walther PPK is used by Don Huertero (Joaquim de Almeida) during the hostage exchange.
Wilson Combat Protector
Tim "Bobby Z" Kearney (Paul Walker) wields a Wilson Combat Protector.
Shotguns
Franchi PA3
One of Don Huertero's men is briefly seen with a Franchi PA3.
Mossberg 500 Cruiser
A few of Don Huertero's men are seen with rubber prop versions of the Mossberg 500 Cruiser with extended magazine tube and heat shield.
Submachine Guns
Heckler & Koch MP5K
Two bikers near the ending carry Heckler & Koch MP5Ks.
Kimel AP-9
Two of Don Huertero's men are seen with Kimel AP-9s during the hostage exchange.
Rifles
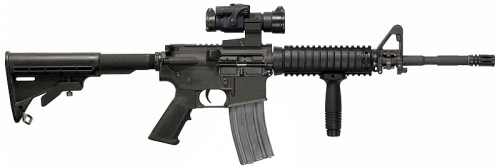
Colt M4A1
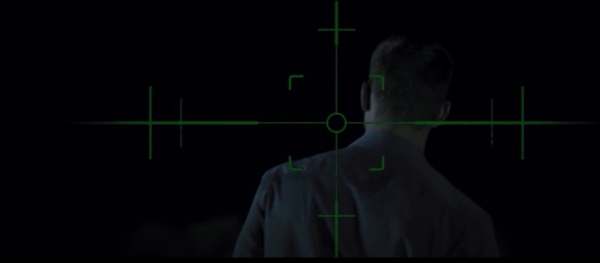
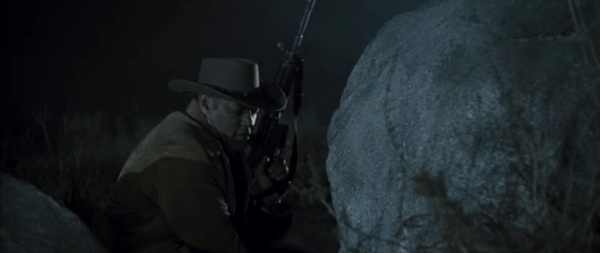
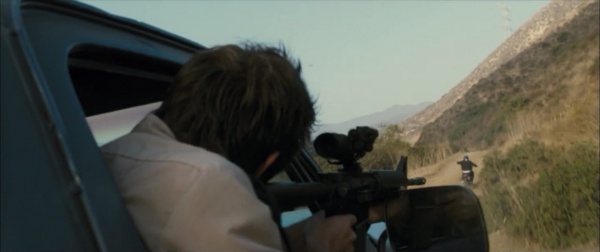
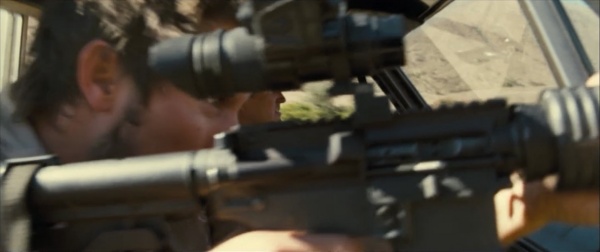
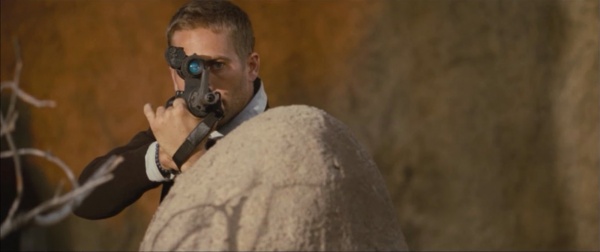
The Colt M4A1 is used by agent Tad Gruzsa (Laurence Fishburne), one of Don Huertero's men, and Tim "Bobby Z" Kearney (Paul Walker).
Winchester Model 70
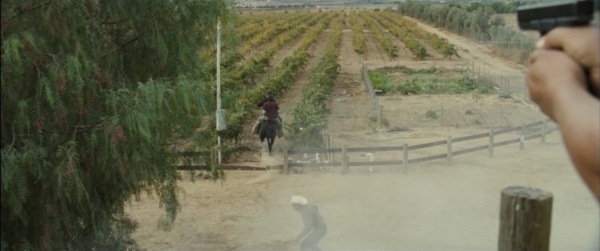
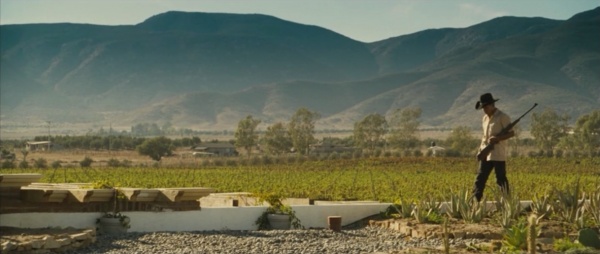
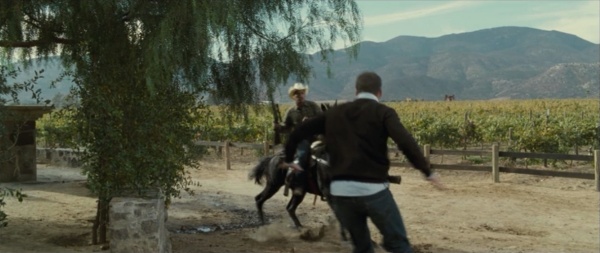
Guards at Don Huertero's villa carry post-1964 Winchester Model 70s. The one carried by a guard on horse back alternates between having a scope and not having one between shots. A prison guard is also seen with a Winchester Model 70.
Winchester Model 1892
Johnson (Keith Carradine) carries a Winchester Model 1892.
Explosives
C4
Boom Boom (M.C. Gainey) wires Tim Kearney's cabin with C4 plastic explosive.
M26 Grenade
While Tim Kearney and Kit (J.R. Villarreal) are on the run, one of Don Huertero's men in a microlight drops M26 Grenades on them.
